link管理
链接快照平台
- 输入网页链接,自动生成快照
- 标签化管理网页链接
相关文章推荐

|
闷骚的蛋挞 · python 字符串去空格_python ...· 3 月前 · |
|
|
神勇威武的草稿本 · Webpack 报错:The CLI ...· 2 年前 · |
|
|
文雅的数据线 · Java 操作 Neo4J ...· 2 年前 · |
|
|
近视的鸡蛋 · 返回空项集合的app.box .NET ...· 2 年前 · |
link管理
›
System Administrator’s Guide Red Hat Enterprise Linux 7 | Red Hat Customer Portal

|
霸气的小熊猫
2 年前 |
Increase visibility into IT operations to detect and resolve technical issues before they impact your business.
Learn More Go to InsightsEngage with our Red Hat Product Security team, access security updates, and ensure your environments are not exposed to any known security vulnerabilities. Product Security Center
Keep your systems secure with Red Hat's specialized responses to security vulnerabilities. View Responses Expand section "9.7. Automatically Refreshing Package Database and Downloading Updates with Yum-cron" Collapse section "9.7. Automatically Refreshing Package Database and Downloading Updates with Yum-cron" Expand section "14.1.12. Configure the Firewall for HTTP and HTTPS Using the Command Line" Collapse section "14.1.12. Configure the Firewall for HTTP and HTTPS Using the Command Line" Expand section "15.6.1. Configuring Spam Filtering for Mail Transport Agent or Mail Delivery Agent" Collapse section "15.6.1. Configuring Spam Filtering for Mail Transport Agent or Mail Delivery Agent" Expand section "16.1.7.4. Setting up Automatic Printer Driver Downloads for Windows Clients" Collapse section "16.1.7.4. Setting up Automatic Printer Driver Downloads for Windows Clients"
The
System Administrator's Guide
documents relevant information regarding the deployment, configuration, and administration of Red Hat Enterprise Linux 7. It is oriented towards system administrators with a basic understanding of the system.
To expand your expertise, you might also be interested in the
Red Hat System Administration I (RH124)
,
Red Hat System Administration II (RH134)
,
Red Hat System Administration III (RH254)
, or
RHCSA Rapid Track (RH199)
training courses.
If you want to use Red Hat Enterprise Linux 7 with the Linux Containers functionality, see
Product Documentation for Red Hat Enterprise Linux Atomic Host
. For an overview of general Linux Containers concept and their current capabilities implemented in Red Hat Enterprise Linux 7, see
Overview of Containers in Red Hat Systems
. The topics related to containers management and administration are described in the
Red Hat Enterprise Linux Atomic Host 7 Managing Containers
guide.
Part I. Basic System Configuration
This part covers basic post-installation tasks and basic system administration tasks such as keyboard configuration, date and time configuration, managing users and groups, and gaining privileges.
Chapter 1. Getting Started
This chapter covers the basic tasks that you might need to perform just after you have installed Red Hat Enterprise Linux 7.
Note that these items may include tasks that are usually done already during the installation process, but they do not have to be done necessarily, such as the registration of the system. The subchapters dealing with such tasks provide a brief summary of how this can be achieved during the installation and links to related documentation in a special section.
For detailed information on Red Hat Enterprise Linux 7 installation, consult
Red Hat Enterprise Linux 7 Installation Guide
.
This chapter mentions some commands to be performed. The commands that need to be entered by the
root
user have
#
in the prompt, while the commands that can be performed by a regular user, have
$
in their prompt.
For further information on common post-installation tasks, you can see also
Red Hat Enterprise Linux 7 Installation Guide
.
Although all post-installation tasks can be achieved through the command line, you can also use the
web console
tool to perform some of them.
What web console Is and Which Tasks It Can Be Used For
web console is a system administration tool that provides a user interface for monitoring and administering servers through a web browser. web console enables to perform these tasks: Monitoring basic system features, such as hardware, internet connection, or performance characteristics Analyzing the content of the system log files Configuring basic networking features, such as interfaces, network logs, packet sizes Managing user accounts Monitoring and configuring system services Creating diagnostic reports Setting kernel dump configuration Configuring SELinux Managing system subscriptions Accessing the terminal For more information on installing and using web console , see Managing systems using the RHEL 7 web console .
1.1. Basic Configuration of the Environment
Basic configuration of the environment includes: Date and Time System Locales Keyboard Layout Setting of these items is normally a part of the installation process. For more information, see the appropriate source according to the installation method: When installing with the Anaconda installer, see: Date&Time , Language Support and Keyboard Configuration in Red Hat Enterprise Linux 7 Installation Guide When installing with the Kickstart file, consult: Kickstart Commands and Options in Red Hat Enterprise Linux 7 Installation Guide. If you need to reconfigure the basic characteristics of the environment after the installation, follow the instructions in this section.
1.1.1. Introduction to Configuring the Date and Time
Accurate time keeping is important for a number of reasons. In Red Hat Enterprise Linux 7, time keeping is ensured by the
NTP
protocol, which is implemented by a daemon running in user space. The user space daemon updates the system clock running in the kernel. The system clock can keep time by using various clock sources.
Red Hat Enterprise Linux 7 uses the following daemons to implement
NTP
:
chronyd
The
chronyd
daemon is used by default. It is available from the
chrony
package. For more information on configuring and using
NTP
with
chronyd
, see
Chapter 18,
Configuring NTP Using the chrony Suite
.
The
ntpd
daemon is available from the
ntp
package. For more information on configuring and using
NTP
with
ntpd
, see
Chapter 19,
Configuring NTP Using ntpd
.
If you want to use
ntpd
instead of default
chronyd
, you need to disable
chronyd
, install, enable and configure
ntpd
as shown in
Chapter 19,
Configuring NTP Using ntpd
.
Displaying the Current Date and Time
To display the current date and time, use one of the following commands:
~]$ date
~]$ timedatectl
Note that the
timedatectl
command provides more verbose output, including universal time, currently used time zone, the status of the Network Time Protocol (NTP) configuration, and some additional information.
For more information on configuring the date and time, see
Chapter 3,
Configuring the Date and Time
.
1.1.2. Introduction to Configuring the System Locale
System-wide locale settings are stored in the
/etc/locale.conf
file, which is read at early boot by the
systemd
daemon. The locale settings configured in
/etc/locale.conf
are inherited by every service or user, unless individual programs or individual users override them.
Basic tasks to handle the system locales:
Listing available system locale settings:
~]$ localectl list-locales
Displaying current status of the system locales settings:
~]$ localectl status
Setting or changing the default system locale settings:
~]# localectl set-locale LANG=locale
For more information on configuring the system locale, see Chapter 2, System Locale and Keyboard Configuration .
1.1.3. Introduction to Configuring the Keyboard Layout
The keyboard layout settings control the layout used on the text console and graphical user interfaces. Basic tasks to handle the keyboard layout include: Listing available keymaps:
~]$ localectl list-keymaps
Displaying current status of keymap settings:
~]$ localectl status
Setting or changing the default system keymap:
~]# localectl set-keymap
For more information on configuring the keyboard layout, see Chapter 2, System Locale and Keyboard Configuration .
1.2. Configuring and Inspecting Network Access
The network access is usually configured during the installation process. However, the installation process does not prompt you to configure network interfaces on some common installation paths. Consequently, it is possible that the network access is not configured after the installation. If this happens, you can configure network access after installation. For a quickstart to configuring network access during the installation, see Section 1.2.1, “Configuring Network Access During the Installation Process” . To configure network access after the installation, you can use either the nmcli command-line utility, described in Red Hat Enterprise Linux 7 Networking Guide or the nmtui text user interface utility, described in Red Hat Enterprise Linux 7 Networking Guide . The nmcli and nmtui utilities also enable you to add one or more new network connections, as well as modify and inspect the existing connections. If you want to create and manage network connections with nmcli , see Section 1.2.2, “Managing Network Connections After the Installation Process Using nmcli” . If you want to create and manage network connections with nmtui , see Section 1.2.3, “Managing Network Connections After the Installation Process Using nmtui” .
1.2.1. Configuring Network Access During the Installation Process
Ways to configure network access during the installation proces: The Network & Hostname menu at the Installation Summary screen in the graphical user interface of the Anaconda installation program The Network settings option in the text mode of the Anaconda installation program The Kickstart file When the system boots for the first time after the installation has finished, any network interfaces which you configured during the installation are automatically activated. For detailed information on configuration of network access during installation process, see Red Hat Enterprise Linux 7 Installation Guide .
1.2.2. Managing Network Connections After the Installation Process Using nmcli
Run the following commands as the
root
user to manage network connections using the
nmcli
utility.
To create a new connection:
~]# nmcli con add type type of the connection "con-name" connection name ifname ifname interface-name the name of the interface ipv4 address ipv4 address gw4 address gateway address
To modify the existing connection:
~]# nmcli con mod "con-name"
To display all connections:
~]# nmcli con show
To display the active connection:
~]# nmcli con show --active
To display all configuration settings of a particular connection:
~]# nmcli con show "con-name"
For more information on the nmcli command-line utility, see Red Hat Enterprise Linux 7 Networking Guide .
1.2.3. Managing Network Connections After the Installation Process Using nmtui
The NetworkManager text user interface (TUI) utility, nmtui , provides a text interface to configure networking by controlling NetworkManager . For more information about installing and using the nmtui text interface tool, see Red Hat Enterprise Linux 7 Networking Guide .
1.2.4. Managing Networking in web console
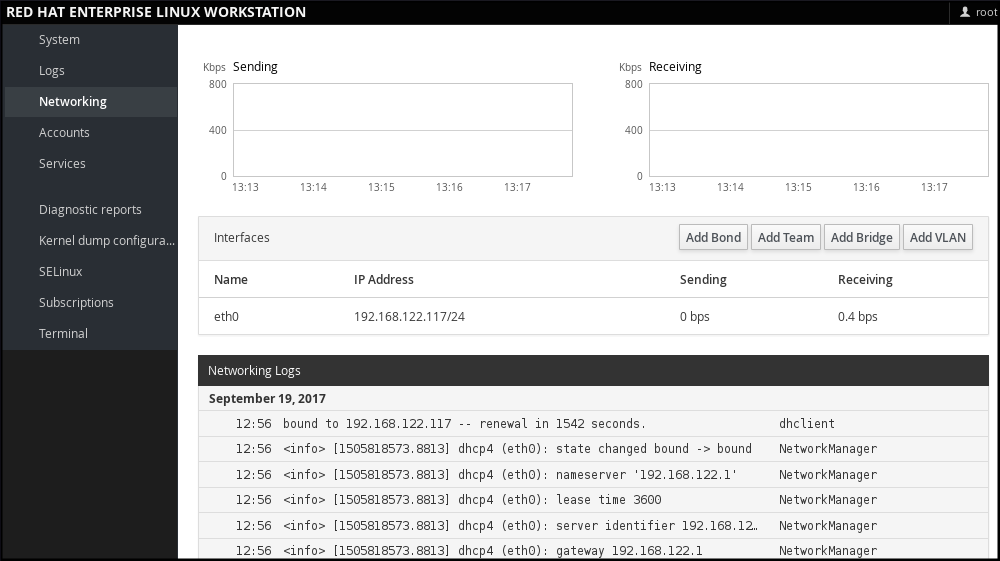
In web console , the Networking menu enables you: To display currently received and sent packets To display the most important characteristics of available network interfaces To display content of the networking logs. To add various types of network interfaces (bond, team, bridge, VLAN)
Figure 1.1. Managing Networking in web console
1.3. The Basics of Registering the System and Managing Subscriptions
1.3.1. What Red Hat Subscriptions Are and Which Tasks They Can Be Used For
The products installed on Red Hat Enterprise Linux 7, including the operating system itself, are covered by subscriptions. A subscription to Red Hat Content Delivery Network is used to track: Registered systems Products installed on those system Subscriptions attached to those product
1.3.2. Registering the System During the Installation
This section provides a brief summary of registering Red Hat Enterprise Linux 7 during the installation process. If your operating system is not registered after the installation, you can find what might have been missed during the installation by reading through this section. For detailed information, consult Red Hat Enterprise Linux 7 Installation Guide . Basically, there are two ways to register the system during the installation: Normally, registration is a part of the Initial Setup configuration process. For more information, see Red Hat Enterprise Linux 7 Installation Guide . Another option is to run Subscription manager as a post-installation script , which performs the automatic registration at the moment when the installation is complete and before the system is rebooted for the first time. To ensure this, modify the %post section of the Kickstart file. For more detailed information on running Subscription manager as a post-installation script, see Red Hat Enterprise Linux 7 Installation Guide .
1.3.3. Registering the System after the Installation
If you have not registered your system during installation process, you can do it afterwards by applying the following procedure. Note that all commands in this procedure need to be performed as the
root
user.
Registering and Subscribing Your System
-
Register your system:
~]# subscription-manager register
The command will prompt you to enter your Red Hat Customer Portal user name and password. Determine the pool ID of a subscription that you require:
~]# subscription-manager list --available
This command displays all available subscriptions for your Red Hat account. For every subscription, various characteristics are displayed, including the pool ID. Attach the appropriate subscription to your system by replacing pool_id with the pool ID determined in the previous step:
~]# subscription-manager attach --pool=pool_id
For more information on registration of your system and attachment of the Red Hat Content Delivery Network subscriptions, see Chapter 7, Registering the System and Managing Subscriptions .
1.3.4. Registering a System to EUS Content
To access the Extended Update Support (EUS) content, register your system as follows: Verify that EUS entitlements are available:
~]# subscription-manager list --available --matches="*Extended Update Support"
    +-------------------------------------------+
        Available Subscriptions
    +-------------------------------------------+
    Subscription Name:   Extended Update Support
    Provides:            Red Hat Enterprise Linux High Availability for x86_64 - Extended Update Support
                         Red Hat Enterprise Linux Resilient Storage for x86_64 - Extended Update Support
                         Red Hat Enterprise Linux for x86_64 - Extended Update Support
                         Red Hat EUCJP Support (for RHEL Server) - Extended Update Support
                         RHEL for SAP - Extended Update Support
                         Red Hat Enterprise Linux Load Balancer (for RHEL Server) - Extended Update Support
                         Red Hat Enterprise Linux Scalable File System (for RHEL Server) - Extended Update Support
                         Red Hat CodeReady Linux Builder for x86_64 - Extended Update Support
                         RHEL for SAP HANA - Extended Update Support
                         Red Hat Enterprise Linux High Performance Networking (for RHEL Server) - Extended Update Support
                         Oracle Java (for RHEL Server) - Extended Update Support
                         Red Hat S-JIS Support (for RHEL Server) - Extended Update Support
    SKU:                 RH00030
    Contract:            12069074
    Pool ID:             8a99f9ac7238188b01723d9c8a8a06a9
    Provides Management: No
    Available:           8
    Suggested:           0
    Service Level:       Layered
    Service Type:        L1-L3
    Subscription Type:   Instance Based
    Starts:              05/22/2020
    Ends:                05/21/2021
    System Type:         Physical
Attach the applicable subscription using the Pool identifier:
~]# subscription-manager attach --pool 8a99f9ac7238188b01723d9c8a8a06a9
Replace the default repositories enabled for the system with the EUS variants:
~]# subscription-manager repos --disable \*
Enable the repositories which represent the EUS content set for the RHEL revision in use:
~]# subscription-manager repos --enable rhel-7-server-eus-rpms
Select the required and supported release for the end system:
~]# subscription-manager release --set 7.6
For currently supported EUS releases, see Extended Update Support Add-on .
1.3.5. Registering a System to E4S Content
The following procedure describes how to register a system and utilize the E4S content. Register your system using the following command:
~]# subscription-manager register
Verify that E4S entitlements are available:
~]# subscription-manager list --available --matches="*Update Services for SAP Solutions*"
+-------------------------------------------+
    Available Subscriptions
+-------------------------------------------+
Subscription Name:   Red Hat Enterprise Linux for SAP Solutions, Standard (Physical or Virtual Nodes)
Provides:            dotNET on RHEL Beta (for RHEL Server)
                     Red Hat CodeReady Linux Builder for x86_64
                     Red Hat Enterprise Linux for SAP HANA for x86_64
                     Red Hat Ansible Engine
                     RHEL for SAP HANA - Update Services for SAP Solutions
                     Red Hat Enterprise Linux Scalable File System (for RHEL Server) - Extended Update Support
                     RHEL for SAP HANA - Extended Update Support
                     Red Hat Enterprise Linux Atomic Host Beta
                     Red Hat Beta
                     Red Hat EUCJP Support (for RHEL Server) - Extended Update Support
                     Red Hat Enterprise Linux High Availability for x86_64
                     Red Hat Enterprise Linux Load Balancer (for RHEL Server) - Extended Update Support
                     dotNET on RHEL (for RHEL Server)
                     Red Hat CodeReady Linux Builder for x86_64 - Extended Update Support
                     Red Hat Enterprise Linux High Availability - Update Services for SAP Solutions
                     Red Hat Enterprise Linux Resilient Storage for x86_64 - Extended Update Support
                     Red Hat Enterprise Linux High Availability for x86_64 - Extended Update Support
                     Oracle Java (for RHEL Server)
                     Red Hat Enterprise Linux Server - Update Services for SAP Solutions
                     Red Hat Software Collections (for RHEL Server)
                     Red Hat Enterprise Linux Scalable File System (for RHEL Server)
                     Red Hat Enterprise Linux High Performance Networking (for RHEL Server) - Extended Update Support
                     RHEL for SAP - Update Services for SAP Solutions
                     Oracle Java (for RHEL Server) - Extended Update Support
                     Red Hat Enterprise Linux Atomic Host
                     Red Hat Developer Tools (for RHEL Server)
                     Red Hat Software Collections Beta (for RHEL Server)
                     Red Hat Enterprise Linux Server
                     Red Hat Enterprise Linux for SAP Applications for x86_64
                     Red Hat Developer Tools Beta (for RHEL Server)
                     Red Hat Enterprise Linux for x86_64
                     Red Hat Enterprise Linux for x86_64 - Extended Update Support
                     RHEL for SAP - Extended Update Support
                     Red Hat Developer Toolset (for RHEL Server)
                     Red Hat S-JIS Support (for RHEL Server) - Extended Update Support
SKU:                 RH00764
Contract:            11977725
Pool ID:             8a85f99c6c4825eb016c4a30d3493064
Provides Management: Yes
Available:           18
Suggested:           0
Service Level:       Standard
Service Type:        L1-L3
Subscription Type:   Instance Based
Starts:              03/29/2020
Ends:                12/31/2021
System Type:         Physical
Attach the applicable subscription using the Pool identifier:
~]# subscription-manager attach --pool=#################
Replace the default repositories enabled for the system with the EUS variants:
~]# subscription-manager repos --disable="*"
Enable the repositories which represent the E4S content set for the RHEL revision in use:
~]# subscription-manager --enable=rhel-7-server-e4s-rpms
Clear the repository cache and release lock the system to a valid release for E4S which supports your SAP application:
~]# yum clean all && subscription-manager release --set=7.7
1.4. Installing Software
This section provides information to guide you through the basics of software installation on a Red Hat Enterprise Linux 7 system. It mentions the prerequisites that you need to fulfil to be able to install software in Section 1.4.1, “Prerequisites for Software Installation” , provides the basic information on software packaging and software repositories in Section 1.4.2, “Introduction to the System of Software Packaging and Software Repositories” , and references the ways to perform basic tasks related to software installation in Section 1.4.3, “Managing Basic Software Installation Tasks with Subscription Manager and Yum” .
1.4.1. Prerequisites for Software Installation
The Red Hat Content Delivery Network subscription service provides a mechanism to handle Red Hat software inventory and enables you to install additional software or update already installed packages. You can start installing software once you have registered your system and attached a subscription, as described in Section 1.3, “The Basics of Registering the System and Managing Subscriptions” .
1.4.2. Introduction to the System of Software Packaging and Software Repositories
All software on a Red Hat Enterprise Linux system is divided into RPM packages, which are stored in particular repositories. When a system is subscribed to the Red Hat Content Delivery Network, a repository file is created in the
/etc/yum.repos.d/
directory.
Use the
yum
utility to manage package operations:
Searching information about packages
Installing packages
Updating packages
Removing packages
Checking the list of currently available repositories
Adding or removing a repository
Enabling or disabling a repository
For information on basic tasks related to the installation of software, see
Section 1.4.3, “Managing Basic Software Installation Tasks with Subscription Manager and Yum”
. For further information on managing software repositories, see
Section 7.2, “Managing Software Repositories”
. For detailed information on using the
yum
utility, see
Chapter 9,
Yum
.
1.4.3. Managing Basic Software Installation Tasks with Subscription Manager and Yum
The most basic software-installation tasks that you might need after the operating system has been installed include: Listing all available repositories:
~]# subscription-manager repos --list
Listing all currently enabled repositories:
~]$ yum repolist
Enabling or disabling a repository:
~]# subscription-manager repos --enable repository
~]# subscription-manager repos --disable repository
Searching for packages matching a specific string:
~]$ yum search string
Installing a package:
~]# yum install package_name
Updating all packages and their dependencies:
~]# yum update
Updating a package:
~]# yum update package_name
Uninstalling a package and any packages that depend on it:
~]# yum remove package_name
Listing information on all installed and available packages:
~]$ yum list all
Listing information on all installed packages:
~]$ yum list installed
1.5. Making systemd Services Start at Boot Time
Systemd is a system and service manager for Linux operating systems that introduces the concept of systemd units. For more information on systemd, see Section 10.1, “Introduction to systemd” . This section provides the information on how to ensure that a service is enabled or disabled at boot time. It also explains how to manage the services through web console .
1.5.1. Enabling or Disabling the Services
You can determine services that are enabled or disabled at boot time already during the installation process, or you can enable or disable a service on an installed operating system.
To create the list of services enabled or disabled at boot time during the installation process, use the
services
option in the Kickstart file:
services [--disabled=list] [--enabled=list]
Note
The list of disabled services is processed before the list of enabled services. Therefore, if a service appears on both lists, it will be enabled. The list of the services should be given in the comma separated format. Do not include spaces in the list of services. For detailed information, refer to Red Hat Enterprise Linux 7 Installation Guide. To enable or disable a service on an already installed operating system:
~]# systemctl enableservice_name
~]# systemctl disableservice_name
For further details, see Section 10.2, “Managing System Services” .
1.5.2. Managing Services in web console
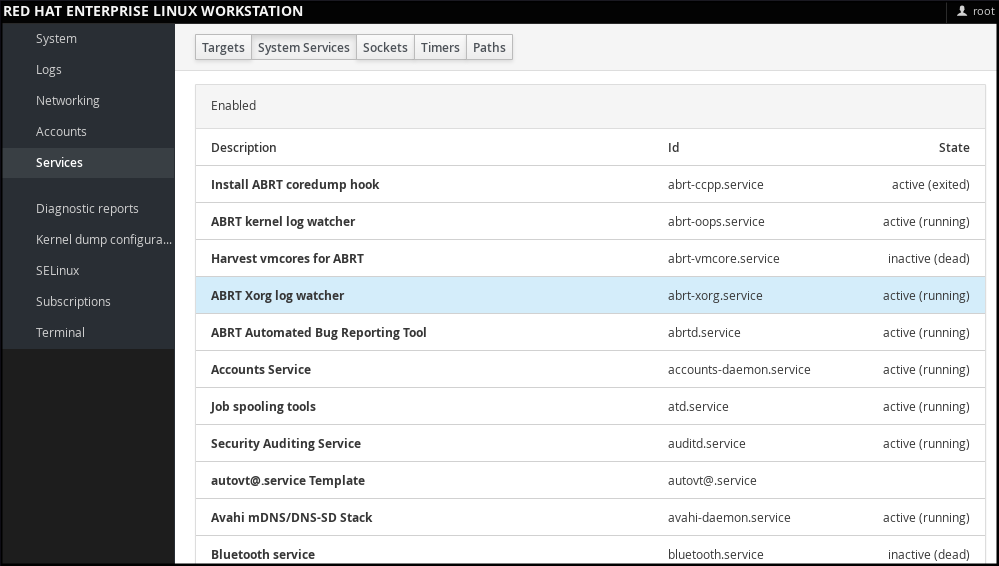
In web console , select Services to manage systemd targets, services, sockets, timers and paths. There you can check their status, start or stop them, enable or disable them.
Figure 1.2. Managing Services in web console
1.5.3. Additional Resources on systemd Services
For more information on systemd, see Chapter 10, Managing Services with systemd .
1.6. Enhancing System Security with a Firewall, SELinux and SSH Logings
Computer security is the protection of computer systems from the theft or damage to their hardware, software, or information, as well as from disruption or misdirection of the services they provide. Ensuring computer security is therefore an essential task not only in the enterprises processing sensitive data or handling some business transactions. Computer security includes a wide variety of features and tools. This section covers only the basic security features that you need to configure after you have installed the operating system. For detailed information on securing Red Hat Enterprise Linux 7, see Red Hat Enterprise Linux 7 Security Guide .
1.6.1. Ensuring the Firewall Is Enabled and Running
1.6.1.1. What a Firewall Is and How It Enhances System Security
A firewall is a network security system that monitors and controls the incoming and outgoing network traffic based on predetermined security rules. A firewall typically establishes a barrier between a trusted, secure internal network and another outside network.
On Red Hat Enterprise Linux 7, the firewall is provided by the
firewalld
service, which is automatically enabled during the installation of Red Hat Enterprise Linux. However, if you explicitly disabled the service, for example in the kickstart configuration, you can re-enable it, as described in
Section 1.6.1.2, “Re-enabling the firewalld Service”
. For overview of firewall setting options in the Kickstart file, see
Red Hat Enterprise Linux 7 Installation Guide
.
1.6.1.2. Re-enabling the firewalld Service
In case that the
firewalld
service is disabled after the installation, Red Hat recommends to consider re-enabling it.
You can display the current status of
firewalld
even as a regular user:
~]$ systemctl status firewalld
If
firewalld
is not enabled and running, switch to the
root
user, and change its status:
~]# systemctl start firewalld
~]# systemctl enable firewalld
For further information on post-installation procedures related to
firewalld
, see
Red Hat Enterprise Linux 7 Security Guide
. For detailed information on configuring and using firewall, see
Red Hat Enterprise Linux 7 Security Guide
1.6.2. Ensuring the Appropriate State of SELinux
1.6.2.1. What SELinux Is and How It Enhances System Security
Security Enhanced Linux (SELinux) is an additional layer of system security that determines which process can access which files, directories, and ports.
SELinux States
SELinux has two possible states: Enabled Disabled When SELinux is disabled, only Discretionary Access Control (DAC) rules are used.
SELinux Modes
When SELinux is enabled, it can run in one of the following modes: Enforcing Permissive Enforcing mode means that SELinux policies is enforced. SELinux denies access based on SELinux policy rules, and enables only the interactions that are particularly allowed. Enforcing mode is the default mode after the installation and it is also the safest SELinux mode. Permissive mode means that SELinux policies is not enforced. SELinux does not deny access, but denials are logged for actions that would have been denied if running in enforcing mode. Permissive mode is the default mode during the installation. Operating in permissive mode is also useful in some specific cases, for example if you require access to the Access Vector Cache (AVC) denials when troubleshooting problems. For further information on SELinux in Red Hat Enterprise Linux 7, see Red Hat Enterprise Linux 7 SELinux User’s and Administrator’s Guide .
1.6.2.2. Ensuring the Required State of SELinux
By default, SELinux operates in permissive mode during the installation and in enforcing mode when the installation has finished. However, in some specific situations, SELinux might be explicitly set to permissive mode or it might even be disabled on the installed operating system. This can be set for example in the kickstart configuration. For overview of SELinux setting options in the Kickstart file, see Red Hat Enterprise Linux 7 Installation Guide .
Important
Red Hat recommends to keep your system in enforcing mode. To display the current SELinux mode, and to set the mode as needed:
Ensuring the Required State of SELinux
-
Display the current SELinux mode in effect:
~]$
getenforce -
If needed, switch between the SELinux modes. The switch can be either temporary or permanent. A temporary switch is not persistent across reboots, while permanent switch is. To temporary switch to either enforcing or permissive mode:
~]# setenforce Enforcing
~]# setenforce Permissive
-
To permanently set the SELinux mode, modify the SELINUX variable in the
/etc/selinux/configconfiguration file. For example, to switch SELinux to enforcing mode:# This file controls the state of SELinux on the system. # SELINUX= can take one of these three values: # enforcing - SELinux security policy is enforced. # permissive - SELinux prints warnings instead of enforcing. # disabled - No SELinux policy is loaded. SELINUX=enforcing
1.6.2.3. Managing SELinux in web console
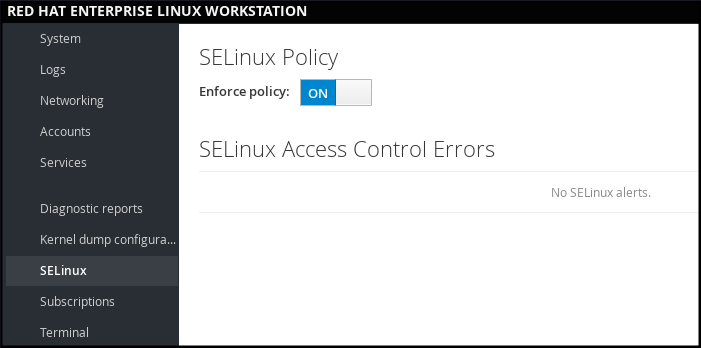
In web console , use the SELinux option to turn SELinux enforcing policy on or off. By default, SELinux enforcing policy in web console is on, and SELinux operates in enforcing mode. By turning it off, you can switch SELinux into permissive mode. Note that such deviation from the default configuration in the /etc/sysconfig/selinux file is automatically reverted on the next boot.
Figure 1.3. Managing SELinux in web console
1.6.3. Using SSH-based Authentication
1.6.3.1. What SSH-based Authentication Is and How It Enhances System Security
If you want to secure your communication with another computer, you can use SSH-based authentication. Secure Shell (SSH) is a protocol which facilitates client-server communication and allows users to log in to any host system running SSH remotely. SSH encrypts the connection. The client transmits its authentication information to the server using encryption, and all data sent and received during a session are transferred under the encryption. SSH enables its users to authenticate without a password. To do so, SSH uses a private-public key scheme. For further information about SSH safeguards, see Section 12.1.2, “Main Features” .
1.6.3.2. Establishing an SSH Connection
To be able to use SSH connection, create a pair of two keys consisting of a public and a private key.
Creating the Key Files and Copying Them to the Server
-
Generate a public and a private key:
~]$
ssh-keygenBoth keys are stored in the
~/.ssh/directory:~/.ssh/id_rsa.pub- public key~/.ssh/id_rsa- private key The public key does not need to be secret. It is used to verify the private key. The private key is secret. You can choose to protect the private key with the passphrase that you specify during the key generation process. With the passphrase, authentication is even more secure, but is no longer password-less. You can avoid this using thessh-agentcommand. In this case, you will enter the passphrase only once - at the beginning of a session. For more information onssh-agentconfiguration, see Section 12.2.4, “Using Key-based Authentication” . Copy the most recently modified public key to a remote machine you want to log into:~]# ssh-copy-id USER@hostname
As a result, you are now able to enter the system in a secure way, but without entering a password.
1.6.3.3. Disabling SSH Root Login
To increase system security, you can disable SSH access for the
root
user, which is enabled by default.
For more information on this topic, see
Red Hat Enterprise Linux 7 Security Guide
.
Disabling SSH Root Login
-
Access the
/etc/ssh/sshd_configfile:~]# vi /etc/ssh/sshd_config
-
Change the line that reads
#PermitRootLogin yesto:PermitRootLogin no
-
Restart the
sshdservice:~]# systemctl restart sshd
1.7. The Basics of Managing User Accounts
Red Hat Enterprise Linux 7 is a multi-user operating system, which enables multiple users on different computers to access a single system installed on one machine. Every user operates under its own account, and managing user accounts thus represents a core element of Red Hat Enterprise Linux system administration.
Normal and System Accounts
Normal accounts are created for users of a particular system. Such accounts can be added, removed, and modified during normal system administration. System accounts represent a particular applications identifier on a system. Such accounts are generally added or manipulated only at software installation time, and they are not modified later.
Warning
System accounts are presumed to be available locally on a system. If these accounts are configured and provided remotely, such as in the instance of an LDAP configuration, system breakage and service start failures can occur.
For system accounts, user IDs below 1000 are reserved. For normal accounts, you can use IDs starting at 1000. However, the recommended practice is to assign IDs starting at 5000. See
Section 4.1, “Introduction to Users and Groups”
for more information. The guidelines for assigning IDs can be found in the
/etc/login.defs
file.
# Min/max values for automatic uid selection in useradd
UID_MIN         1000
UID_MAX         60000
# System accounts
SYS_UID_MIN        201
SYS_UID_MAX        999
What Groups Are and Which Purposes They Can Be Used For
A group is an entity which ties together multiple user accounts for a common purpose, such as granting access to particular files.
1.7.1. The Most Basic Command-Line Tools to Manage User Accounts and Groups
The most basic tasks to manage user accounts and groups, and the appropriate command-line tools, include: Displaying user and group IDs:
~]$ id
Creating a new user account:
~]# useradd [options] user_name
Assigning a new password to a user account belonging to username :
~]# passwd user_name
Adding a user to a group:
~]# usermod -a -G group_name user_name
For detailed information on managing users and groups, see Chapter 4, Managing Users and Groups . If you want to use graphical user interface to manage users and groups, see Section 4.2, “Managing Users in a Graphical Environment” .
1.7.2. Managing User Accounts in web console
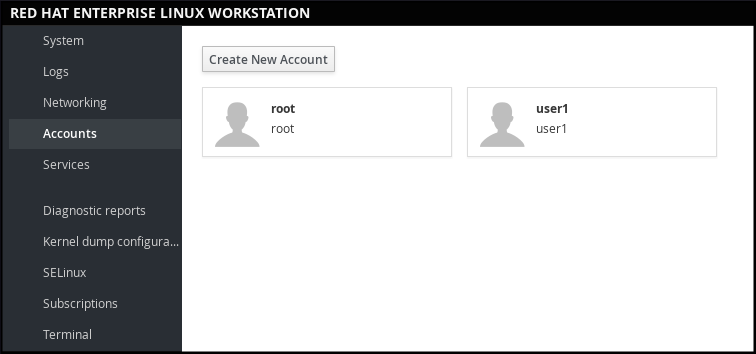
To manage accounts in web console , select the Accounts menu.
Figure 1.4. Managing User Accounts in web console
1.8. Dumping the Crashed Kernel Using the kdump Mechanism
This section provides an introduction to the Kernel crash dump mechanism, also called
kdump
, and briefly explains what
kdump
is used for in
Section 1.8.1, “What kdump Is and Which Tasks It Can Be Used For”
.
Activation of the
kdump
service is a part of the installation process, and by default,
kdump
was enabled during the installation. This section summarizes how to activate
kdump
during the installation in
Section 1.8.2, “Enabling and Activating kdump During the Installation Process”
, and how to manually enable the
kdump
service if it is disabled after the installation in
Section 1.8.3, “Ensuring That kdump Is Installed and Enabled after the Installation Process”
.
You can also use
web console
to configure
kdump
. See
Section 1.8.4, “Configuring kdump in web console”
for more information.
1.8.1. What kdump Is and Which Tasks It Can Be Used For
In case of a system crash, you can use the Kernel crash dump mechanism called kdump that enables you to save the content of the system’s memory for later analysis. The kdump mechanism relies on the kexec system call, which can be used to boot a Linux kernel from the context of another kernel, bypass BIOS, and preserve the contents of the first kernel’s memory that would otherwise be lost. When kernel crash occurs, kdump uses kexec to boot into a second kernel (a capture kernel), which resides in a reserved part of the system memory that is inaccessible to the first kernel. The second kernel captures the contents of the crashed kernel’s memory (a crash dump) and saves it.
1.8.2. Enabling and Activating kdump During the Installation Process
During the installation, enablement and activation of
kdump
can be done either in the Anaconda installer or using the
%addon com_redhat_kdump
command in the Kickstart file.
For more information, see the appropriate source according to the installation method:
When installing with the Anaconda installer, see:
Installing Using Anaconda
in Red Hat Enterprise Linux 7 Installation Guide.
When installing with the Kickstart file, see:
Kickstart Commands and Options
in Red Hat Enterprise Linux 7 Installation Guide.
1.8.3. Ensuring That kdump Is Installed and Enabled after the Installation Process
To ensure that kdump is installed and to configure it:
Checking Whether kdump Is Installed and Configuring kdump
-
To check whether kdump is installed on your system:
~]$
rpm -q kexec-tools -
If not installed, to install kdump , enter as the
rootuser:~]# yum install kexec-tools
-
To configure kdump : Use either the command line or graphical user interface. Both options are described in detail in Red Hat Enterprise Linux 7 Kernel Crash Dump Guide. If you need to install the graphical configuration tool:
~]# yum install system-config-kdump
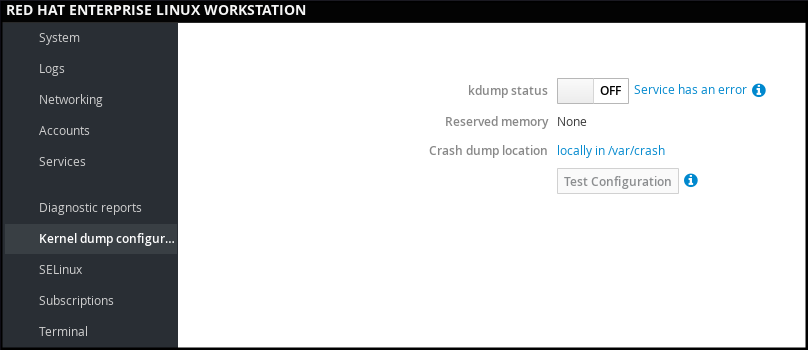
1.8.4. Configuring kdump in web console
In web console , select Kernel dump to verify: the kdump status the amount of memory reserved for kdump the location of the crash dump files
Figure 1.5. Configuring kdump in web console
1.8.5. Additional Resources on kdump
For more information on kdump , see Red Hat Enterprise Linux 7 Kernel Crash Dump Guide.
1.9. Performing System Rescue and Creating System Backup with ReaR
When a software or hardware failure breaks the operating system, you need a mechanism to rescue the system. It is also useful to have the system backup saved. Red Hat recommends using the Relax-and-Recover (ReaR) tool to fulfil both these needs.
1.9.1. What ReaR Is and Which Tasks It Can Be Used For
ReaR is a disaster recovery and system migration utility which enables you to create the complete rescue system. By default, this rescue system restores only the storage layout and the boot loader, but not the actual user and system files. Additionally, certain backup software enables you to integrate ReaR for disaster recovery. ReaR enables to perform the following tasks: Booting a rescue system on the new hardware Replicating the original storage layout Restoring user and system files
1.9.2. Quickstart to Installation and Configuration of ReaR
To install ReaR, enter as the
root
user:
~]# yum install rear
Use the settings in the
/etc/rear/local.conf
file to configure ReaR.
For further information see,
Section 27.1, “Basic ReaR Usage”
.
1.9.3. Quickstart to Creation of the Rescue System with ReaR
-
To create the rescue system, perform the following command as the
rootuser
~]# rear mkrescue
For further information on creating the rescue system with ReaR, see Section 27.1.3, “Creating a Rescue System” .
1.9.4. Quickstart to Configuration of ReaR with the Backup Software
ReaR contains a fully-integrated built-in, or internal, backup method called NETFS.
To make ReaR use its internal backup method, add these lines to the
/etc/rear/local.conf
file:
BACKUP=NETFS
BACKUP_URL=backup location
You can also configure ReaR to keep the previous backup archives when the new ones are created by adding the following line to
/etc/rear/local.conf
:
NETFS_KEEP_OLD_BACKUP_COPY=y
To make the backups incremental, meaning that only the changed files are backed up on each run, add this line to
/etc/rear/local.conf
:
BACKUP_TYPE=incremental
For detailed information about using the ReaR NETFS internal backup method, see Section 27.2.1, “The Built-in Backup Method” . For information on supported external backup methods and unsupported backup methods, see Section 27.2.2, “Supported Backup Methods” and Section 27.2.3, “Unsupported Backup Methods” .
1.10. Using the Log Files to Troubleshoot Problems
When troubleshooting a problem, you may appreciate the log files that contain different information and messages about the operating system. The logging system in Red Hat Enterprise Linux 7 is based on the built-in syslog protocol. Particular programs use this system to record events and organize them into log files, which are useful when auditing the operating system and troubleshooting various problems. For more information on log files, see Chapter 23, Viewing and Managing Log Files .
1.10.1. Services Handling the syslog Messages
The syslog messages are handled by two services:
the
systemd-journald
daemon - Collects messages from the kernel, the early stages of the boot process, standard output and error of daemons as they start up and run, and syslog, and forwards the messages to the
rsyslog
service for further processing.
the
rsyslog
service - Sorts the syslog messages by type and priority, and writes them to the files in the
/var/log
directory, where the logs are persistently stored.
1.10.2. Subdirectories Storing the syslog Messages
The syslog messages are stored in various subdirectories under the
/var/log
directory according to what kind of messages and logs they contain:
var/log/messages
- all syslog messages except those mentioned below
var/log/secure
- security and authentication-related messages and errors
var/log/maillog
- mail server-related messages and errors
var/log/cron
- log files related to periodically executed tasks
var/log/boot.log
- log files related to system startup
1.11. Accessing Red Hat Support
To obtain support from Red Hat, use the Red Hat Customer Portal , which provides access to everything available with your subscription. This section describes: Obtaining Red Hat support, see Section 1.11.1, “Obtaining Red Hat Support Through Red Hat Customer Portal” Using the SOS report to troubleshoot problems, see Section 1.11.2, “Using the SOS Report to Troubleshoot Problems”
1.11.1. Obtaining Red Hat Support Through Red Hat Customer Portal
By using the Red Hat Customer Portal you can: Open a new support case Initiate a live chat with a Red Hat expert Contact a Red Hat expert by making a call or sending an email To access the Red Hat Customer Portal, go to https://access.redhat.com. . To work with Red Hat Customer Portal services related to Red Hat support, you can use: Web browser Red Hat Support Tool
1.11.1.1. What the Red Hat Support Tool Is and Which Tasks It Can Be Used For
The Red Hat Support Tool is a command-line based tool which provides a text console interface to the subscription-based Red Hat access services. This tool is contained in the redhat-support-tool package. The Red Hat Support Tool enables you to perform support-related tasks, such as: Opening or updating support cases Searching in the Red Hat knowledge base solutions Analyzing Python and Java errors To start the tool in interactive mode:
~]$ redhat-support-tool
Welcome to the Red Hat Support Tool.
Command (? for help):
In interactive mode, enter ? to display the available commands:
Command (? for help): ?
For more information about the installation and use of the Red Hat Support Tool, see Chapter 8, Accessing Support Using the Red Hat Support Tool , and the Red Hat Knowledgebase article Red Hat Access: Red Hat Support Tool .
1.11.2. Using the SOS Report to Troubleshoot Problems
The SOS report collects configuration details, system information and diagnostic information from a Red Hat Enterprise Linux system. Attach the report when you open a support case. Note that the SOS report is provided in the sos package, which is not installed with the default minimal installation of Red Hat Enterprise Linux 7. To install the sos package:
~]# yum install sos
To generate an SOS report :
~]# sosreport
To attach the sos report to your support case, see the Red Hat Knowledgebase article How can I attach a file to a Red Hat support case? . Note that you will be prompted to enter the number of the support case, when attaching the sos report . For more information on SOS report , see the Red Hat Knowledgebase article What is a sosreport and how to create one in Red Hat Enterprise Linux 4.6 and later? .
Chapter 2. System Locale and Keyboard Configuration
The
system locale
specifies the language settings of system services and user interfaces. The
keyboard layout
settings control the layout used on the text console and graphical user interfaces.
These settings can be made by modifying the
/etc/locale.conf
configuration file or by using the
localectl
utility. Also, you can use the graphical user interface to perform the task; for a description of this method, see
Red Hat Enterprise Linux 7 Installation Guide
.
2.1. Setting the System Locale
System-wide locale settings are stored in the
/etc/locale.conf
file, which is read at early boot by the
systemd
daemon. The locale settings configured in
/etc/locale.conf
are inherited by every service or user, unless individual programs or individual users override them.
The basic file format of
/etc/locale.conf
is a newline-separated list of variable assignments. For example, German locale with English messages in
/etc/locale.conf
looks as follows:
LANG=de_DE.UTF-8
LC_MESSAGES=C
Here, the LC_MESSAGES option determines the locale used for diagnostic messages written to the standard error output. To further specify locale settings in
/etc/locale.conf
, you can use several other options, the most relevant are summarized in
Table 2.1, “Options configurable in /etc/locale.conf”
. See the
locale(7)
manual page for detailed information on these options. Note that the LC_ALL option, which represents all possible options, should not be configured in
/etc/locale.conf
.
Table 2.1. Options configurable in /etc/locale.conf
| Option | Description |
|---|---|
|
Provides a default value for the system locale. LC_COLLATE Changes the behavior of functions which compare strings in the local alphabet. LC_CTYPE Changes the behavior of the character handling and classification functions and the multibyte character functions. LC_NUMERIC Describes the way numbers are usually printed, with details such as decimal point versus decimal comma. LC_TIME Changes the display of the current time, 24-hour versus 12-hour clock. LC_MESSAGES Determines the locale used for diagnostic messages written to the standard error output. |
2.1.1. Displaying the Current Status
The
localectl
command can be used to query and change the system locale and keyboard layout settings. To show the current settings, use the
status
option:
localectlstatus
Example 2.1. Displaying the Current Status
The output of the previous command lists the currently set locale, keyboard layout configured for the console and for the X11 window system.
~]$ localectl status
  System Locale: LANG=en_US.UTF-8
    VC Keymap: us
   X11 Layout: n/a
2.1.2. Listing Available Locales
To list all locales available for your system, type:
localectllist-locales
Example 2.2. Listing Locales
Imagine you want to select a specific English locale, but you are not sure if it is available on the system. You can check that by listing all English locales with the following command:
~]$ localectl list-locales | grep en_
en_AG
en_AG.utf8
en_AU
en_AU.iso88591
en_AU.utf8
en_BW
en_BW.iso88591
en_BW.utf8
output truncated
2.1.3. Setting the Locale
To set the default system locale, use the following command as
root
:
localectlset-localeLANG=locale
Replace
locale
with the locale name, found with the
localectl
list-locales
command. The above syntax can also be used to configure parameters from
Table 2.1, “Options configurable in /etc/locale.conf”
.
Example 2.3. Changing the Default Locale
For example, if you want to set British English as your default locale, first find the name of this locale by using
list-locales
. Then, as
root
, type the command in the following form:
~]# localectl set-locale LANG=en_GB.utf8
2.1.4. Making System Locale Settings Permanent when Installing with Kickstart
When Red Hat Enterprise Linux is installed with the Red Hat Kickstart installation method, setting of the system locales might not be persistent after an upgrade of the operating system.
When the
%packages
section of the Kickstart file includes the
--instLang
option, the
_install_langs
RPM macro is set to the particular value for this installation, and the set of installed locales is adjusted accordingly. However, this adjustment affects only this installation, not subsequent upgrades. If an upgrade reinstalls the
glibc
package, the entire set of locales is upgraded instead of only the locales you requested during the installation.
To avoid this, make the choice of locales permanent. You have these options:
If you have not started the Kickstart installation, modify the Kickstart file to include instructions for setting RPM macros globally by applying this procedure:
Setting RPM macros during the Kickstart installation
If you have already installed the system, set RPM macros globally on the system by applying this procedure:
Setting RPM macros globally
Setting RPM macros during the Kickstart installation
-
Modify the
%postsection of the Kickstart file:LANG=en_US echo "%_install_langs $LANG" > /etc/rpm/macros.language-conf yum-config-manager --setopt=override_install_langs=$LANG --save -
Modify the
%packagessection of the Kickstart file:%packages yum-utils* %end
Setting RPM macros globally
-
Create the RPM configuration file at
/etc/rpm/macros.language-confwith the following contents:%_install_langs LANGLANG is the value of the
instLangoption. Update the/etc/yum.conffile with:override_install_langs=LANG
2.2. Changing the Keyboard Layout
The keyboard layout settings enable the user to control the layout used on the text console and graphical user interfaces.
2.2.1. Displaying the Current Settings
As mentioned before, you can check your current keyboard layout configuration with the following command:
localectlstatus
Example 2.4. Displaying the Keyboard Settings
In the following output, you can see the keyboard layout configured for the virtual console and for the X11 window system.
~]$ localectl status
  System Locale: LANG=en_US.utf8
    VC Keymap: us
   X11 Layout: us
2.2.2. Listing Available Keymaps
To list all available keyboard layouts that can be configured on your system, type:
localectllist-keymaps
Example 2.5. Searching for a Particular Keymap
You can use
grep
to search the output of the previous command for a specific keymap name. There are often multiple keymaps compatible with your currently set locale. For example, to find available Czech keyboard layouts, type:
~]$localectllist-keymaps|grepczcz-cp1250 cz-lat2 cz-lat2-prog cz-qwerty cz-us-qwertz sunt5-cz-us sunt5-us-cz
2.2.3. Setting the Keymap
To set the default keyboard layout for your system, use the following command as
root
:
localectlset-keymapmap
Replace
map
with the name of the keymap taken from the output of the
localectl
list-keymaps
command. Unless the
--no-convert
option is passed, the selected setting is also applied to the default keyboard mapping of the X11 window system, after converting it to the closest matching X11 keyboard mapping. This also applies in reverse, you can specify both keymaps with the following command as
root
:
localectlset-x11-keymapmap
If you want your X11 layout to differ from the console layout, use the
--no-convert
option.
localectl--no-convertset-x11-keymapmap
With this option, the X11 keymap is specified without changing the previous console layout setting.
Example 2.6. Setting the X11 Keymap Separately
Imagine you want to use German keyboard layout in the graphical interface, but for console operations you want to retain the US keymap. To do so, type as
root
:
~]# localectl --no-convert set-x11-keymap de
Then you can verify if your setting was successful by checking the current status:
~]$ localectl status
  System Locale: LANG=de_DE.UTF-8
    VC Keymap: us
   X11 Layout: de
Apart from keyboard layout ( map ), three other options can be specified:
localectlset-x11-keymapmap model variant options
Replace
model
with the keyboard model name,
variant
and
options
with keyboard variant and option components, which can be used to enhance the keyboard behavior. These options are not set by default. For more information on X11 Model, X11 Variant, and X11 Options see the
kbd(4)
man page.
2.3. Additional Resources
For more information on how to configure the keyboard layout on Red Hat Enterprise Linux, see the resources listed below:
Installed Documentation
-
localectl(1) — The manual page for thelocalectlcommand line utility documents how to use this tool to configure the system locale and keyboard layout.loadkeys(1) — The manual page for theloadkeyscommand provides more information on how to use this tool to change the keyboard layout in a virtual console.
See Also
-
Chapter 6,
Gaining Privileges
documents how to gain administrative privileges by using the
suandsudocommands. Chapter 10, Managing Services with systemd provides more information onsystemdand documents how to use thesystemctlcommand to manage system services.
Chapter 3. Configuring the Date and Time
Modern operating systems distinguish between the following two types of clocks:
A
real-time clock
(
RTC
), commonly referred to as a
hardware clock
, (typically an integrated circuit on the system board) that is completely independent of the current state of the operating system and runs even when the computer is shut down.
A
system clock
, also known as a
software clock
, that is maintained by the kernel and its initial value is based on the real-time clock. Once the system is booted and the system clock is initialized, the system clock is completely independent of the real-time clock.
The system time is always kept in
Coordinated Universal Time
(
UTC
) and converted in applications to local time as needed.
Local time
is the actual time in your current time zone, taking into account
daylight saving time
(
DST
). The real-time clock can use either UTC or local time. UTC is recommended.
Red Hat Enterprise Linux 7 offers three command line tools that can be used to configure and display information about the system date and time:
The
timedatectl
utility, which is new in Red Hat Enterprise Linux 7 and is part of
systemd
.
The traditional
date
command.
The
hwclock
utility for accessing the hardware clock.
3.1. Using the
timedatectl
Command
The
timedatectl
utility is distributed as part of the
systemd
system and service manager and allows you to review and change the configuration of the system clock. You can use this tool to change the current date and time, set the time zone, or enable automatic synchronization of the system clock with a remote server.
For information on how to display the current date and time in a custom format, see also
Section 3.2, “Using the date Command”
.
3.1.1. Displaying the Current Date and Time
To display the current date and time along with detailed information about the configuration of the system and hardware clock, run the
timedatectl
command with no additional command line options:
timedatectl
This displays the local and universal time, the currently used time zone, the status of the Network Time Protocol (
NTP
) configuration, and additional information related to DST.
Example 3.1. Displaying the Current Date and Time
The following is an example output of the
timedatectl
command on a system that does not use
NTP
to synchronize the system clock with a remote server:
~]$ timedatectl
   Local time: Mon 2016-09-16 19:30:24 CEST
 Universal time: Mon 2016-09-16 17:30:24 UTC
    Timezone: Europe/Prague (CEST, +0200)
   NTP enabled: no
NTP synchronized: no
 RTC in local TZ: no
   DST active: yes
 Last DST change: DST began at
         Sun 2016-03-31 01:59:59 CET
         Sun 2016-03-31 03:00:00 CEST
 Next DST change: DST ends (the clock jumps one hour backwards) at
         Sun 2016-10-27 02:59:59 CEST
         Sun 2016-10-27 02:00:00 CET
Important
Changes to the status of
chrony
or
ntpd
will not be immediately noticed by
timedatectl
. If changes to the configuration or status of these tools is made, enter the following command:
~]# systemctl restart systemd-timedated.service
3.1.2. Changing the Current Time
To change the current time, type the following at a shell prompt as
root
:
timedatectlset-timeHH:MM:SS
Replace
HH
with an hour,
MM
with a minute, and
SS
with a second, all typed in two-digit form.
This command updates both the system time and the hardware clock. The result it is similar to using both the
date --set
and
hwclock --systohc
commands.
The command will fail if an
NTP
service is enabled. See
Section 3.1.5, “Synchronizing the System Clock with a Remote Server”
to temporally disable the service.
Example 3.2. Changing the Current Time
To change the current time to 11:26 p.m., run the following command as
root
:
~]# timedatectl set-time 23:26:00
By default, the system is configured to use UTC. To configure your system to maintain the clock in the local time, run the
timedatectl
command with the
set-local-rtc
option as
root
:
timedatectlset-local-rtcboolean
To configure your system to maintain the clock in the local time, replace
boolean
with
yes
(or, alternatively,
y
,
true
,
t
, or
1
). To configure the system to use UTC, replace
boolean
with
no
(or, alternatively,
n
,
false
,
f
, or
0
). The default option is
no
.
3.1.3. Changing the Current Date
To change the current date, type the following at a shell prompt as
root
:
timedatectlset-timeYYYY-MM-DD
Replace YYYY with a four-digit year, MM with a two-digit month, and DD with a two-digit day of the month. Note that changing the date without specifying the current time results in setting the time to 00:00:00.
Example 3.3. Changing the Current Date
To change the current date to 2 June 2017 and keep the current time (11:26 p.m.), run the following command as
root
:
~]# timedatectl set-time "2017-06-02 23:26:00"
3.1.4. Changing the Time Zone
To list all available time zones, type the following at a shell prompt:
timedatectllist-timezones
To change the currently used time zone, type as
root
:
timedatectl set-timezone time_zone
Replace
time_zone
with any of the values listed by the
timedatectl list-timezones
command.
Example 3.4. Changing the Time Zone
To identify which time zone is closest to your present location, use the
timedatectl
command with the
list-timezones
command line option. For example, to list all available time zones in Europe, type:
~]# timedatectl list-timezones | grep Europe Europe/Amsterdam Europe/Andorra Europe/Athens Europe/Belgrade Europe/Berlin Europe/Bratislava To change the time zone toEurope/Prague, type asroot:~]# timedatectl set-timezone Europe/Prague
3.1.5. Synchronizing the System Clock with a Remote Server
As opposed to the manual adjustments described in the previous sections, the
timedatectl
command also allows you to enable automatic synchronization of your system clock with a group of remote servers using the
NTP
protocol. Enabling NTP enables the
chronyd
or
ntpd
service, depending on which of them is installed.
The
NTP
service can be enabled and disabled using a command as follows:
timedatectlset-ntpboolean
To enable your system to synchronize the system clock with a remote
NTP
server, replace
boolean
with
yes
(the default option). To disable this feature, replace
boolean
with
no
.
Example 3.5. Synchronizing the System Clock with a Remote Server
To enable automatic synchronization of the system clock with a remote server, type:
~]# timedatectl set-ntp yes
The command will fail if an
NTP
service is not installed. See
Section 18.3.1, “Installing chrony”
for more information.
3.2. Using the date Command
The
date
utility is available on all Linux systems and allows you to display and configure the current date and time. It is frequently used in scripts to display detailed information about the system clock in a custom format.
For information on how to change the time zone or enable automatic synchronization of the system clock with a remote server, see
Section 3.1, “Using the
timedatectl
Command”
.
3.2.1. Displaying the Current Date and Time
To display the current date and time, run the
date
command with no additional command line options:
This displays the day of the week followed by the current date, local time, abbreviated time zone, and year.
By default, the
date
command displays the local time. To display the time in UTC, run the command with the
--utc
or
-u
command line option:
date--utc
You can also customize the format of the displayed information by providing the
       +"


         format


       "
option on the command line:
date +"format"
Replace
format
with one or more supported control sequences as illustrated in
Example 3.6, “Displaying the Current Date and Time”
. See
Table 3.1, “Commonly Used Control Sequences”
for a list of the most frequently used formatting options, or the
date
(1) manual page for a complete list of these options.
Table 3.1. Commonly Used Control Sequences
| Control Sequence | Description |
|---|---|
|
The hour in the
HH
format (for example,
|
Example 3.6. Displaying the Current Date and Time
To display the current date and local time, type the following at a shell prompt:
~]$ date
Mon Sep 16 17:30:24 CEST 2016
To display the current date and time in UTC, type the following at a shell prompt:
~]$ date --utc
Mon Sep 16 15:30:34 UTC 2016
To customize the output of the
date
command, type:
~]$ date +"%Y-%m-%d %H:%M"
2016-09-16 17:30
3.2.2. Changing the Current Time
To change the current time, run the
date
command with the
--set
or
-s
option as
root
:
date--setHH:MM:SS
Replace
HH
with an hour,
MM
with a minute, and
SS
with a second, all typed in two-digit form.
By default, the
date
command sets the system clock to the local time. To set the system clock in UTC, run the command with the
--utc
or
-u
command line option:
date--setHH:MM:SS--utc
Example 3.7. Changing the Current Time
To change the current time to 11:26 p.m., run the following command as
root
:
~]# date --set 23:26:00
3.2.3. Changing the Current Date
To change the current date, run the
date
command with the
--set
or
-s
option as
root
:
date--setYYYY-MM-DD
Replace YYYY with a four-digit year, MM with a two-digit month, and DD with a two-digit day of the month. Note that changing the date without specifying the current time results in setting the time to 00:00:00.
Example 3.8. Changing the Current Date
To change the current date to 2 June 2017 and keep the current time (11:26 p.m.), run the following command as
root
:
~]# date --set "2017-06-02 23:26:00"
3.3. Using the
hwclock
Command
hwclock
is a utility for accessing the hardware clock, also referred to as the Real Time Clock (RTC). The hardware clock is independent of the operating system you use and works even when the machine is shut down. This utility is used for displaying the time from the hardware clock.
hwclock
also contains facilities for compensating for systematic drift in the hardware clock.
The hardware clock stores the values of: year, month, day, hour, minute, and second. It is not able to store the time standard, local time or Coordinated Universal Time (UTC), nor set the Daylight Saving Time (DST).
The
hwclock
utility saves its settings in the
/etc/adjtime
file, which is created with the first change you make, for example, when you set the time manually or synchronize the hardware clock with the system time.
For the changes in the
hwclock
behaviour between Red Hat Enterprise Linux version 6 and 7, see
Red Hat Enterprise Linux 7 Migration Planning Guide
guide.
3.3.1. Displaying the Current Date and Time
Running
hwclock
with no command line options as the
root
user returns the date and time in local time to standard output.
hwclock
Note that using the
--utc
or
--localtime
options with the
hwclock
command does not mean you are displaying the hardware clock time in UTC or local time. These options are used for setting the hardware clock to keep time in either of them. The time is always displayed in local time. Additionally, using the
hwclock --utc
or
hwclock --local
commands does not change the record in the
/etc/adjtime
file. This command can be useful when you know that the setting saved in
/etc/adjtime
is incorrect but you do not want to change the setting. On the other hand, you may receive misleading information if you use the command an incorrect way. See the
hwclock
(8) manual page for more details.
Example 3.9. Displaying the Current Date and Time
To display the current date and the current local time from the hardware clock, run as
root
:
~]# hwclock
Tue 15 Apr 2017 04:23:46 PM CEST   -0.329272 seconds
CEST is a time zone abbreviation and stands for Central European Summer Time. For information on how to change the time zone, see Section 3.1.4, “Changing the Time Zone” .
3.3.2. Setting the Date and Time
Besides displaying the date and time, you can manually set the hardware clock to a specific time.
When you need to change the hardware clock date and time, you can do so by appending the
--set
and
--date
options along with your specification:
hwclock --set --date "dd mmm yyyy HH:MM"
Replace
dd
with a day (a two-digit number),
mmm
with a month (a three-letter abbreviation),
yyyy
with a year (a four-digit number),
HH
with an hour (a two-digit number),
MM
with a minute (a two-digit number).
At the same time, you can also set the hardware clock to keep the time in either UTC or local time by adding the
--utc
or
--localtime
options, respectively. In this case,
UTC
or
LOCAL
is recorded in the
/etc/adjtime
file.
Example 3.10. Setting the Hardware Clock to a Specific Date and Time
If you want to set the date and time to a specific value, for example, to "21:17, October 21, 2016", and keep the hardware clock in UTC, run the command as
root
in the following format:
~]# hwclock --set --date "21 Oct 2016 21:17" --utc
3.3.3. Synchronizing the Date and Time
You can synchronize the hardware clock and the current system time in both directions. Either you can set the hardware clock to the current system time by using this command:
hwclock --systohcNote that if you use NTP, the hardware clock is automatically synchronized to the system clock every 11 minutes, and this command is useful only at boot time to get a reasonable initial system time. Or, you can set the system time from the hardware clock by using the following command:
hwclock --hctosys
When you synchronize the hardware clock and the system time, you can also specify whether you want to keep the hardware clock in local time or UTC by adding the
--utc
or
--localtime
option. Similarly to using
--set
,
UTC
or
LOCAL
is recorded in the
/etc/adjtime
file.
The
hwclock --systohc --utc
command is functionally similar to
timedatectl set-local-rtc false
and the
hwclock --systohc --local
command is an alternative to
timedatectl set-local-rtc true
.
Example 3.11. Synchronizing the Hardware Clock with System Time
To set the hardware clock to the current system time and keep the hardware clock in local time, run the following command as
root
:
~]# hwclock --systohc --localtime
To avoid problems with time zone and DST switching, it is recommended to keep the hardware clock in UTC. The shown Example 3.11, “Synchronizing the Hardware Clock with System Time” is useful, for example, in case of a multi boot with a Windows system, which assumes the hardware clock runs in local time by default, and all other systems need to accommodate to it by using local time as well. It may also be needed with a virtual machine; if the virtual hardware clock provided by the host is running in local time, the guest system needs to be configured to use local time, too.
3.4. Additional Resources
For more information on how to configure the date and time in Red Hat Enterprise Linux 7, see the resources listed below.
Installed Documentation
-
timedatectl(1) — The manual page for thetimedatectlcommand line utility documents how to use this tool to query and change the system clock and its settings.date(1) — The manual page for thedatecommand provides a complete list of supported command line options.hwclock(8) — The manual page for thehwclockcommand provides a complete list of supported command line options.
See Also
-
Chapter 2,
System Locale and Keyboard Configuration
documents how to configure the keyboard layout.
Chapter 6,
Gaining Privileges
documents how to gain administrative privileges by using the
suandsudocommands. Chapter 10, Managing Services with systemd provides more information on systemd and documents how to use thesystemctlcommand to manage system services.
Chapter 4. Managing Users and Groups
The control of users and groups is a core element of Red Hat Enterprise Linux system administration. This chapter explains how to add, manage, and delete users and groups in the graphical user interface and on the command line, and covers advanced topics, such as creating group directories.
4.1. Introduction to Users and Groups
While users can be either people (meaning accounts tied to physical users) or accounts that exist for specific applications to use, groups are logical expressions of organization, tying users together for a common purpose. Users within a group share the same permissions to read, write, or execute files owned by that group.
Each user is associated with a unique numerical identification number called a
user ID
(
UID
). Likewise, each group is associated with a
group ID
(
GID
). A user who creates a file is also the owner and group owner of that file. The file is assigned separate read, write, and execute permissions for the owner, the group, and everyone else. The file owner can be changed only by
root
, and access permissions can be changed by both the
root
user and file owner.
Additionally, Red Hat Enterprise Linux supports
access control lists
(
ACLs
) for files and directories which allow permissions for specific users outside of the owner to be set. For more information about this feature, see
Chapter 5,
Access Control Lists
.
Reserved User and Group IDs
Red Hat Enterprise Linux reserves user and group IDs below 1000 for system users and groups. By default, the User Manager does not display the system users. Reserved user and group IDs are documented in the setup package. To view the documentation, use this command:
cat /usr/share/doc/setup*/uidgid
The recommended practice is to assign IDs starting at 5,000 that were not already reserved, as the reserved range can increase in the future. To make the IDs assigned to new users by default start at 5,000, change the
UID_MIN
and
GID_MIN
directives in the
/etc/login.defs
file:
[file contents truncated]
UID_MIN         5000
[file contents truncated]
GID_MIN         5000
[file contents truncated]
Note
For users created before you changed
UID_MIN
and
GID_MIN
directives, UIDs will still start at the default 1000.
Even with new user and group IDs beginning with 5,000, it is recommended not to raise IDs reserved by the system above 1000 to avoid conflict with systems that retain the 1000 limit.
4.1.1. User Private Groups
Red Hat Enterprise Linux uses a
user private group
(
UPG
) scheme, which makes UNIX groups easier to manage. A user private group is created whenever a new user is added to the system. It has the same name as the user for which it was created and that user is the only member of the user private group.
User private groups make it safe to set default permissions for a newly created file or directory, allowing both the user and
the group of that user
to make modifications to the file or directory.
The setting which determines what permissions are applied to a newly created file or directory is called a
umask
and is configured in the
/etc/bashrc
file. Traditionally on UNIX-based systems, the
umask
is set to
022
, which allows only the user who created the file or directory to make modifications. Under this scheme, all other users,
including members of the creator’s group
, are not allowed to make any modifications. However, under the UPG scheme, this "group protection" is not necessary since every user has their own private group. See
Section 4.3.5, “Setting Default Permissions for New Files Using
umask
”
for more information.
A list of all groups is stored in the
/etc/group
configuration file.
4.1.2. Shadow Passwords
In environments with multiple users, it is very important to use
shadow passwords
provided by the
shadow-utils
package to enhance the security of system authentication files. For this reason, the installation program enables shadow passwords by default.
The following is a list of the advantages shadow passwords have over the traditional way of storing passwords on UNIX-based systems:
Shadow passwords improve system security by moving encrypted password hashes from the world-readable
/etc/passwd
file to
/etc/shadow
, which is readable only by the
root
user.
Shadow passwords store information about password aging.
Shadow passwords allow to enforce some of the security policies set in the
/etc/login.defs
file.
Most utilities provided by the
shadow-utils
package work properly whether or not shadow passwords are enabled. However, since password aging information is stored exclusively in the
/etc/shadow
file, some utilities and commands do not work without first enabling shadow passwords:
The
chage
utility for setting password aging parameters. For details, see the
Password Security
section in the
Red Hat Enterprise Linux 7 Security Guide
.
The
gpasswd
utility for administrating the
/etc/group
file.
The
usermod
command with the
-e, --expiredate
or
-f, --inactive
option.
The
useradd
command with the
-e, --expiredate
or
-f, --inactive
option.
4.2. Managing Users in a Graphical Environment
The Users utility allows you to view, modify, add, and delete local users in the graphical user interface.
4.2.1. Using the Users Settings Tool
Press the
Super
key to enter the Activities Overview, type
Users
and then press
Enter
. The
Users
settings tool appears. The
Super
key appears in a variety of guises, depending on the keyboard and other hardware, but often as either the Windows or Command key, and typically to the left of the Space bar. Alternatively, you can open the
Users
utility from the Settings menu after clicking your user name in the top right corner of the screen.
To make changes to the user accounts, first select the
Unlock
button and authenticate yourself as indicated by the dialog box that appears. Note that unless you have superuser privileges, the application will prompt you to authenticate as
root
. To add and remove users, select the
+
and
-
button respectively. To add a user to the administrative group
wheel
, change the Account Type from
Standard
to
Administrator
. To edit a user’s language setting, select the language and a drop-down menu appears.
Figure 4.1. The Users Settings Tool

When a new user is created, the account is disabled until a password is set. The Password drop-down menu, shown in Figure 4.2, “The Password Menu” , contains the options to set a password by the administrator immediately, choose a password by the user at the first login, or create a guest account with no password required to log in. You can also disable or enable an account from this menu.
Figure 4.2. The Password Menu

4.3. Using Command-Line Tools
Apart from the Users settings tool described in Section 4.2, “Managing Users in a Graphical Environment” , which is designed for basic managing of users, you can use command line tools for managing users and groups that are listed in Table 4.1, “Command line utilities for managing users and groups” .
Table 4.1. Command line utilities for managing users and groups
| Utilities | Description |
|---|---|
|
Displays user and group IDs.
|
4.3.1. Adding a New User
To add a new user to the system, type the following at a shell prompt as
root
:
useradd options username
…where
options
are command-line options as described in
Table 4.2, “Common useradd command-line options”
.
By default, the
useradd
command creates a locked user account. To unlock the account, run the following command as
root
to assign a password:
passwd usernameOptionally, you can set a password aging policy. See the Password Security section in the Red Hat Enterprise Linux 7 Security Guide .
Table 4.2. Common useradd command-line options
| Option | |
|---|---|
|
|
Important
The default range of IDs for system and normal users has been changed in Red Hat Enterprise Linux 7 from earlier releases. Previously, UID 1-499 was used for system users and values above for normal users. The default range for system users is now 1-999. This change might cause problems when migrating to Red Hat Enterprise Linux 7 with existing users having UIDs and GIDs between 500 and 999. The default ranges of UID and GID can be changed in the
/etc/login.defs
file.
Explaining the Process
The following steps illustrate what happens if the command
useradd juan
is issued on a system that has shadow passwords enabled:
A new line for
juan
is created in
/etc/passwd
:
juan:x:1001:1001::/home/juan:/bin/bash
The line has the following characteristics:
It begins with the user name
juan
.
There is an
x
for the password field indicating that the system is using shadow passwords.
A UID greater than 999 is created. Under Red Hat Enterprise Linux 7, UIDs below 1000 are reserved for system use and should not be assigned to users.
A GID greater than 999 is created. Under Red Hat Enterprise Linux 7, GIDs below 1000 are reserved for system use and should not be assigned to users.
The optional
GECOS
information is left blank. The GECOS field can be used to provide additional information about the user, such as their full name or phone number.
The home directory for
juan
is set to
/home/juan/
.
The default shell is set to
/bin/bash
.
A new line for
juan
is created in
/etc/shadow
:
juan:!!:14798:0:99999:7:::
The line has the following characteristics:
It begins with the user name
juan
.
Two exclamation marks (
!!
) appear in the password field of the
/etc/shadow
file, which locks the account.
If an encrypted password is passed using the
-p
flag, it is placed in the
/etc/shadow
file on the new line for the user.
The password is set to never expire.
A new line for a group named
juan
is created in
/etc/group
:
juan:x:1001:
A group with the same name as a user is called a
user private group
. For more information on user private groups, see
Section 4.1.1, “User Private Groups”
.
The line created in
/etc/group
has the following characteristics:
It begins with the group name
juan
.
An
x
appears in the password field indicating that the system is using shadow group passwords.
The GID matches the one listed for
juan
's primary group in
/etc/passwd
.
A new line for a group named
juan
is created in
/etc/gshadow
:
juan:!::
The line has the following characteristics:
It begins with the group name
juan
.
An exclamation mark (
!
) appears in the password field of the
/etc/gshadow
file, which locks the group.
All other fields are blank.
A directory for user
juan
is created in the
/home
directory:
~]# ls -ld /home/juan
drwx------. 4 juan juan 4096 Mar 3 18:23 /home/juan
This directory is owned by user
juan
and group
juan
. It has
read
,
write
, and
execute
privileges
only
for the user
juan
. All other permissions are denied.
The files within the
/etc/skel/
directory (which contain default user settings) are copied into the new
/home/juan/
directory:
~]# ls -la /home/juan
total 28
drwx------. 4 juan juan 4096 Mar 3 18:23 .
drwxr-xr-x. 5 root root 4096 Mar 3 18:23 ..
-rw-r--r--. 1 juan juan  18 Jun 22 2010 .bash_logout
-rw-r--r--. 1 juan juan 176 Jun 22 2010 .bash_profile
-rw-r--r--. 1 juan juan 124 Jun 22 2010 .bashrc
drwxr-xr-x. 4 juan juan 4096 Nov 23 15:09 .mozilla
At this point, a locked account called
juan
exists on the system. To activate it, the administrator must next assign a password to the account using the
passwd
command and, optionally, set password aging guidelines (see the
Password Security
section in the
Red Hat Enterprise Linux 7 Security Guide
for details).
4.3.2. Adding a New Group
To add a new group to the system, type the following at a shell prompt as
root
:
groupadd options group_name
…where options are command-line options as described in Table 4.3, “Common groupadd command-line options” .
Table 4.3. Common groupadd command-line options
| Option | Description |
|---|---|
|
|
4.3.3. Adding an Existing User to an Existing Group
Use the
usermod
utility to add an already existing user to an already existing group.
Various options of
usermod
have different impact on user’s primary group and on his or her supplementary groups.
To override user’s primary group, run the following command as
root
:
~]# usermod -g group_name user_name
To override user’s supplementary groups, run the following command as
root
:
~]# usermod -G group_name1,group_name2,... user_name
Note that in this case all previous supplementary groups of the user are replaced by the new group or several new groups.
To add one or more groups to user’s supplementary groups, run one of the following commands as
root
:
~]# usermod -aG group_name1,group_name2,... user_name
~]# usermod --append -G group_name1,group_name2,... user_name
Note that in this case the new group is added to user’s current supplementary groups.
4.3.4. Creating Group Directories
System administrators usually like to create a group for each major project and assign people to the group when they need to access that project’s files. With this traditional scheme, file management is difficult; when someone creates a file, it is associated with the primary group to which they belong. When a single person works on multiple projects, it becomes difficult to associate the right files with the right group. However, with the UPG scheme, groups are automatically assigned to files created within a directory with the
setgid
bit set. The
setgid
bit makes managing group projects that share a common directory very simple because any files a user creates within the directory are owned by the group that owns the directory.
For example, a group of people need to work on files in the
/opt/myproject/
directory. Some people are trusted to modify the contents of this directory, but not everyone.
As
root
, create the
/opt/myproject/
directory by typing the following at a shell prompt:
mkdir /opt/myproject
Add the
myproject
group to the system:
groupadd myproject
Associate the contents of the
/opt/myproject/
directory with the
myproject
group:
chown root:myproject /opt/myprojectAllow users in the group to create files within the directory and set the setgid bit:
chmod 2775 /opt/myproject
At this point, all members of the
myproject
group can create and edit files in the
/opt/myproject/
directory without the administrator having to change file permissions every time users write new files. To verify that the permissions have been set correctly, run the following command:
~]# ls -ld /opt/myproject
drwxrwsr-x. 3 root myproject 4096 Mar 3 18:31 /opt/myproject
Add users to the
myproject
group:
usermod -aG myproject username
4.3.5. Setting Default Permissions for New Files Using
umask
When a process creates a file, the file has certain default permissions, for example,
-rw-rw-r--
. These initial permissions are partially defined by the
file mode creation mask
, also called
file permission mask
or
umask
. Every process has its own umask, for example,
bash
has
umask
0022
by default. Process
umask
can be changed.
What umask consists of
A
umask
consists of bits corresponding to standard file permissions. For example, for
umask
0137
, the digits mean that:
0
= no meaning, it is always
0
(umask does not affect special bits)
1
= for owner permissions, the execute bit is set
3
= for group permissions, the execute and write bits are set
7
= for others permissions, the execute, write, and read bits are set
Umasks
can be represented in binary, octal, or symbolic notation. For example, the octal representation
0137
equals symbolic representation
u=rw-,g=r--,o=---
. Symbolic notation specification is the reverse of the octal notation specification: it shows the allowed permissions, not the prohibited permissions.
How umask works
Umask
prohibits permissions
from being set for a file:
When a bit is set in
umask
, it is unset in the file.
When a bit is not set in
umask
, it can be set in the file, depending on other factors.
The following figure shows how
umask
0137
affects creating a new file.
Figure 4.3. Applying umask when creating a file

Important
For security reasons, a regular file cannot have execute permissions by default. Therefore, even if
umask
is
0000
, which does not prohibit any permissions, a new regular file still does not have execute permissions. However, directories can be created with execute permissions:
[john@server tmp]$ umask 0000
[john@server tmp]$ touch file
[john@server tmp]$ mkdir directory
[john@server tmp]$ ls -lh .
total 0
drwxrwxrwx. 2 john john 40 Nov 2 13:17 directory
-rw-rw-rw-. 1 john john 0 Nov 2 13:17 file
4.3.5.1. Managing umask in Shells
For popular shells, such as
bash
,
ksh
,
zsh
and
tcsh
,
umask
is managed using the
umask
shell
builtin
. Processes started from shell inherit its umask.
Displaying the current mask
To show the current umask in octal notation:
~]$umaskTo show the current umask in symbolic notation:~]$umask -Su=rwx,g=rx,o=rxSetting mask in shell using umask
To set umask for the current shell session using octal notation run:
~]$ umask octal_maskSubstitute octal_mask with four or less digits from
0to7. When three or less digits are provided, permissions are set as if the command contained leading zeros. For example, umask7translates to0007.Example 4.1. Setting umask Using Octal Notation
To prohibit new files from having write and execute permissions for owner and group, and from having any permissions for others:
~]$umask 0337Or simply:
~]$umask 337To set umask for the current shell session using symbolic notation:
~]$ umask -S symbolic_maskExample 4.2. Setting umask Using Symbolic Notation
To set umask
0337using symbolic notation:~]$umask -S u=r,g=r,o=Working with the default shell umask
Shells usually have a configuration file where their default umask is set. For
bash, it is/etc/bashrc. To show the defaultbashumask:~]$grep -i -B 1 umask /etc/bashrcThe output shows if umask is set, either using the
umaskcommand or theUMASKvariable. In the following example, umask is set to022using theumaskcommand:~]$ grep -i -B 1 umask /etc/bashrc # By default, we want umask to get set. This sets it for non-login shell. if [ $UID -gt 199 ] && [ “id -gn” = “id -un” ]; then umask 002 umask 022To change the default umask for
bash, change theumaskcommand call or theUMASKvariable assignment in/etc/bashrc. This example changes the default umask to0227:if [ $UID -gt 199 ] && [ “id -gn” = “id -un” ]; then umask 002 umask 227Working with the default shell umask of a specific user
By default,
bashumask of a new user defaults to the one defined in/etc/bashrc. To changebashumaskfor a particular user, add a call to theumaskcommand in$HOME/.bashrcfile of that user. For example, to changebashumask of userjohnto0227:john@server ~]$echo 'umask 227' >> /home/john/.bashrcSetting default permissions for newly created home directories
To change permissions with which user home directories are created, change the
UMASKvariable in the/etc/login.defsfile:# The permission mask is initialized to this value. If not specified, # the permission mask will be initialized to 022. UMASK 077
4.4. Additional Resources
For more information on how to manage users and groups on Red Hat Enterprise Linux, see the resources listed below.
Installed Documentation
For information about various utilities for managing users and groups, see the following manual pages:
useradd
(8) — The manual page for the
useradd
command documents how to use it to create new users.
userdel
(8) — The manual page for the
userdel
command documents how to use it to delete users.
usermod
(8) — The manual page for the
usermod
command documents how to use it to modify users.
groupadd
(8) — The manual page for the
groupadd
command documents how to use it to create new groups.
groupdel
(8) — The manual page for the
groupdel
command documents how to use it to delete groups.
groupmod
(8) — The manual page for the
groupmod
command documents how to use it to modify group membership.
gpasswd
(1) — The manual page for the
gpasswd
command documents how to manage the
/etc/group
file.
grpck
(8) — The manual page for the
grpck
command documents how to use it to verify the integrity of the
/etc/group
file.
pwck
(8) — The manual page for the
pwck
command documents how to use it to verify the integrity of the
/etc/passwd
and
/etc/shadow
files.
pwconv
(8) — The manual page for the
pwconv
,
pwunconv
,
grpconv
, and
grpunconv
commands documents how to convert shadowed information for passwords and groups.
id
(1) — The manual page for the
id
command documents how to display user and group IDs.
umask
(2) — The manual page for the
umask
command documents how to work with the file mode creation mask.
For information about related configuration files, see:
group
(5) — The manual page for the
/etc/group
file documents how to use this file to define system groups.
passwd
(5) — The manual page for the
/etc/passwd
file documents how to use this file to define user information.
shadow
(5) — The manual page for the
/etc/shadow
file documents how to use this file to set passwords and account expiration information for the system.
Online Documentation
- Red Hat Enterprise Linux 7 Security Guide — The Security Guide for Red Hat Enterprise Linux 7 provides additional information how to ensure password security and secure the workstation by enabling password aging and user account locking.
See Also
-
Chapter 6,
Gaining Privileges
documents how to gain administrative privileges by using the
suandsudocommands.
Chapter 5. Access Control Lists
Files and directories have permission sets for the owner of the file, the group associated with the file, and all other users for the system. However, these permission sets have limitations. For example, different permissions cannot be configured for different users. Thus,
Access Control Lists
(ACLs) were implemented.
The Red Hat Enterprise Linux kernel provides ACL support for the ext3 file system and NFS-exported file systems. ACLs are also recognized on ext3 file systems accessed via Samba.
Along with support in the kernel, the
acl
package is required to implement ACLs. It contains the utilities used to add, modify, remove, and retrieve ACL information.
The
cp
and
mv
commands copy or move any ACLs associated with files and directories.
5.1. Mounting File Systems
Before using ACLs for a file or directory, the partition for the file or directory must be mounted with ACL support. If it is a local ext3 file system, it can mounted with the following command:
      mount -t ext3 -o acl


        device-name


        partition
For example:
mount -t ext3 -o acl /dev/VolGroup00/LogVol02 /work
Alternatively, if the partition is listed in the
/etc/fstab
file, the entry for the partition can include the
acl
option:
LABEL=/work /work ext3 acl 1 2
If an ext3 file system is accessed via Samba and ACLs have been enabled for it, the ACLs are recognized because Samba has been compiled with the
--with-acl-support
option. No special flags are required when accessing or mounting a Samba share.
5.1.1. NFS
By default, if the file system being exported by an NFS server supports ACLs and the NFS client can read ACLs, ACLs are utilized by the client system.
To disable ACLs on NFS shares when configuring the server, include the
no_acl
option in the
/etc/exports
file. To disable ACLs on an NFS share when mounting it on a client, mount it with the
no_acl
option via the command line or the
/etc/fstab
file.
5.2. Setting Access ACLs
There are two types of ACLs:
access ACLs
and
default ACLs
. An access ACL is the access control list for a specific file or directory. A default ACL can only be associated with a directory; if a file within the directory does not have an access ACL, it uses the rules of the default ACL for the directory. Default ACLs are optional.
ACLs can be configured:
Per user
Per group
Via the effective rights mask
For users not in the user group for the file
The
setfacl
utility sets ACLs for files and directories. Use the
-m
option to add or modify the ACL of a file or directory:
# setfacl -m rules files
Rules ( rules ) must be specified in the following formats. Multiple rules can be specified in the same command if they are separated by commas.
-
u: uid : perms - Sets the access ACL for a user. The user name or UID may be specified. The user may be any valid user on the system.
-
g: gid : perms - Sets the access ACL for a group. The group name or GID may be specified. The group may be any valid group on the system.
-
m: perms - Sets the effective rights mask. The mask is the union of all permissions of the owning group and all of the user and group entries.
-
o: perms -
Sets the access ACL for users other than the ones in the group for the file.
Permissions (
perms
) must be a combination of the characters
r,w, andxfor read, write, and execute. If a file or directory already has an ACL, and thesetfaclcommand is used, the additional rules are added to the existing ACL or the existing rule is modified.Example 5.1. Give read and write permissions
For example, to give read and write permissions to user andrius:
# setfacl -m u:andrius:rw /project/somefile
To remove all the permissions for a user, group, or others, use the
-xoption and do not specify any permissions:# setfacl -x rules files
Example 5.2. Remove all permissions
For example, to remove all permissions from the user with UID 500:
# setfacl -x u:500 /project/somefile
5.3. Setting Default ACLs
To set a default ACL, add
d:
before the rule and specify a directory instead of a file name.
Example 5.3. Setting default ACLs
For example, to set the default ACL for the
/share/
directory to read and execute for users not in the user group (an access ACL for an individual file can override it):
# setfacl -m d:o:rx /share
5.4. Retrieving ACLs
To determine the existing ACLs for a file or directory, use the
getfacl
command. In the example below, the
getfacl
is used to determine the existing ACLs for a file.
Example 5.4. Retrieving ACLs
# getfacl home/john/picture.png
The above command returns the following output:
# file: home/john/picture.png
# owner: john
# group: john
user::rw-
group::r--
other::r--
If a directory with a default ACL is specified, the default ACL is also displayed as illustrated below. For example,
getfacl home/sales/
will display similar output:
# file: home/sales/
# owner: john
# group: john
user::rw-
user:barryg:r--
group::r--
mask::r--
other::r--
default:user::rwx
default:user:john:rwx
default:group::r-x
default:mask::rwx
default:other::r-x
5.5. Archiving File Systems With ACLs
By default, the
dump
command now preserves ACLs during a backup operation. When archiving a file or file system with
tar
, use the
--acls
option to preserve ACLs. Similarly, when using
cp
to copy files with ACLs, include the
--preserve=mode
option to ensure that ACLs are copied across too. In addition, the
-a
option (equivalent to
-dR --preserve=all
) of
cp
also preserves ACLs during a backup along with other information such as timestamps, SELinux contexts, and the like. For more information about
dump
,
tar
, or
cp
, refer to their respective
man
pages.
The
star
utility is similar to the
tar
utility in that it can be used to generate archives of files; however, some of its options are different. Refer to
Table 5.1, “Command Line Options for
star
”
for a listing of more commonly used options. For all available options, refer to
man star
. The
star
package is required to use this utility.
Table 5.1. Command Line Options for
star
| Option | Description |
|---|---|
|
Creates an archive file.
Do not extract the files; use in conjunction with
|
5.6. Compatibility with Older Systems
If an ACL has been set on any file on a given file system, that file system has the
ext_attr
attribute. This attribute can be seen using the following command:
# tune2fs -l filesystem-device
A file system that has acquired the
ext_attr
attribute can be mounted with older kernels, but those kernels do not enforce any ACLs which have been set.
Versions of the
e2fsck
utility included in version 1.22 and higher of the
e2fsprogs
package (including the versions in Red Hat Enterprise Linux 2.1 and 4) can check a file system with the
ext_attr
attribute. Older versions refuse to check it.
5.7. ACL References
Refer to the following man pages for more information.
man acl
— Description of ACLs
man getfacl
— Discusses how to get file access control lists
man setfacl
— Explains how to set file access control lists
man star
— Explains more about the
star
utility and its many options
Chapter 6. Gaining Privileges
System administrators, and in some cases users, need to perform certain tasks with administrative access. Accessing the system as the
root
user is potentially dangerous and can lead to widespread damage to the system and data. This chapter covers ways to gain administrative privileges using the
setuid
programs such as
su
and
sudo
. These programs allow specific users to perform tasks which would normally be available only to the
root
user while maintaining a higher level of control and system security.
See the
Red Hat Enterprise Linux 7 Security Guide
for more information on administrative controls, potential dangers and ways to prevent data loss resulting from improper use of privileged access.
6.1. Configuring Administrative Access Using the su Utility
When a user executes the
su
command, they are prompted for the
root
password and, after authentication, are given a
root
shell prompt.
Once logged in using the
su
command, the user
is
the
root
user and has absolute administrative access to the system. Note that this access is still subject to the restrictions imposed by SELinux, if it is enabled. In addition, once a user has become
root
, it is possible for them to use the
su
command to change to any other user on the system without being prompted for a password.
Because this program is so powerful, administrators within an organization may want to limit who has access to the command.
One of the simplest ways to do this is to add users to the special administrative group called
wheel
. To do this, type the following command as
root
:
~]# usermod -a -G wheel username
In the previous command, replace
username
with the user name you want to add to the
wheel
group.
You can also use the
Users
settings tool to modify group memberships, as follows. Note that you need administrator privileges to perform this procedure.
Press the
Super
key to enter the Activities Overview, type
Users
and then press
Enter
. The
Users
settings tool appears. The
Super
key appears in a variety of guises, depending on the keyboard and other hardware, but often as either the Windows or Command key, and typically to the left of the
Spacebar
.
To enable making changes, click the
Unlock
button, and enter a valid administrator password.
Click a user icon in the left column to display the user’s properties in the right pane.
Change the Account Type from
Standard
to
Administrator
. This will add the user to the
wheel
group.
See
Section 4.2, “Managing Users in a Graphical Environment”
for more information about the
Users
tool.
After you add the desired users to the
wheel
group, it is advisable to only allow these specific users to use the
su
command. To do this, edit the
Pluggable Authentication Module
(PAM) configuration file for
su
,
/etc/pam.d/su
. Open this file in a text editor and uncomment the following line by removing the
#
character:
#auth required pam_wheel.so use_uid
This change means that only members of the administrative group
wheel
can switch to another user using the
su
command.
6.2. Configuring Administrative Access Using the sudo Utility
The
sudo
command offers another approach to giving users administrative access. When trusted users precede an administrative command with
sudo
, they are prompted for
their own
password. Then, when they have been authenticated and assuming that the command is permitted, the administrative command is executed as if they were the
root
user.
The basic format of the
sudo
command is as follows:
sudo command
In the above example,
command
would be replaced by a command normally reserved for the
root
user, such as
mount
.
The
sudo
command allows for a high degree of flexibility. For instance, only users listed in the
/etc/sudoers
configuration file are allowed to use the
sudo
command and the command is executed in
the user’s
shell, not a
root
shell. This means the
root
shell can be completely disabled as shown in the
Red Hat Enterprise Linux 7 Security Guide
.
Each successful authentication using the
sudo
command is logged to the file
/var/log/messages
and the command issued along with the issuer’s user name is logged to the file
/var/log/secure
. If additional logging is required, use the
pam_tty_audit
module to enable TTY auditing for specified users by adding the following line to your
/etc/pam.d/system-auth
file:
session required pam_tty_audit.so disable=pattern enable=pattern
where
pattern
represents a comma-separated listing of users with an optional use of globs. For example, the following configuration will enable TTY auditing for the
root
user and disable it for all other users:
session required pam_tty_audit.so disable=* enable=root
Important
Configuring the
pam_tty_audit
PAM module for TTY auditing records only TTY input. This means that, when the audited user logs in,
pam_tty_audit
records the exact keystrokes the user makes into the
/var/log/audit/audit.log
file. For more information, see the pam_tty_audit(8) manual page.
Another advantage of the
sudo
command is that an administrator can allow different users access to specific commands based on their needs.
Administrators wanting to edit the
sudo
configuration file,
/etc/sudoers
, should use the
visudo
command.
To give someone full administrative privileges, type
visudo
and add a line similar to the following in the user privilege specification section:
juan ALL=(ALL) ALL
This example states that the user,
juan
, can use
sudo
from any host and execute any command.
The example below illustrates the granularity possible when configuring
sudo
:
%users localhost=/usr/sbin/shutdown -h now
This example states that any member of the
users
system group can issue the command
/sbin/shutdown -h now
as long as it is issued from the console.
The man page for
sudoers
has a detailed listing of options for this file.
You can also configure sudo users who do not need to provide any password by using the
NOPASSWD
option in the
/etc/sudoers
file:
user_name ALL=(ALL) NOPASSWD: ALL
However, even for such users,
sudo
runs Pluggable Authentication Module (PAM) account management modules, which enables checking for restrictions imposed by PAM modules outside of the authentication phase. This ensures that PAM modules work properly. For example, in case of the
pam_time
module, the time-based account restriction does not fail.
Warning
Always include
sudo
in the list of allowed services in all PAM-based access control rules. Otherwise, users will receive a "permission denied" error message when they try to access
sudo
but access is forbidden based on current access control rules.
For more information, see the Red Hat Knowledgebase article
After patching to Red Hat Enterprise Linux 7.6, sudo gives a permission denied error.
.
Important
There are several potential risks to keep in mind when using the
sudo
command. You can avoid them by editing the
/etc/sudoers
configuration file using
visudo
as described above. Leaving the
/etc/sudoers
file in its default state gives every user in the
wheel
group unlimited
root
access.
By default,
sudo
stores the password for a five minute timeout period. Any subsequent uses of the command during this period will not prompt the user for a password. This could be exploited by an attacker if the user leaves his workstation unattended and unlocked while still being logged in. This behavior can be changed by adding the following line to the
/etc/sudoers
file:
Defaults timestamp_timeout=value
where
value
is the desired timeout length in minutes. Setting the
value
to 0 causes
sudo
to require a password every time.
If an account is compromised, an attacker can use
sudo
to open a new shell with administrative privileges:
sudo /bin/bash
Opening a new shell as
root
in this or similar fashion gives the attacker administrative access for a theoretically unlimited amount of time, bypassing the timeout period specified in the
/etc/sudoers
file and never requiring the attacker to input a password for
sudo
again until the newly opened session is closed.
6.3. Additional Resources
While programs allowing users to gain administrative privileges are a potential security risk, security itself is beyond the scope of this particular book. You should therefore refer to the resources listed below for more information regarding security and privileged access.
Installed Documentation
-
su(1) — The manual page forsuprovides information regarding the options available with this command.sudo(8) — The manual page forsudoincludes a detailed description of this command and lists options available for customizing its behavior.pam(8) — The manual page describing the use of Pluggable Authentication Modules (PAM) for Linux.
Online Documentation
-
Red Hat Enterprise Linux 7 Security Guide
— The
Security Guide
for Red Hat Enterprise Linux 7 provides a more detailed look at potential security issues pertaining to the
setuidprograms as well as techniques used to alleviate these risks.
See Also
- Chapter 4, Managing Users and Groups documents how to manage system users and groups in the graphical user interface and on the command line.
Part II. Subscription and Support
To receive updates to the software on a Red Hat Enterprise Linux system it must be subscribed to the Red Hat Content Delivery Network ( CDN ) and the appropriate repositories enabled. This part describes how to subscribe a system to the Red Hat Content Delivery Network. Red Hat provides support via the Customer Portal , and you can access this support directly from the command line using the Red Hat Support Tool . This part describes the use of this command-line tool.
Chapter 7. Registering the System and Managing Subscriptions
The subscription service provides a mechanism to handle Red Hat software inventory and allows you to install additional software or update already installed programs to newer versions using the yum package manager. In Red Hat Enterprise Linux 7 the recommended way to register your system and attach subscriptions is to use Red Hat Subscription Management . It is also possible to register the system and attach subscriptions after installation during the initial setup process. For detailed information about the initial setup see the Initial Setup chapter in the Installation Guide for Red Hat Enterprise Linux 7. Note that the Initial Setup application is only available on systems installed with the X Window System at the time of installation.
7.1. Registering the System and Attaching Subscriptions
Complete the following steps to register your system and attach one or more subscriptions using Red Hat Subscription Management. Note that all
subscription-manager
commands are supposed to be run as
root
.
Run the following command to register your system. You will be prompted to enter your user name and password. Note that the user name and password are the same as your login credentials for Red Hat Customer Portal.
subscription-manager registerDetermine the pool ID of a subscription that you require. To do so, type the following at a shell prompt to display a list of all subscriptions that are available for your system:
subscription-manager list --available
For each available subscription, this command displays its name, unique identifier, expiration date, and other details related to your subscription. To list subscriptions for all architectures, add the
--all
option. The pool ID is listed on a line beginning with
Pool ID
.
Attach the appropriate subscription to your system by entering a command as follows:
subscription-manager attach --pool=pool_id
Replace pool_id with the pool ID you determined in the previous step. To verify the list of subscriptions your system has currently attached, at any time, run:
subscription-manager list --consumedFor more details on how to register your system using Red Hat Subscription Management and associate it with subscriptions, see the designated solution article . For comprehensive information about subscriptions, see the Red Hat Subscription Management collection of guides.
7.2. Managing Software Repositories
When a system is subscribed to the Red Hat Content Delivery Network, a repository file is created in the
/etc/yum.repos.d/
directory. To verify that, use
yum
to list all enabled repositories:
yum repolistRed Hat Subscription Management also allows you to manually enable or disable software repositories provided by Red Hat. To list all available repositories, use the following command:
subscription-manager repos --listThe repository names depend on the specific version of Red Hat Enterprise Linux you are using and are in the following format:
rhel-version-variant-rpms
rhel-version-variant-debug-rpms
rhel-version-variant-source-rpms
Where
version
is the Red Hat Enterprise Linux system version (
6
or
7
), and
variant
is the Red Hat Enterprise Linux system variant (
server
or
workstation
), for example:
rhel-7-server-rpms
rhel-7-server-debug-rpms
rhel-7-server-source-rpms
To enable a repository, enter a command as follows:
subscription-manager repos --enable repositoryReplace repository with the name of the repository to enable. Similarly, to disable a repository, use the following command:
subscription-manager repos --disable repository
Section 9.5, “Configuring Yum and Yum Repositories”
provides detailed information about managing software repositories using
yum
.
If you want to update the repositories automatically, you can use the
yum-cron
service. For more information, see
Section 9.7, “Automatically Refreshing Package Database and Downloading Updates with Yum-cron”
.
7.3. Removing Subscriptions
To remove a particular subscription, complete the following steps. Determine the serial number of the subscription you want to remove by listing information about already attached subscriptions:
subscription-manager list --consumed
The serial number is the number listed as
serial
. For instance,
744993814251016831
in the example below:
SKU:        ES0113909
Contract:     01234567
Account:      1234567
Serial:      744993814251016831
Pool ID:      8a85f9894bba16dc014bccdd905a5e23
Active:      False
Quantity Used:   1
Service Level:   SELF-SUPPORT
Service Type:   L1-L3
Status Details:
Subscription Type: Standard
Starts:      02/27/2015
Ends:       02/27/2016
System Type:    Virtual
Enter a command as follows to remove the selected subscription:
subscription-manager remove --serial=serial_number
Replace serial_number with the serial number you determined in the previous step. To remove all subscriptions attached to the system, run the following command:
subscription-manager remove --all7.4. Additional Resources
For more information on how to register your system using Red Hat Subscription Management and associate it with subscriptions, see the resources listed below.
Installed Documentation
-
subscription-manager(8) — the manual page for Red Hat Subscription Management provides a complete list of supported options and commands.
Related Books
- Red Hat Subscription Management collection of guides — These guides contain detailed information how to use Red Hat Subscription Management. Installation Guide — see the Initial Setup chapter for detailed information on how to register during the initial setup process.
See Also
-
Chapter 6,
Gaining Privileges
documents how to gain administrative privileges by using the
suandsudocommands. Chapter 9, Yum provides information about using the yum packages manager to install and update software.
Chapter 8. Accessing Support Using the Red Hat Support Tool
The
Red Hat Support Tool
, in the
redhat-support-tool
package, can function as both an interactive shell and as a single-execution program. It can be run over
SSH
or from any terminal. It enables, for example, searching the Red Hat Knowledgebase from the command line, copying solutions directly on the command line, opening and updating support cases, and sending files to Red Hat for analysis.
8.1. Installing the Red Hat Support Tool
The
Red Hat Support Tool
is installed by default on Red Hat Enterprise Linux. If required, to ensure that it is, enter the following command as
root
:
~]# yum install redhat-support-tool
8.2. Registering the Red Hat Support Tool Using the Command Line
To register the Red Hat Support Tool to the customer portal using the command line, run the following commands:
~]# redhat-support-tool config user username
Where username is the user name of the Red Hat Customer Portal account.
~]# redhat-support-tool config password
Please enter the password for username:
8.3. Using the Red Hat Support Tool in Interactive Shell Mode
To start the tool in interactive mode, enter the following command:
~]$ redhat-support-tool
Welcome to the Red Hat Support Tool.
Command (? for help):
The tool can be run as an unprivileged user, with a consequently reduced set of commands, or as
root
.
The commands can be listed by entering the
?
character. The program or menu selection can be exited by entering the
q
or
e
character. You will be prompted for your Red Hat Customer Portal user name and password when you first search the Knowledgebase or support cases. Alternately, set the user name and password for your Red Hat Customer Portal account using interactive mode, and optionally save it to the configuration file.
8.4. Configuring the Red Hat Support Tool
When in interactive mode, the configuration options can be listed by entering the command
config --help
:
~]# redhat-support-tool
Welcome to the Red Hat Support Tool.
Command (? for help): config --help
Usage: config [options] config.option <new option value>
Use the 'config' command to set or get configuration file values.
Options:
 -h, --help  show this help message and exit
 -g, --global Save configuration option in /etc/redhat-support-tool.conf.
 -u, --unset  Unset configuration option.
The configuration file options which can be set are:
 user   : The Red Hat Customer Portal user.
 password : The Red Hat Customer Portal password.
 debug   : CRITICAL, ERROR, WARNING, INFO, or DEBUG
 url    : The support services URL. Default=https://api.access.redhat.com
 proxy_url : A proxy server URL.
 proxy_user: A proxy server user.
 proxy_password: A password for the proxy server user.
 ssl_ca  : Path to certificate authorities to trust during communication.
 kern_debug_dir: Path to the directory where kernel debug symbols should be downloaded and cached. Default=/var/lib/redhat-support-tool/debugkernels
Examples:
- config user
- config user my-rhn-username
- config --unset user
Registering the Red Hat Support Tool Using Interactive Mode
To register the Red Hat Support Tool to the customer portal using interactive mode, proceed as follows: Start the tool by entering the following command:
~]# redhat-support-tool
Enter your Red Hat Customer Portal user name:
Command (? for help): config user username
To save your user name to the global configuration file, add the
-g
option.
Enter your Red Hat Customer Portal password:
Command (? for help): config password
Please enter the password for username:
8.4.1. Saving Settings to the Configuration Files
The
Red Hat Support Tool
, unless otherwise directed, stores values and options locally in the home directory of the current user, using the
~/.redhat-support-tool/redhat-support-tool.conf
configuration file. If required, it is recommended to save passwords to this file because it is only readable by that particular user. When the tool starts, it will read values from the global configuration file
/etc/redhat-support-tool.conf
and from the local configuration file. Locally stored values and options take precedence over globally stored settings.
Warning
It is recommended
not
to save passwords in the global
/etc/redhat-support-tool.conf
configuration file because the password is just
base64
encoded and can easily be decoded. In addition, the file is world readable.
To save a value or option to the global configuration file, add the
-g, --global
option as follows:
Command (? for help): config setting -g value
Note
In order to be able to save settings globally, using the
-g, --global
option, the
Red Hat Support Tool
must be run as
root
because normal users do not have the permissions required to write to
/etc/redhat-support-tool.conf
.
To remove a value or option from the local configuration file, add the
-u, --unset
option as follows:
Command (? for help): config setting -u value
This will clear, unset, the parameter from the tool and fall back to the equivalent setting in the global configuration file, if available.
When running as an unprivileged user, values stored in the global configuration file cannot be removed using the
-u, --unset
option, but they can be cleared, unset, from the current running instance of the tool by using the
-g, --global
option simultaneously with the
-u, --unset
option. If running as
root
, values and options can be removed from the global configuration file using
-g, --global
simultaneously with the
-u, --unset
option.
8.5. Opening and Updating Support Cases Using Interactive Mode
Opening a New Support Case Using Interactive Mode
To open a new support case using interactive mode, proceed as follows: Start the tool by entering the following command:
~]# redhat-support-tool
Enter the
opencase
command:
Command (? for help): opencase
Support case 0123456789 has successfully been opened
Viewing and Updating an Existing Support Case Using Interactive Mode
To view and update an existing support case using interactive mode, proceed as follows: Start the tool by entering the following command:
~]# redhat-support-tool
Enter the
getcase
command:
Command (? for help): getcase case-number
Where case-number is the number of the case you want to view and update. Follow the on screen prompts to view the case, modify or add comments, and get or add attachments.
Modifying an Existing Support Case Using Interactive Mode
To modify the attributes of an existing support case using interactive mode, proceed as follows: Start the tool by entering the following command:
~]# redhat-support-tool
Enter the
modifycase
command:
Command (? for help): modifycase case-number
Where case-number is the number of the case you want to view and update. The modify selection list appears:
Type the number of the attribute to modify or 'e' to return to the previous menu.
 1 Modify Type
 2 Modify Severity
 3 Modify Status
 4 Modify Alternative-ID
 5 Modify Product
 6 Modify Version
End of options.
Follow the on screen prompts to modify one or more of the options.
For example, to modify the status, enter
3
:
Selection: 3
 1  Waiting on Customer
 2  Waiting on Red Hat
 3  Closed
Please select a status (or 'q' to exit):
8.6. Viewing Support Cases on the Command Line
Viewing the contents of a case on the command line provides a quick and easy way to apply solutions from the command line. To view an existing support case on the command line, enter a command as follows:
~]# redhat-support-tool getcase case-number
Where case-number is the number of the case you want to download.
8.7. Additional Resources
The Red Hat Knowledgebase article Red Hat Support Tool has additional information, examples, and video tutorials.
Part III. Installing and Managing Software
All software on a Red Hat Enterprise Linux system is divided into RPM packages, which can be installed, upgraded, or removed. This part describes how to manage packages on Red Hat Enterprise Linux using Yum .
Chapter 9. Yum
Yum is the Red Hat package manager that is able to query for information about available packages, fetch packages from repositories, install and uninstall them, and update an entire system to the latest available version. Yum performs automatic dependency resolution when updating, installing, or removing packages, and thus is able to automatically determine, fetch, and install all available dependent packages. Yum can be configured with new, additional repositories, or package sources , and also provides many plug-ins which enhance and extend its capabilities. Yum is able to perform many of the same tasks that RPM can; additionally, many of the command-line options are similar. Yum enables easy and simple package management on a single machine or on groups of them. The following sections assume your system was registered with Red Hat Subscription Management during installation as described in the Red Hat Enterprise Linux 7 Installation Guide . If your system is not subscribed, see Chapter 7, Registering the System and Managing Subscriptions .
Important
Yum provides secure package management by enabling GPG (Gnu Privacy Guard; also known as GnuPG) signature verification on GPG-signed packages to be turned on for all package repositories (package sources), or for individual repositories. When signature verification is enabled, yum will refuse to install any packages not GPG-signed with the correct key for that repository. This means that you can trust that the
RPM
packages you download and install on your system are from a trusted source, such as Red Hat, and were not modified during transfer. See
Section 9.5, “Configuring Yum and Yum Repositories”
for details on enabling signature-checking with yum.
Yum also enables you to easily set up your own repositories of
RPM
packages for download and installation on other machines. When possible, yum uses
parallel download
of multiple packages and metadata to speed up downloading.
Learning yum is a worthwhile investment because it is often the fastest way to perform system administration tasks, and it provides capabilities beyond those provided by the
PackageKit
graphical package management tools.
You must have superuser privileges in order to use yum to install, update or remove packages on your system. All examples in this chapter assume that you have already obtained superuser privileges by using either the
su
or
sudo
command.
9.1. Checking For and Updating Packages
Yum enables you to check if your system has any updates waiting to be applied. You can list packages that need to be updated and update them as a whole, or you can update a selected individual package.
9.1.1. Checking For Updates
To see which installed packages on your system have updates available, use the following command:
yumcheck-update
Example 9.1. Example output of the yum check-update command
The output of
yum
check-update
can look as follows:
~]# yum check-update
Loaded plugins: product-id, search-disabled-repos, subscription-manager
dracut.x86_64             033-360.el7_2   rhel-7-server-rpms
dracut-config-rescue.x86_64      033-360.el7_2   rhel-7-server-rpms
kernel.x86_64             3.10.0-327.el7   rhel-7-server-rpms
rpm.x86_64              4.11.3-17.el7   rhel-7-server-rpms
rpm-libs.x86_64            4.11.3-17.el7   rhel-7-server-rpms
rpm-python.x86_64           4.11.3-17.el7   rhel-7-server-rpms
yum.noarch              3.4.3-132.el7   rhel-7-server-rpms
The packages in the above output are listed as having updates available. The first package in the list is
dracut
. Each line in the example output consists of several rows, in case of
dracut
:
dracut
— the name of the package,
x86_64
— the CPU architecture the package was built for,
033
— the version of the updated package to be installed,
360.el7
— the release of the updated package,
_2
— a build version, added as part of a z-stream update,
rhel-7-server-rpms
— the repository in which the updated package is located.
The output also shows that we can update the kernel (the
kernel
package), yum and RPM themselves (the
yum
and
rpm
packages), as well as their dependencies (such as the
rpm-libs
, and
rpm-python
packages), all using the
yum
command.
9.1.2. Updating Packages
You can choose to update a single package, multiple packages, or all packages at once. If any dependencies of the package or packages you update have updates available themselves, then they are updated too.
Updating a Single Package
To update a single package, run the following command as
root
:
yum update package_name
Example 9.2. Updating the rpm package
To update the rpm package, type:
~]# yum update rpm
Loaded plugins: langpacks, product-id, subscription-manager
Updating Red Hat repositories.
INFO:rhsm-app.repolib:repos updated: 0
Setting up Update Process
Resolving Dependencies
--> Running transaction check
---> Package rpm.x86_64 0:4.11.1-3.el7 will be updated
--> Processing Dependency: rpm = 4.11.1-3.el7 for package: rpm-libs-4.11.1-3.el7.x86_64
--> Processing Dependency: rpm = 4.11.1-3.el7 for package: rpm-python-4.11.1-3.el7.x86_64
--> Processing Dependency: rpm = 4.11.1-3.el7 for package: rpm-build-4.11.1-3.el7.x86_64
---> Package rpm.x86_64 0:4.11.2-2.el7 will be an update
--> Running transaction check
--> Finished Dependency Resolution
Dependencies Resolved
=============================================================================
 Package          Arch    Version     Repository    Size
=============================================================================
Updating:
 rpm            x86_64   4.11.2-2.el7  rhel      1.1 M
Updating for dependencies:
 rpm-build         x86_64   4.11.2-2.el7  rhel      139 k
 rpm-build-libs      x86_64   4.11.2-2.el7  rhel       98 k
 rpm-libs         x86_64   4.11.2-2.el7  rhel      261 k
 rpm-python        x86_64   4.11.2-2.el7  rhel       74 k
Transaction Summary
=============================================================================
Upgrade 1 Package (+4 Dependent packages)
Total size: 1.7 M
Is this ok [y/d/N]:
This output contains several items of interest:
Loaded plugins: langpacks, product-id, subscription-manager
— Yum always informs you which yum plug-ins are installed and enabled. See
Section 9.6, “Yum Plug-ins”
for general information on yum plug-ins, or
Section 9.6.3, “Working with Yum Plug-ins”
for descriptions of specific plug-ins.
rpm.x86_64
— you can download and install a new
rpm
package as well as its dependencies. Transaction check is performed for each of these packages.
Yum presents the update information and then prompts you for confirmation of the update; yum runs interactively by default. If you already know which transactions the
yum
command plans to perform, you can use the
-y
option to automatically answer
yes
to any questions that yum asks (in which case it runs non-interactively). However, you should always examine which changes yum plans to make to the system so that you can easily troubleshoot any problems that might arise. You can also choose to download the package without installing it. To do so, select the
d
option at the download prompt. This launches a background download of the selected package.
If a transaction fails, you can view yum transaction history by using the
yum history
command as described in
Section 9.4, “Working with Transaction History”
.
Important
Yum always
installs
a new kernel regardless of whether you are using the
yum update
or
yum install
command.
When using
RPM
, on the other hand, it is important to use the
rpm -i kernel
command which installs a new kernel instead of
rpm -u kernel
which
replaces
the current kernel.
Similarly, it is possible to update a package group. Type as
root
:
yum group update group_name
Here, replace
group_name
with a name of the package group you want to update. For more information on package groups, see
Section 9.3, “Working with Package Groups”
.
Yum also offers the
upgrade
command that is equal to
update
with enabled
obsoletes
configuration option (see
Section 9.5.1, “Setting [main] Options”
). By default,
obsoletes
is turned on in
/etc/yum.conf
, which makes these two commands equivalent.
Updating All Packages and Their Dependencies
To update all packages and their dependencies, use the
yum update
command without any arguments:
yum updateUpdating Security-Related Packages
If packages have security updates available, you can update only these packages to their latest versions. Type as
root
:
yum update --security
You can also update packages only to versions containing the latest security updates. Type as
root
:
yum update-minimal --security
For example, assume that:
the
kernel-3.10.0-1
package is installed on your system;
the
kernel-3.10.0-2
package was released as a security update;
the
kernel-3.10.0-3
package was released as a bug fix update.
Then
yum update-minimal --security
updates the package to
kernel-3.10.0-2
, and
yum update --security
updates the package to
kernel-3.10.0-3
.
Automating Package Updating
To refresh the package database and download updates automatically, you can use the
yum-cron
service. For more information, see
Section 9.7, “Automatically Refreshing Package Database and Downloading Updates with Yum-cron”
.
9.1.3. Upgrading the System Off-line with ISO and Yum
For systems that are disconnected from the Internet or Red Hat Network, using the
yum update
command with the Red Hat Enterprise Linux installation ISO image is an easy and quick way to upgrade systems to the latest minor version. The following steps illustrate the upgrading process:
Create a target directory to mount your ISO image. This directory is not automatically created when mounting, so create it before proceeding to the next step. As
root
, type:
mkdir mount_dir
Replace
mount_dir
with a path to the mount directory. Typically, users create it as a subdirectory in the
/media
directory.
Mount the Red Hat Enterprise Linux 7 installation ISO image to the previously created target directory. As
root
, type:
mount -o loop iso_name mount_dir
Replace
iso_name
with a path to your ISO image and
mount_dir
with a path to the target directory. Here, the
-o
loop
option is required to mount the file as a block device.
Copy the
media.repo
file from the mount directory to the
/etc/yum.repos.d/
directory. Note that configuration files in this directory must have the
.repo
extension to function properly.
cpmount_dir/media.repo/etc/yum.repos.d/new.repo
This creates a configuration file for the yum repository. Replace
new.repo
with the filename, for example
rhel7.repo
.
Edit the new configuration file so that it points to the Red Hat Enterprise Linux installation ISO. Add the following line into the
       /etc/yum.repos.d/


         new.repo
file:
baseurl=file:///mount_dir
Replace
mount_dir
with a path to the mount point.
Update all yum repositories including
       /etc/yum.repos.d/


         new.repo
created in previous steps. As
root
, type:
yumupdate
This upgrades your system to the version provided by the mounted ISO image.
After successful upgrade, you can unmount the ISO image. As
root
, type:
umount mount_dir
where
mount_dir
is a path to your mount directory. Also, you can remove the mount directory created in the first step. As
root
, type:
rmdir mount_dir
If you will not use the previously created configuration file for another installation or update, you can remove it. As
root
, type:
rm/etc/yum.repos.d/new.repo
Example 9.3. Upgrading from Red Hat Enterprise Linux 7.0 to 7.1
If required to upgrade a system without access to the Internet using an ISO image with the newer version of the system, called for example
rhel-server-7.1-x86_64-dvd.iso
, create a target directory for mounting, such as
/media/rhel7/
. As
root
, change into the directory with your ISO image and type:
~]# mount -o loop
    rhel-server-7.1-x86_64-dvd.iso /media/rhel7/
Then set up a yum repository for your image by copying the
media.repo
file from the mount directory:
~]# cp/media/rhel7/media.repo/etc/yum.repos.d/rhel7.repo
To make yum recognize the mount point as a repository, add the following line into the
/etc/yum.repos.d/rhel7.repo
copied in the previous step:
baseurl=file:///media/rhel7/
Now, updating the yum repository will upgrade your system to a version provided by
rhel-server-7.1-x86_64-dvd.iso
. As
root
, execute:
~]# yum update
When your system is successfully upgraded, you can unmount the image, remove the target directory and the configuration file:
~]# umount /media/rhel7/
~]# rmdir /media/rhel7/
~]# rm
     /etc/yum.repos.d/rhel7.repo
9.2. Working with Packages
Yum enables you to perform a complete set of operations with software packages, including searching for packages, viewing information about them, installing and removing.
9.2.1. Searching Packages
You can search all RPM package names, descriptions and summaries by using the following command:
yumsearchterm…
Replace term with a package name you want to search.
Example 9.4. Searching for packages matching a specific string
To list all packages that match "vim", "gvim", or "emacs", type:
~]$ yum search vim gvim emacs
Loaded plugins: langpacks, product-id, search-disabled-repos, subscription-manager
============================= N/S matched: vim ==============================
vim-X11.x86_64 : The VIM version of the vi editor for the X Window System
vim-common.x86_64 : The common files needed by any version of the VIM editor
[output truncated]
============================ N/S matched: emacs =============================
emacs.x86_64 : GNU Emacs text editor
emacs-auctex.noarch : Enhanced TeX modes for Emacs
[output truncated]
 Name and summary matches mostly, use "search all" for everything.
Warning: No matches found for: gvim
The
yum search
command is useful for searching for packages you do not know the name of, but for which you know a related term. Note that by default,
yum search
returns matches in package name and summary, which makes the search faster. Use the
yum search all
command for a more exhaustive but slower search.
Filtering the Results
All of yum’s list commands allow you to filter the results by appending one or more
glob expressions
as arguments. Glob expressions are normal strings of characters which contain one or more of the wildcard characters
*
(which expands to match any character subset) and
?
(which expands to match any single character).
Be careful to escape the glob expressions when passing them as arguments to a
yum
command, otherwise the Bash shell will interpret these expressions as
pathname expansions
, and potentially pass all files in the current directory that match the global expressions to
yum
. To make sure the glob expressions are passed to
yum
as intended, use one of the following methods:
escape the wildcard characters by preceding them with a backslash character
double-quote or single-quote the entire glob expression.
Examples in the following section demonstrate usage of both these methods.
9.2.2. Listing Packages
To list information on all installed and available packages type the following at a shell prompt:
yumlistall
To list installed and available packages that match inserted glob expressions use the following command:
yum list glob_expression…
Example 9.5. Listing ABRT-related packages
Packages with various ABRT add-ons and plug-ins either begin with "abrt-addon-", or "abrt-plugin-". To list these packages, type the following command at a shell prompt. Note how the wildcard characters are escaped with a backslash character:
~]$ yum list abrt-addon\* abrt-plugin\*
Loaded plugins: langpacks, product-id, search-disabled-repos, subscription-manager
Installed Packages
abrt-addon-ccpp.x86_64          2.1.11-35.el7       @rhel-7-server-rpms
abrt-addon-kerneloops.x86_64       2.1.11-35.el7       @rhel-7-server-rpms
abrt-addon-pstoreoops.x86_64       2.1.11-35.el7       @rhel-7-server-rpms
abrt-addon-python.x86_64         2.1.11-35.el7       @rhel-7-server-rpms
abrt-addon-vmcore.x86_64         2.1.11-35.el7       @rhel-7-server-rpms
abrt-addon-xorg.x86_64          2.1.11-35.el7       @rhel-7-server-rpms
To list all packages installed on your system use the
installed
keyword. The rightmost column in the output lists the repository from which the package was retrieved.
yum list installed glob_expression…
Example 9.6. Listing all installed versions of the krb package
The following example shows how to list all installed packages that begin with "krb" followed by exactly one character and a hyphen. This is useful when you want to list all versions of certain component as these are distinguished by numbers. The entire glob expression is quoted to ensure proper processing.
~]$ yum list installed "krb?-*"
Loaded plugins: langpacks, product-id, search-disabled-repos, subscription-manager
Installed Packages
krb5-libs.x86_64         1.13.2-10.el7          @rhel-7-server-rpms
To list all packages in all enabled repositories that are available to install, use the command in the following form:
yum list available glob_expression…
Example 9.7. Listing available gstreamer plug-ins
For instance, to list all available packages with names that contain "gstreamer" and then "plugin", run the following command:
~]$ yum list available gstreamer*plugin\*
Loaded plugins: langpacks, product-id, search-disabled-repos, subscription-manager
Available Packages
gstreamer-plugins-bad-free.i686       0.10.23-20.el7     rhel-7-server-rpms
gstreamer-plugins-base.i686         0.10.36-10.el7     rhel-7-server-rpms
gstreamer-plugins-good.i686         0.10.31-11.el7     rhel-7-server-rpms
gstreamer1-plugins-bad-free.i686      1.4.5-3.el7      rhel-7-server-rpms
gstreamer1-plugins-base.i686        1.4.5-2.el7      rhel-7-server-rpms
gstreamer1-plugins-base-devel.i686     1.4.5-2.el7      rhel-7-server-rpms
gstreamer1-plugins-base-devel.x86_64    1.4.5-2.el7      rhel-7-server-rpms
gstreamer1-plugins-good.i686        1.4.5-2.el7      rhel-7-server-rpms
Listing Repositories
To list the repository ID, name, and number of packages for each enabled repository on your system, use the following command:
yumrepolist
To list more information about these repositories, add the
-v
option. With this option enabled, information including the file name, overall size, date of the last update, and base URL are displayed for each listed repository. As an alternative, you can use the
repoinfo
command that produces the same output.
yumrepolist-v
yumrepoinfo
To list both enabled and disabled repositories use the following command. A status column is added to the output list to show which of the repositories are enabled.
yumrepolistall
By passing
disabled
as a first argument, you can reduce the command output to disabled repositories. For further specification you can pass the ID or name of repositories or related glob_expressions as arguments. Note that if there is an exact match between the repository ID or name and the inserted argument, this repository is listed even if it does not pass the
enabled
or
disabled
filter.
9.2.3. Displaying Package Information
To display information about one or more packages, use the following command (glob expressions are valid here as well):
yum info package_name…
Replace package_name with the name of the package.
Example 9.8. Displaying information on the abrt package
To display information about the abrt package, type:
~]$ yum info abrt
Loaded plugins: langpacks, product-id, search-disabled-repos, subscription-manager
Installed Packages
Name    : abrt
Arch    : x86_64
Version   : 2.1.11
Release   : 35.el7
Size    : 2.3 M
Repo    : installed
From repo  : rhel-7-server-rpms
Summary   : Automatic bug detection and reporting tool
URL     : https://fedorahosted.org/abrt/
License   : GPLv2+
Description : abrt is a tool to help users to detect defects in applications and
      : to create a bug report with all information needed by maintainer to fix
      : it. It uses plugin system to extend its functionality.
The
       yum info


         package_name
command is similar to the
       rpm -q --info


         package_name
command, but provides as additional information the name of the yum repository the RPM package was installed from (look for the
From repo:
line in the output).
Using yumdb
You can also query the yum database for alternative and useful information about a package by using the following command:
yumdb info package_name
This command provides additional information about a package, including the check sum of the package (and the algorithm used to produce it, such as SHA-256), the command given on the command line that was invoked to install the package (if any), and the reason why the package is installed on the system (where
user
indicates it was installed by the user, and
dep
means it was brought in as a dependency).
Example 9.9. Querying yumdb for information on the yum package
To display additional information about the yum package, type:
~]$ yumdb info yum
Loaded plugins: langpacks, product-id
yum-3.4.3-132.el7.noarch
   changed_by = 1000
   checksum_data = a9d0510e2ff0d04d04476c693c0313a11379053928efd29561f9a837b3d9eb02
   checksum_type = sha256
   command_line = upgrade
   from_repo = rhel-7-server-rpms
   from_repo_revision = 1449144806
   from_repo_timestamp = 1449144805
   installed_by = 4294967295
   origin_url = https://cdn.redhat.com/content/dist/rhel/server/7/7Server/x86_64/os/Packages/yum-3.4.3-132.el7.noarch.rpm
   reason = user
   releasever = 7Server
   var_uuid = 147a7d49-b60a-429f-8d8f-3edb6ce6f4a1
For more information on the
yumdb
command, see the
yumdb
(8) manual page.
9.2.4. Installing Packages
To install a single package and all of its non-installed dependencies, enter a command in the following form as
root
:
yum install package_name
You can also install multiple packages simultaneously by appending their names as arguments. To do so, type as
root
:
yum install package_name package_name…
If you are installing packages on a multilib system, such as an AMD64 or Intel 64 machine, you can specify the architecture of the package (as long as it is available in an enabled repository) by appending .arch to the package name:
yum install package_name.arch
Example 9.10. Installing packages on multilib system
To install the
sqlite
package for the
i686
architecture, type:
~]# yum install sqlite.i686
You can use glob expressions to quickly install multiple similarly named packages. Execute as
root
:
yum install glob_expression…
Example 9.11. Installing all audacious plugins
Global expressions are useful when you want to install several packages with similar names. To install all audacious plug-ins, use the command in the following form:
~]# yum install audacious-plugins-\*
In addition to package names and glob expressions, you can also provide file names to
yum install
. If you know the name of the binary you want to install, but not its package name, you can give
yum install
the path name. As
root
, type:
yum install /usr/sbin/named
Yum then searches through its package lists, finds the package which provides
/usr/sbin/named
, if any, and prompts you as to whether you want to install it.
As you can see in the above examples, the
yum install
command does not require strictly defined arguments. It can process various formats of package names and glob expressions, which makes installation easier for users. On the other hand, it takes some time until
yum
parses the input correctly, especially if you specify a large number of packages. To optimize the package search, you can use the following commands to explicitly define how to parse the arguments:
yum install-n nameyum install-na name.architectureyum install-nevra name-epoch:version-release.architecture
With
install-n
,
yum
interprets
name
as the exact name of the package. The
install-na
command tells
yum
that the subsequent argument contains the package name and architecture divided by the dot character. With
install-nevra
,
yum
will expect an argument in the form
name-epoch:version-release.architecture
. Similarly, you can use
yum remove-n
,
yum remove-na
, and
yum remove-nevra
when searching for packages to be removed.
If you know you want to install the package that contains the
named
binary, but you do not know in which
bin/
or
sbin/
directory the file is installed, use the
yum provides
command with a glob expression:
~]# yum provides "*bin/named"
Loaded plugins: langpacks, product-id, search-disabled-repos, subscription-
       : manager
32:bind-9.9.4-14.el7.x86_64 : The Berkeley Internet Name Domain (BIND) DNS
              : (Domain Name System) server
Repo    : rhel-7-server-rpms
Matched from:
Filename  : /usr/sbin/named
       yum provides "*/


         file_name


       "
is a useful way to find the packages that contain
file_name
.
Example 9.12. Installation Process
The following example provides an overview of installation with use of
yum
. To download and install the latest version of the
httpd
package, execute as
root
:
~]# yum install httpd
Loaded plugins: langpacks, product-id, subscription-manager
Resolving Dependencies
--> Running transaction check
---> Package httpd.x86_64 0:2.4.6-12.el7 will be updated
---> Package httpd.x86_64 0:2.4.6-13.el7 will be an update
--> Processing Dependency: 2.4.6-13.el7 for package: httpd-2.4.6-13.el7.x86_64
--> Running transaction check
---> Package httpd-tools.x86_64 0:2.4.6-12.el7 will be updated
---> Package httpd-tools.x86_64 0:2.4.6-13.el7 will be an update
--> Finished Dependency Resolution
Dependencies Resolved
After executing the above command, yum loads the necessary plug-ins and runs the transaction check. In this case, httpd is already installed. Since the installed package is older than the latest currently available version, it will be updated. The same applies to the httpd-tools package that httpd depends on. Then, a transaction summary is displayed:
================================================================================
 Package    Arch   Version         Repository        Size
================================================================================
Updating:
 httpd     x86_64  2.4.6-13.el7      rhel-x86_64-server-7  1.2 M
Updating for dependencies:
 httpd-tools  x86_64  2.4.6-13.el7      rhel-x86_64-server-7   77 k
Transaction Summary
================================================================================
Upgrade 1 Package (+1 Dependent package)
Total size: 1.2 M
Is this ok [y/d/N]:
In this step
yum
prompts you to confirm the installation. Apart from
y
(yes) and
N
(no) options, you can choose
d
(download only) to download the packages but not to install them directly. If you choose
y
, the installation proceeds with the following messages until it is finished successfully.
Downloading packages:
Running transaction check
Running transaction test
Transaction test succeeded
Running transaction
 Updating  : httpd-tools-2.4.6-13.el7.x86_64               1/4
 Updating  : httpd-2.4.6-13.el7.x86_64                  2/4
 Cleanup  : httpd-2.4.6-12.el7.x86_64                  3/4
 Cleanup  : httpd-tools-2.4.6-12.el7.x86_64               4/4
 Verifying : httpd-2.4.6-13.el7.x86_64                  1/4
 Verifying : httpd-tools-2.4.6-13.el7.x86_64               2/4
 Verifying : httpd-tools-2.4.6-12.el7.x86_64               3/4
 Verifying : httpd-2.4.6-12.el7.x86_64                  4/4
Updated:
 httpd.x86_64 0:2.4.6-13.el7
Dependency Updated:
 httpd-tools.x86_64 0:2.4.6-13.el7
Complete!
To install a previously downloaded package from the local directory on your system, use the following command:
yum localinstall pathReplace path with the path to the package you want to install.
9.2.5. Downloading Packages
As shown in
Example 9.12, “Installation Process”
, at a certain point of installation process you are prompted to confirm the installation with the following message:
Total size: 1.2 M
Is this ok [y/d/N]:
With the
d
option, yum downloads the packages without installing them immediately. You can install these packages later offline with the
yum localinstall
command or you can share them with a different device. Downloaded packages are saved in one of the subdirectories of the cache directory, by default
/var/cache/yum/$basearch/$releasever/packages/
. The downloading proceeds in background mode so that you can use
yum
for other operations in parallel.
9.2.6. Removing Packages
Similarly to package installation, yum enables you to uninstall them. To uninstall a particular package, as well as any packages that depend on it, run the following command as
root
:
yum remove package_name…
As when you install multiple packages, you can remove several at once by adding more package names to the command.
Example 9.13. Removing several packages
To remove totem , type the following at a shell prompt:
~]# yum remove totem
Similar to
install
,
remove
can take these arguments:
package names
glob expressions
file lists
package provides
Warning
Yum is not able to remove a package without also removing packages which depend on it. This type of operation, which can only be performed by RPM , is not advised, and can potentially leave your system in a non-functioning state or cause applications to not work correctly or crash.
9.3. Working with Package Groups
A package group is a collection of packages that serve a common purpose, for instance
System Tools
or
Sound and Video
. Installing a package group pulls a set of dependent packages, saving time considerably. The
yum groups
command is a top-level command that covers all the operations that act on package groups in yum.
9.3.1. Listing Package Groups
The
summary
option is used to view the number of installed groups, available groups, available environment groups, and both installed and available language groups:
yum groupssummary
Example 9.14. Example output of yum groups summary
~]$yumgroupssummaryLoaded plugins: langpacks, product-id, subscription-manager Available Environment Groups: 12 Installed Groups: 10 Available Groups: 12
To list all package groups from yum repositories add the
list
option. You can filter the command output by group names.
yum group list glob_expression…
Several optional arguments can be passed to this command, including
hidden
to list also groups not marked as user visible, and
ids
to list group IDs. You can add
language
,
environment
,
installed
, or
available
options to reduce the command output to a specific group type.
To list mandatory and optional packages contained in a particular group, use the following command:
yum group info glob_expression…
Example 9.15. Viewing information on the LibreOffice package group
 ~]$ yum group info LibreOffice
Loaded plugins: langpacks, product-id, subscription-manager
Group: LibreOffice
 Group-Id: libreoffice
 Description: LibreOffice Productivity Suite
 Mandatory Packages:
 =libreoffice-calc
  libreoffice-draw
 -libreoffice-emailmerge
  libreoffice-graphicfilter
 =libreoffice-impress
 =libreoffice-math
 =libreoffice-writer
 +libreoffice-xsltfilter
 Optional Packages:
  libreoffice-base
  libreoffice-pyuno
As you can see in the above example, the packages included in the package group can have different states that are marked with the following symbols:
"
-
" — Package is not installed and it will not be installed as a part of the package group.
"
+
" — Package is not installed but it will be installed on the next
yum upgrade
or
yum group upgrade
.
"
=
" — Package is installed and it was installed as a part of the package group.
no symbol
— Package is installed but it was installed outside of the package group. This means that the
yum group remove
will not remove these packages.
These distinctions take place only when the
group_command
configuration parameter is set to
objects
, which is the default setting. Set this parameter to a different value if you do not want yum to track if a package was installed as a part of the group or separately, which will make "
no symbol
" packages equivalent to "
=
" packages.
You can alter the above package states using the
yum group mark
command. For example,
yum group mark packages
marks any given installed packages as members of a specified group. To avoid installation of new packages on group update, use
yum group mark blacklist
. See the
yum
(8) man page for more information on capabilities of
yum group mark
.
You can identify an environmental group with use of the
@^
prefix and a package group can be marked with
@
. When using
yum
group
list
,
info
,
install
, or
remove
, pass
@group_name
to specify a package group,
@^group_name
to specify an environmental group, or
group_name
to include both.
9.3.2. Installing a Package Group
Each package group has a name and a group ID ( groupid ). To list the names of all package groups, and their group IDs, which are displayed in parentheses, type:
yum group list idsExample 9.16. Finding name and groupid of a package group
To find the name or ID of a package group, for example a group related to the KDE desktop environment, type:
~]$ yum group list ids kde\* Available environment groups: KDE Plasma Workspaces (kde-desktop-environment) Some groups are hidden by settings in the configured repositories. For example, on a server, make use of thehiddencommand option to list hidden groups too:~]$ yum group list hidden ids kde\* Loaded plugins: product-id, subscription-manager Available Groups: KDE (kde-desktop) You can install a package group by passing its full group name, without the groupid part, to thegroup installcommand. Asroot, type:yumgroup install"group name"You can also install by groupid. As
root, execute the following command:yumgroup installgroupidYou can pass the groupid or quoted group name to the
installcommand if you prepend it with an @ symbol, which tellsyumthat you want to performgroup install. Asroot, type:yuminstall@groupReplace group with the groupid or quoted group name. The same logic applies to environmental groups:
yum install @^groupExample 9.17. Four equivalent ways of installing the KDE Desktop group
As mentioned before, you can use four alternative, but equivalent ways to install a package group. For KDE Desktop, the commands look as follows:
~]# yum group install "KDE Desktop" ~]# yum group install kde-desktop ~]# yum install @"KDE Desktop" ~]# yum install @kde-desktop
9.3.3. Removing a Package Group
You can remove a package group using syntax similar to the
install
syntax, with use of either name of the package group or its id. As
root
, type:
yum group remove group_name
yumgroup removegroupid
Also, you can pass the groupid or quoted name to the
remove
command if you prepend it with an
@
-symbol, which tells yum that you want to perform
group remove
. As
root
, type:
yumremove@group
Replace group with the groupid or quoted group name. Similarly, you can replace an environmental group:
yum remove @^group
Example 9.18. Four equivalent ways of removing the
KDE Desktop
group
Similarly to install, you can use four alternative, but equivalent ways to remove a package group. For KDE Desktop, the commands look as follows:
~]# yum group remove "KDE Desktop"
~]# yum group remove kde-desktop
~]# yum remove @"KDE Desktop"
~]# yum remove @kde-desktop
9.4. Working with Transaction History
The
yum history
command enables users to review information about a timeline of yum transactions, the dates and times they occurred, the number of packages affected, whether these transactions succeeded or were aborted, and if the RPM database was changed between transactions. Additionally, this command can be used to undo or redo certain transactions. All history data is stored in the
history DB in the
/var/lib/yum/history/
directory.
9.4.1. Listing Transactions
To display a list of the twenty most recent transactions, as
root
, either run
yum history
with no additional arguments, or type the following at a shell prompt:
yumhistorylist
To display all transactions, add the
all
keyword:
yumhistorylistall
To display only transactions in a given range, use the command in the following form:
yum history list start_id..end_id
You can also list only transactions regarding a particular package or packages. To do so, use the command with a package name or a glob expression:
yum history list glob_expression…
Example 9.19. Listing the five oldest transactions
In the output of
yum history list
, the most recent transaction is displayed at the top of the list. To display information about the five oldest transactions stored in the history data base, type:
~]# yum history list 1..5
Loaded plugins: langpacks, product-id, subscription-manager
ID   | Login user        | Date and time  | Action(s)   | Altered
-------------------------------------------------------------------------------
   5 | User <user>       | 2013-07-29 15:33 | Install    |  1
   4 | User <user>       | 2013-07-21 15:10 | Install    |  1
   3 | User <user>       | 2013-07-16 15:27 | I, U      |  73
   2 | System <unset>      | 2013-07-16 15:19 | Update     |  1
   1 | System <unset>      | 2013-07-16 14:38 | Install    | 1106
history list
All forms of the
yum history list
command produce tabular output with each row consisting of the following columns:
ID
— an integer value that identifies a particular transaction.
Login user
— the name of the user whose login session was used to initiate a transaction. This information is typically presented in the
        Full Name


      <


        username>
form. For transactions that were not issued by a user (such as an automatic system update),
System <unset>
is used instead.
Date and time
— the date and time when a transaction was issued.
Action(s)
— a list of actions that were performed during a transaction as described in
Table 9.1, “Possible values of the Action(s) field”
.
Altered
— the number of packages that were affected by a transaction, possibly followed by additional information as described in
Table 9.2, “Possible values of the Altered field”
.
Table 9.1. Possible values of the Action(s) field
| Action | Abbreviation | Description |
|---|---|---|
|
|
Table 9.2. Possible values of the Altered field
| Symbol | Description | |||||||||||||||||||||||||||||||||||||||||||||||||||||||||||||||||||||||||||||||||||||||||||||||||||||||||||||||||||||||||||||||||||
|---|---|---|---|---|---|---|---|---|---|---|---|---|---|---|---|---|---|---|---|---|---|---|---|---|---|---|---|---|---|---|---|---|---|---|---|---|---|---|---|---|---|---|---|---|---|---|---|---|---|---|---|---|---|---|---|---|---|---|---|---|---|---|---|---|---|---|---|---|---|---|---|---|---|---|---|---|---|---|---|---|---|---|---|---|---|---|---|---|---|---|---|---|---|---|---|---|---|---|---|---|---|---|---|---|---|---|---|---|---|---|---|---|---|---|---|---|---|---|---|---|---|---|---|---|---|---|---|---|---|---|---|---|
|
Before the transaction finished, the
To display some overall statistics about the currently used history database use the following command:
Example 9.20. Example output of yum history stats ~]# yum history stats Loaded plugins: langpacks, product-id, subscription-manager File : //var/lib/yum/history/history-2012-08-15.sqlite Size : 2,766,848 Transactions: 41 Begin time : Wed Aug 15 16:18:25 2012 End time : Wed Feb 27 14:52:30 2013 Counts : NEVRAC : 2,204 NEVRA : 2,204 NA : 1,759 NEVR : 2,204 rpm DB : 2,204 yum DB : 2,204 history stats
Yum also enables you to display a summary of all past transactions. To do so, run the command in the following form as
To display only transactions in a given range, type: yum history summary start_id..end_id
Similarly to the
yum history summary glob_expression…
Example 9.21. Summary of the five latest transactions ~]# yum history summary 1..5 Loaded plugins: langpacks, product-id, subscription-manager Login user | Time | Action(s) | Altered ------------------------------------------------------------------------------- Jaromir ... <jhradilek> | Last day | Install | 1 Jaromir ... <jhradilek> | Last week | Install | 1 Jaromir ... <jhradilek> | Last 2 weeks | I, U | 73 System <unset> | Last 2 weeks | I, U | 1107 history summary
All forms of the
yum history package-list glob_expression…
Example 9.22. Tracing the history of a package For example, to trace the history of subscription-manager and related packages, type the following at a shell prompt: ~]# yum history package-list subscription-manager\* Loaded plugins: langpacks, product-id, search-disabled-repos, subscription-manager ID | Action(s) | Package ------------------------------------------------------------------------------- 2 | Updated | subscription-manager-1.13.22-1.el7.x86_64 EE 2 | Update | 1.15.9-15.el7.x86_64 EE 2 | Obsoleted | subscription-manager-firstboot-1.13.22-1.el7.x86_64 EE 2 | Updated | subscription-manager-gui-1.13.22-1.el7.x86_64 EE 2 | Update | 1.15.9-15.el7.x86_64 EE 2 | Obsoleting | subscription-manager-initial-setup-addon-1.15.9-15.el7.x86_64 EE 1 | Install | subscription-manager-1.13.22-1.el7.x86_64 1 | Install | subscription-manager-firstboot-1.13.22-1.el7.x86_64 1 | Install | subscription-manager-gui-1.13.22-1.el7.x86_64 history package-list In this example, three packages were installed during the initial system installation: subscription-manager , subscription-manager-firstboot , and subscription-manager-gui . In the third transaction, all these packages were updated from version 1.10.11 to version 1.10.17. 9.4.2. Examining Transactions
To display the summary of a single transaction, as
Here,
id
stands for the ID of the transaction.
To examine a particular transaction or transactions in more detail, run the following command as
The id argument is optional and when you omit it, yum automatically uses the last transaction. Note that when specifying more than one transaction, you can also use a range: yum history info start_id..end_id Example 9.23. Example output of yum history info The following is sample output for two transactions, each installing one new package: ~]# yum history info 4..5 Loaded plugins: langpacks, product-id, search-disabled-repos, subscription-manager Transaction ID : 4..5 Begin time : Mon Dec 7 16:51:07 2015 Begin rpmdb : 1252:d2b62b7b5768e855723954852fd7e55f641fbad9 End time : 17:18:49 2015 (27 minutes) End rpmdb : 1253:cf8449dc4c53fc0cbc0a4c48e496a6c50f3d43c5 User : Maxim Svistunov <msvistun> Return-Code : Success Command Line : install tigervnc-server.x86_64 Command Line : reinstall tigervnc-server Transaction performed with: Installed rpm-4.11.3-17.el7.x86_64 @rhel-7-server-rpms Installed subscription-manager-1.15.9-15.el7.x86_64 @rhel-7-server-rpms Installed yum-3.4.3-132.el7.noarch @rhel-7-server-rpms Packages Altered: Reinstall tigervnc-server-1.3.1-3.el7.x86_64 @rhel-7-server-rpms history info
You can also view additional information, such as what configuration options were used at the time of the transaction, or from what repository and why were certain packages installed. To determine what additional information is available for a certain transaction, type the following at a shell prompt as
Similarly to
Example 9.24. Example output of
For the fourth transaction in the history, the
~]# yum history addon-info 4
Loaded plugins: langpacks, product-id, subscription-manager
Transaction ID: 4
Available additional history information:
 config-main
 config-repos
 saved_tx
history addon-info
In the output of the
9.4.3. Reverting and Repeating Transactions
Apart from reviewing the transaction history, the
To repeat a particular transaction, as
Both commands also accept the
yum -q history addon-info id saved_tx >
Once you copy this file to the target system, you can repeat the transaction by using the following command as
yum load-transaction file_name
You can configure
9.4.4. Starting New Transaction History
Yum stores the transaction history in a single SQLite database file. To start new transaction history, run the following command as
This will create a new, empty database file in the
9.5. Configuring Yum and Yum Repositories
Note
To expand your expertise, you might also be interested in the
Red Hat System Administration III (RH254)
and
RHCSA Rapid Track (RH199)
training courses.
The configuration information for yum and related utilities is located at
9.5.1. Setting [main] Options
The
[main]
cachedir=/var/cache/yum/$basearch/$releasever
keepcache=0
debuglevel=2
logfile=/var/log/yum.log
exactarch=1
obsoletes=1
gpgcheck=1
plugins=1
installonly_limit=3
[comments abridged]
# PUT YOUR REPOS HERE OR IN separate files named file.repo
# in /etc/yum.repos.d
The following are the most commonly used options in the
installonlypkgs
=
space
separated
list
of
packages
Here you can provide a space-separated list of packages which yum can
install
, but will never
update
. See the
9.5.2. Setting [repository] Options
The
[repository]
name=repository_name
baseurl=repository_url
Every
9.5.3. Using Yum Variables
You can use and reference the following built-in variables in
9.5.4. Viewing the Current Configuration
To display the current values of global yum options (that is, the options specified in the
To list the content of a different configuration section or sections, use the command in the following form: You can also use a glob expression to display the configuration of all matching sections: yum-config-manager glob_expression…
Example 9.26. Viewing configuration of the main section To list all configuration options and their corresponding values for the main section, type the following at a shell prompt: ~]$ yum-config-manager main \* Loaded plugins: langpacks, product-id, subscription-manager ================================== main =================================== [main] alwaysprompt = True assumeyes = False bandwith = 0 bugtracker_url = https://bugzilla.redhat.com/enter_bug.cgi?product=Red%20Hat%20Enterprise%20Linux%206&component=yum cache = 0 [output truncated] 9.5.5. Adding, Enabling, and Disabling a Yum Repository
Note
To expand your expertise, you might also be interested in the
Red Hat System Administration III (RH254)
training course.
Section 9.5.2, “Setting [repository] Options”
describes various options you can use to define a yum repository. This section explains how to add, enable, and disable a repository by using the
Important
When the system is registered with Red Hat Subscription Management to the certificate-based
Adding a Yum Repository
To define a new repository, you can either add a
Warning
Obtaining and installing software packages from unverified or untrusted software sources other than Red Hat’s certificate-based
yum-config-manager --add-repo repository_url
…where
repository_url
is a link to the
Example 9.27. Adding example.repo To add a repository located at http://www.example.com/example.repo , type the following at a shell prompt: ~]# yum-config-manager --add-repo http://www.example.com/example.repo Loaded plugins: langpacks, product-id, subscription-manager adding repo from: http://www.example.com/example.repo grabbing file http://www.example.com/example.repo to /etc/yum.repos.d/example.repo example.repo | 413 B 00:00 repo saved to /etc/yum.repos.d/example.repo Enabling a Yum Repository
To enable a particular repository or repositories, type the following at a shell prompt as
…where
repository
is the unique repository ID (use
yum-config-manager --enable glob_expression…
Example 9.28. Enabling repositories defined in custom sections of /etc/yum.conf.
To enable repositories defined in the
~]# yum-config-manager --enable example\*
Loaded plugins: langpacks, product-id, subscription-manager
============================== repo: example ==============================
[example]
bandwidth = 0
base_persistdir = /var/lib/yum/repos/x86_64/7Server
baseurl = http://www.example.com/repo/7Server/x86_64/
cache = 0
cachedir = /var/cache/yum/x86_64/7Server/example
[output truncated]
Example 9.29. Enabling all repositories
To enable all repositories defined both in the
~]# yum-config-manager --enable \*
Loaded plugins: langpacks, product-id, subscription-manager
============================== repo: example ==============================
[example]
bandwidth = 0
base_persistdir = /var/lib/yum/repos/x86_64/7Server
baseurl = http://www.example.com/repo/7Server/x86_64/
cache = 0
cachedir = /var/cache/yum/x86_64/7Server/example
[output truncated]
When successful, the
Disabling a Yum Repository
To disable a yum repository, run the following command as
…where
repository
is the unique repository ID (use
yum-config-manager --disable glob_expression…
Example 9.30. Disabling all repositories
To disable all repositories defined both in the
~]# yum-config-manager --disable \*
Loaded plugins: langpacks, product-id, subscription-manager
============================== repo: example ==============================
[example]
bandwidth = 0
base_persistdir = /var/lib/yum/repos/x86_64/7Server
baseurl = http://www.example.com/repo/7Server/x86_64/
cache = 0
cachedir = /var/cache/yum/x86_64/7Server/example
[output truncated]
When successful, the
9.5.6. Creating a Yum RepositoryTo set up a yum repository: Install the createrepo package: # yum install createrepo
Copy all packages for your new repository into one directory, such as
cp /your/packages/*.rpm /tmp/local_repo/ To create the repository run: createrepo /tmp/local_repo/
This creates the necessary metadata for the yum repository and places metadata in a newly created subdirectory
9.5.6.1. Adding packages to an already created yum repository
To add packages to an already created yum repository:
Copy the new packages to your repository directory, such as
cp /your/packages/*.rpm /tmp/local_repo/ To reflect the newly added packages in the metadata, run: createrepo --update /tmp/local_repo/ Optional: If you have already used any yum command with newly updated repository, run: 9.5.7. Adding the Optional and Supplementary RepositoriesThe Optional and Supplementary subscription channels provide additional software packages for Red Hat Enterprise Linux that cover open source licensed software (in the Optional channel) and proprietary licensed software (in the Supplementary channel). Before subscribing to the Optional and Supplementary channels see the Scope of Coverage Details . If you decide to install packages from these channels, follow the steps documented in the article called How to access Optional and Supplementary channels, and -devel packages using Red Hat Subscription Manager (RHSM)? on the Red Hat Customer Portal. 9.6. Yum Plug-ins
Yum provides plug-ins that extend and enhance its operations. Certain plug-ins are installed by default. Yum always informs you which plug-ins, if any, are loaded and active whenever you call any
~]# yum info yum
Loaded plugins: langpacks, product-id, subscription-manager
[output truncated]
Note that the plug-in names which follow
9.6.1. Enabling, Configuring, and Disabling Yum Plug-ins
To enable yum plug-ins, ensure that a line beginning with
plugins=1
You can disable all plug-ins by changing this line to
Important
Disabling all plug-ins is not advised because certain plug-ins provide important yum services. In particular, the
product-id
and
subscription-manager
plug-ins provide support for the certificate-based
[main]
enabled=1
Similar to the
~]# yum update --disableplugin=aliases
The plug-in names you provide to the
~]# yum update --disableplugin=aliases,lang* 9.6.2. Installing Additional Yum Plug-ins
Yum plug-ins usually adhere to the
~]# yum install yum-plugin-aliases 9.6.3. Working with Yum Plug-insThe following list provides descriptions and usage instructions for several useful yum plug-ins. Plug-ins are listed by names, brackets contain the name of the package.
9.7. Automatically Refreshing Package Database and Downloading Updates with Yum-cron
The
9.7.1. Enabling Automatic Installation of Updates
To enable automatic installation of downloaded updates, edit the daily configuration file for daily installation or the hourly configuration file for hourly installation by setting the
apply_updates = yes 9.7.2. Setting up Optional Email Notifications
By default, the
9.7.3. Enabling or Disabling Specific Repositories
The
9.7.4. Testing Yum-cron Settings
To test
9.7.5. Disabling Yum-cron messages
The
9.7.6. Automatically Cleaning Packages
The
#!/bin/sh
yum clean all
Make the script executable: # chmod +x /etc/cron.daily/script-name.sh
9.8. Additional ResourcesFor more information on how to manage software packages on Red Hat Enterprise Linux, see the resources listed below. Installed Documentation
Online Resources
See Also
Part IV. Infrastructure ServicesThis part provides information on how to configure services and daemons and enable remote access to a Red Hat Enterprise Linux machine. Chapter 10. Managing Services with systemd10.1. Introduction to systemdSystemd is a system and service manager for Linux operating systems. It is designed to be backwards compatible with SysV init scripts, and provides a number of features such as parallel startup of system services at boot time, on-demand activation of daemons, or dependency-based service control logic. In Red Hat Enterprise Linux 7, systemd replaces Upstart as the default init system. Systemd introduces the concept of systemd units . These units are represented by unit configuration files located in one of the directories listed in Table 10.2, “Systemd Unit Files Locations” , and encapsulate information about system services, listening sockets, and other objects that are relevant to the init system. For a complete list of available systemd unit types, see Table 10.1, “Available systemd Unit Types” . Table 10.1. Available systemd Unit Types
Table 10.2. Systemd Unit Files Locations
Overriding the Default systemd Configuration Using system.conf
The default configuration of systemd is defined during the compilation and it can be found in systemd configuration file at
DefaultTimeoutStartSec=required value
See also Example 10.21, “Changing the timeout limit” . 10.1.1. Main FeaturesIn Red Hat Enterprise Linux 7, the systemd system and service manager provides the following main features: Socket-based activation — At boot time, systemd creates listening sockets for all system services that support this type of activation, and passes the sockets to these services as soon as they are started. This not only allows systemd to start services in parallel, but also makes it possible to restart a service without losing any message sent to it while it is unavailable: the corresponding socket remains accessible and all messages are queued. Systemd uses socket units for socket-based activation. Bus-based activation — System services that use D-Bus for inter-process communication can be started on-demand the first time a client application attempts to communicate with them. Systemd uses D-Bus service files for bus-based activation. Device-based activation — System services that support device-based activation can be started on-demand when a particular type of hardware is plugged in or becomes available. Systemd uses device units for device-based activation. Path-based activation — System services that support path-based activation can be started on-demand when a particular file or directory changes its state. Systemd uses path units for path-based activation. Mount and automount point management — Systemd monitors and manages mount and automount points. Systemd uses mount units for mount points and automount units for automount points. Aggressive parallelization — Because of the use of socket-based activation, systemd can start system services in parallel as soon as all listening sockets are in place. In combination with system services that support on-demand activation, parallel activation significantly reduces the time required to boot the system. Transactional unit activation logic — Before activating or deactivating a unit, systemd calculates its dependencies, creates a temporary transaction, and verifies that this transaction is consistent. If a transaction is inconsistent, systemd automatically attempts to correct it and remove non-essential jobs from it before reporting an error. Backwards compatibility with SysV init — Systemd supports SysV init scripts as described in the Linux Standard Base Core Specification , which eases the upgrade path to systemd service units. 10.1.2. Compatibility Changes
The systemd system and service manager is designed to be mostly compatible with SysV init and Upstart. The following are the most notable compatibility changes with regards to the previous major release of the Red Hat Enterprise Linux system:
Systemd has only limited support for runlevels. It provides a number of target units that can be directly mapped to these runlevels and for compatibility reasons, it is also distributed with the earlier
10.2. Managing System Services
Note
To expand your expertise, you might also be interested in the
Red Hat System Administration II (RH134)
training course.
Previous versions of Red Hat Enterprise Linux, which were distributed with SysV init or Upstart, used
init scripts
located in the
Table 10.3. Comparison of the service Utility with systemctl
Table 10.4. Comparison of the chkconfig Utility with systemctl
Specifying Service Units
For clarity, all command examples in the rest of this section use full unit names with the
~]# systemctl stop nfs-server.service
However, the file extension can be omitted, in which case the
~]# systemctl stop nfs-server Additionally, some units have alias names. Those names can have shorter names than units, which can be used instead of the actual unit names. To find all aliases that can be used for a particular unit, use: ~]# systemctl show nfs-server.service -p Names Behavior of systemctl in a chroot Environment
If you change the root directory using the
~]# chroot /srv/website1
~]# systemctl enable httpd.service
Created symlink /etc/systemd/system/multi-user.target.wants/httpd.service, pointing to /usr/lib/systemd/system/httpd.service.
10.2.1. Listing ServicesTo list all currently loaded service units, type the following at a shell prompt:
For each service unit file, this command displays its full name (
You can also list all available service units to see if they are enabled. To do so, type:
For each service unit, this command displays its full name (
Example 10.1. Listing Services To list all currently loaded service units, run the following command: ~]$
To list all installed service unit files to determine if they are enabled, type: ~]$ systemctl list-unit-files --type service UNIT FILE STATE abrt-ccpp.service enabled abrt-oops.service enabled abrt-vmcore.service enabled abrt-xorg.service enabled abrtd.service enabled wpa_supplicant.service disabled ypbind.service disabled 208 unit files listed. 10.2.2. Displaying Service StatusTo display detailed information about a service unit that corresponds to a system service, type the following at a shell prompt:
Replace
name
with the name of the service unit you want to inspect (for example,
Table 10.5. Available Service Unit Information
|

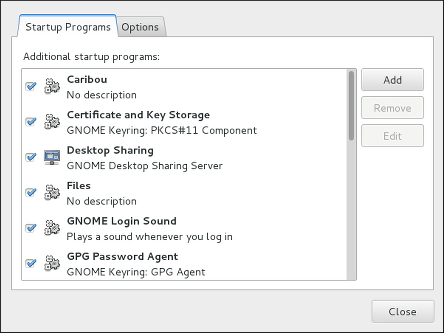
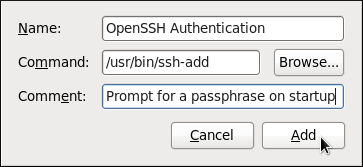
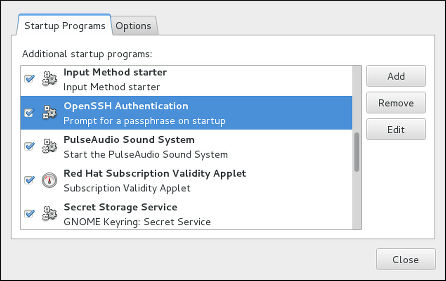
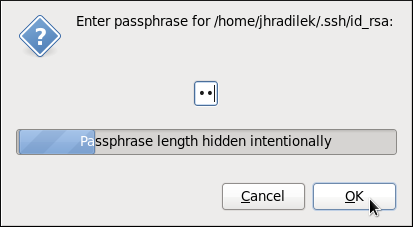
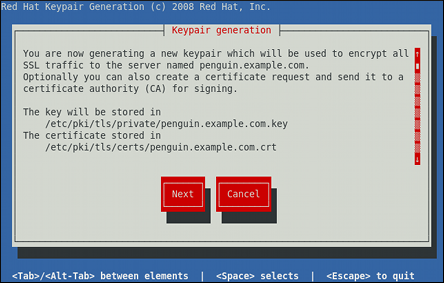
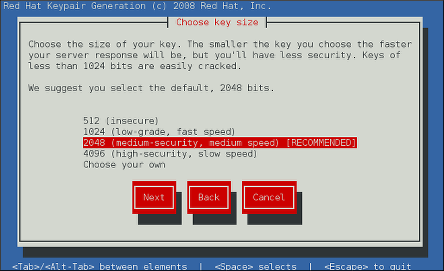
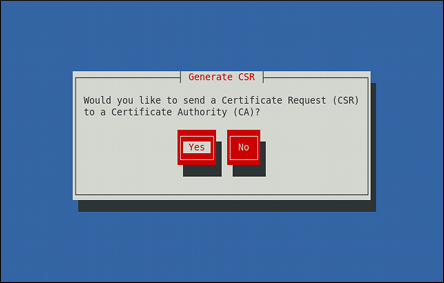
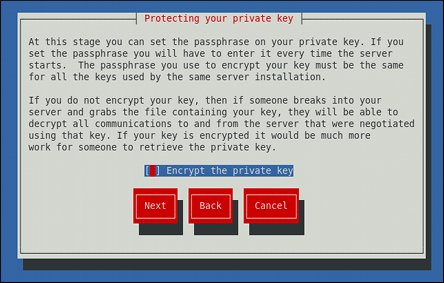

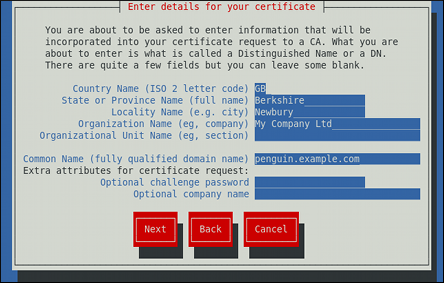
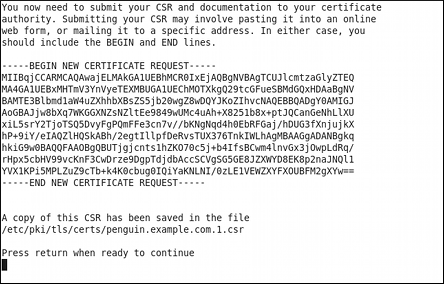
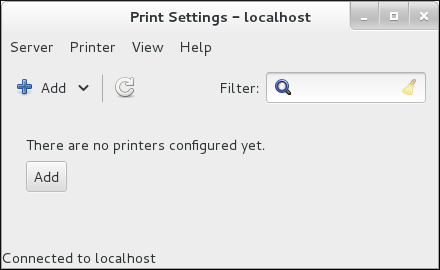
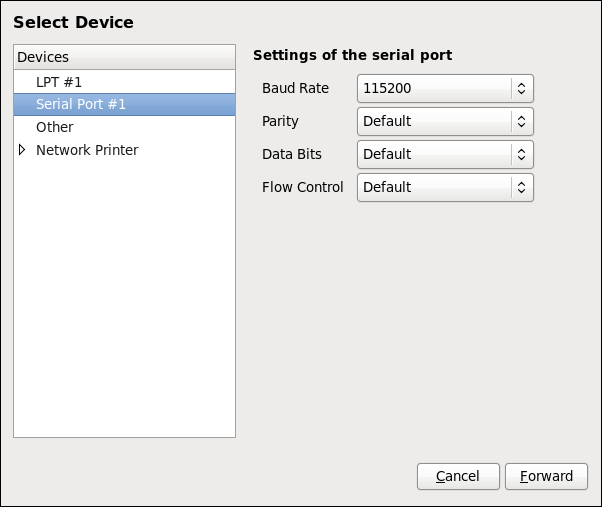

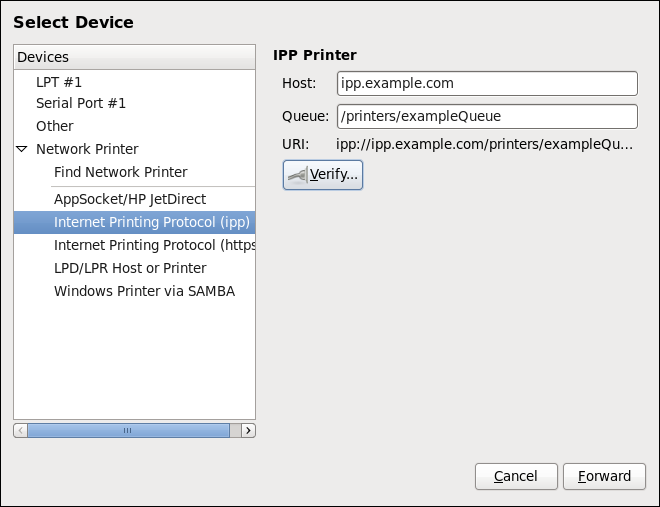
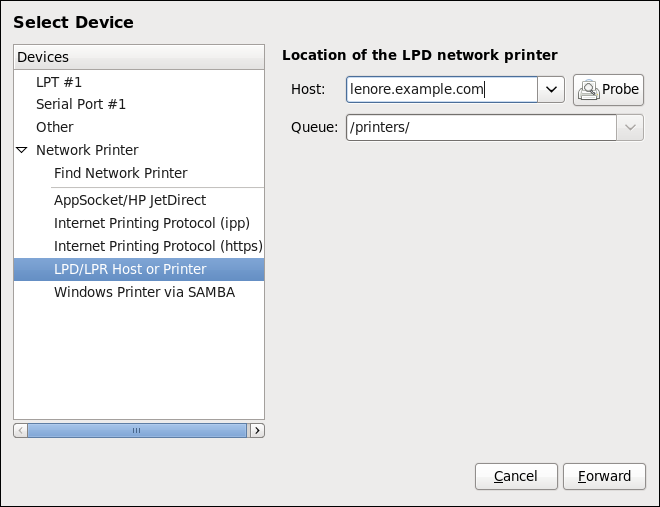
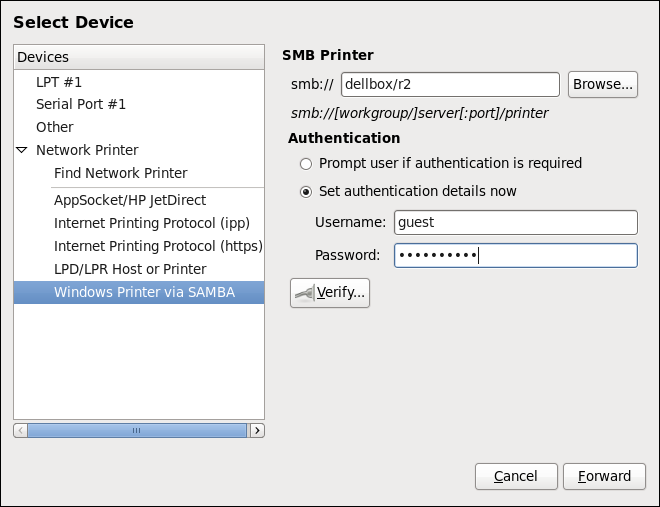
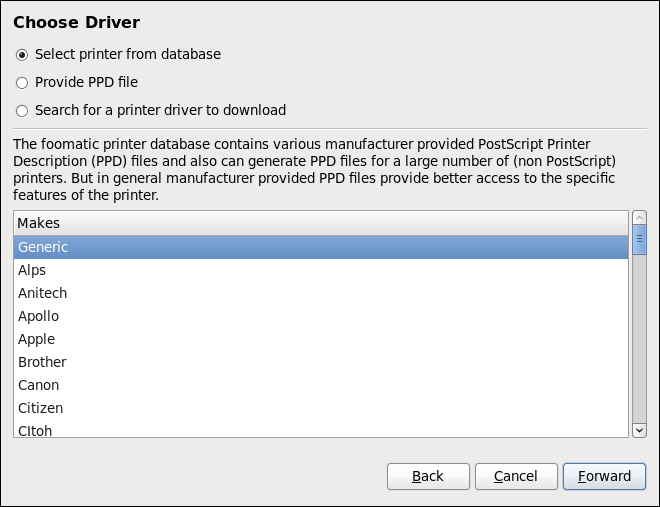
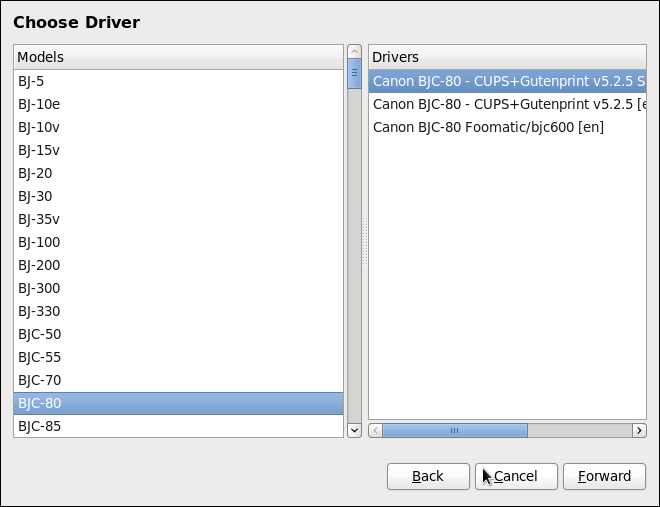


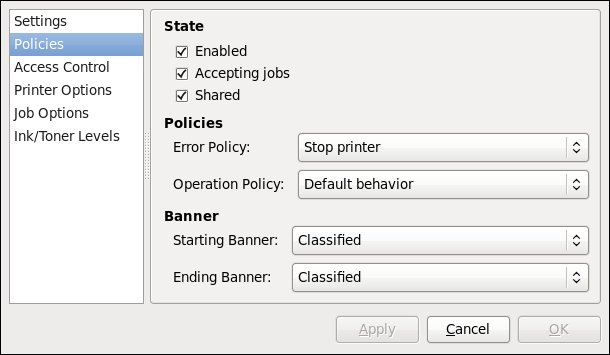

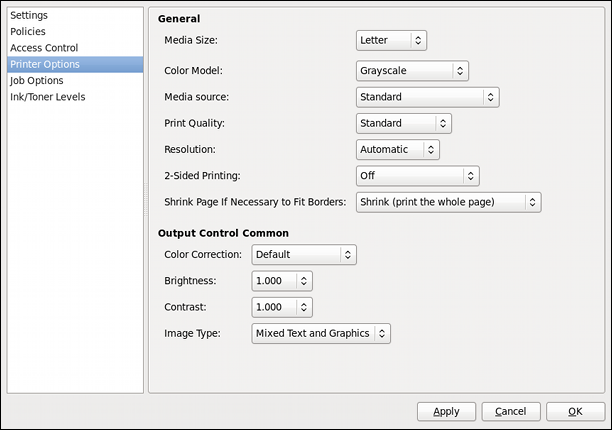
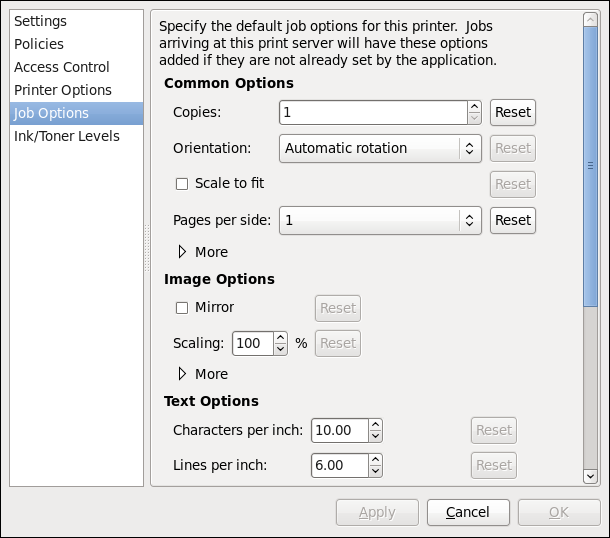
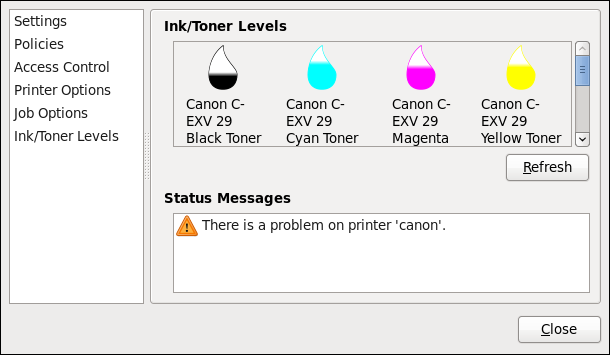
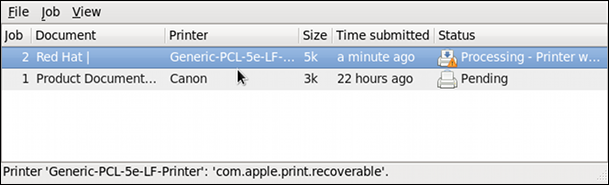
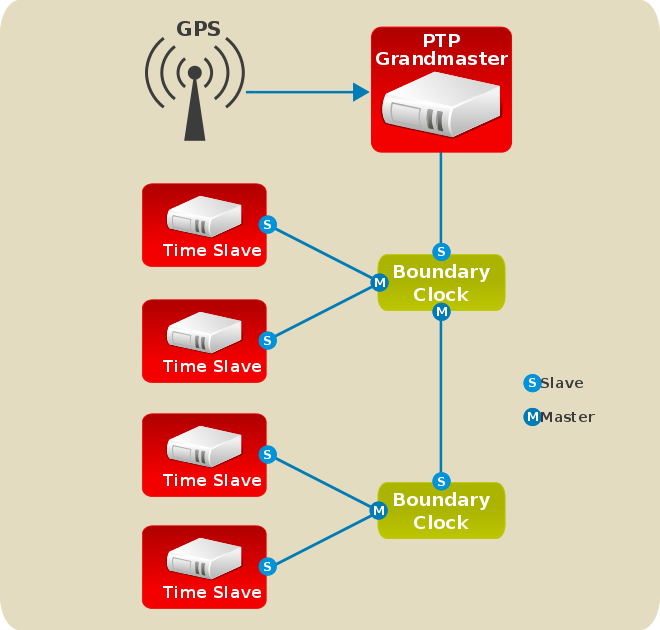
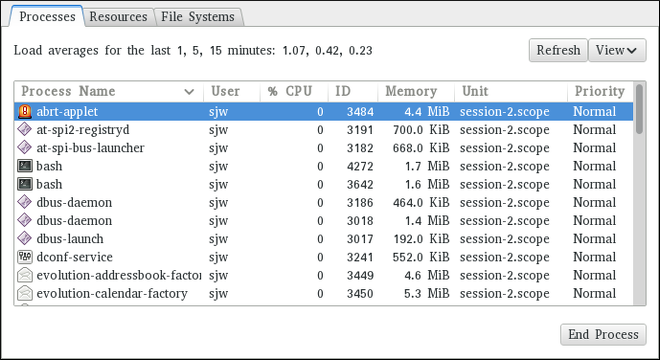
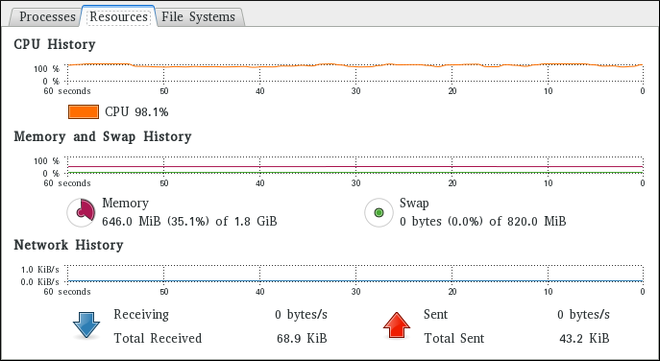
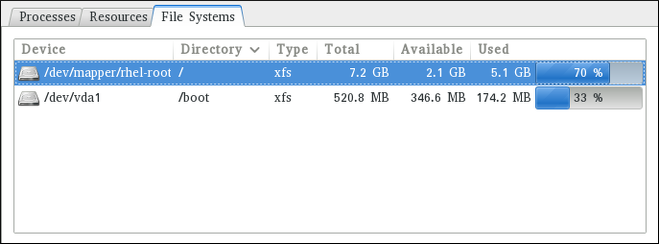


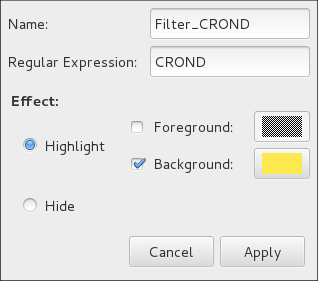

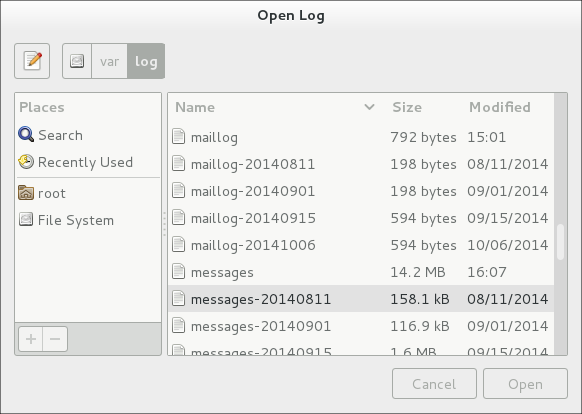
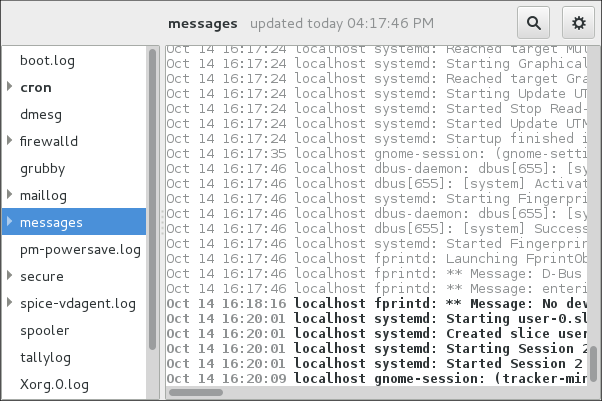
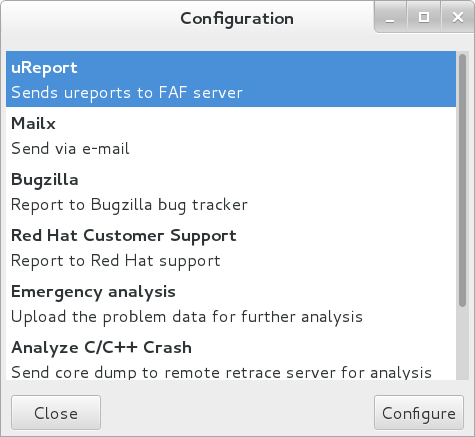
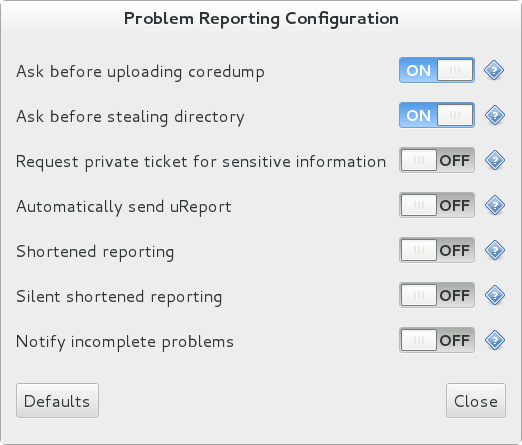


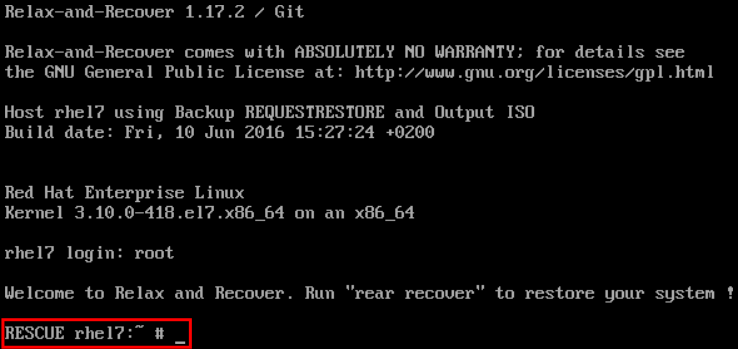
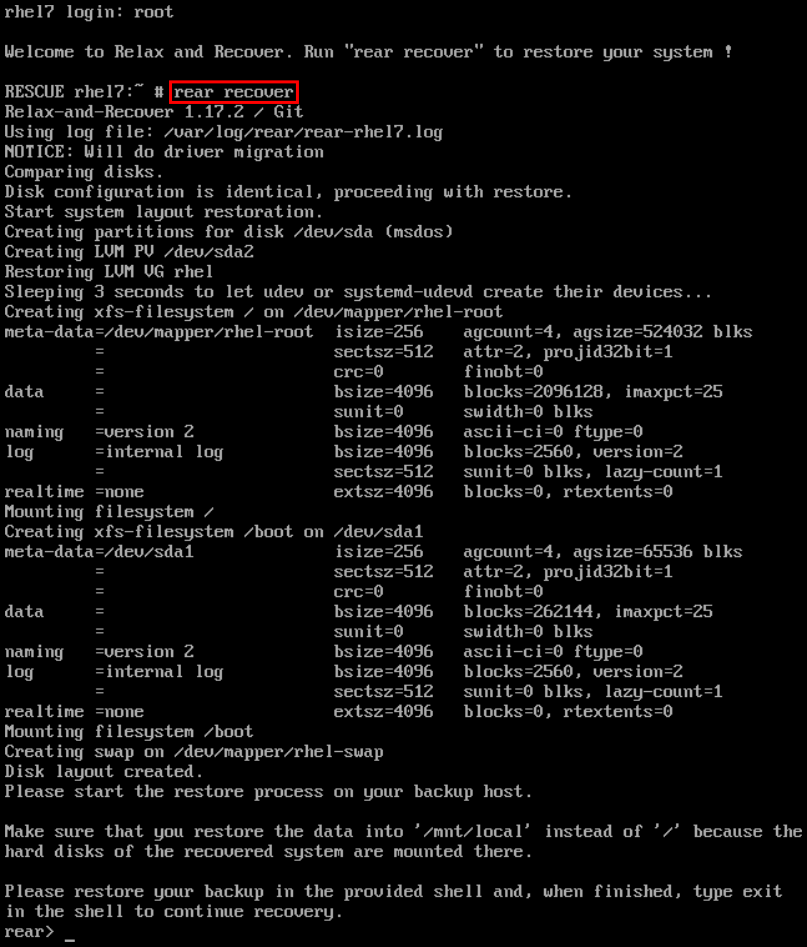
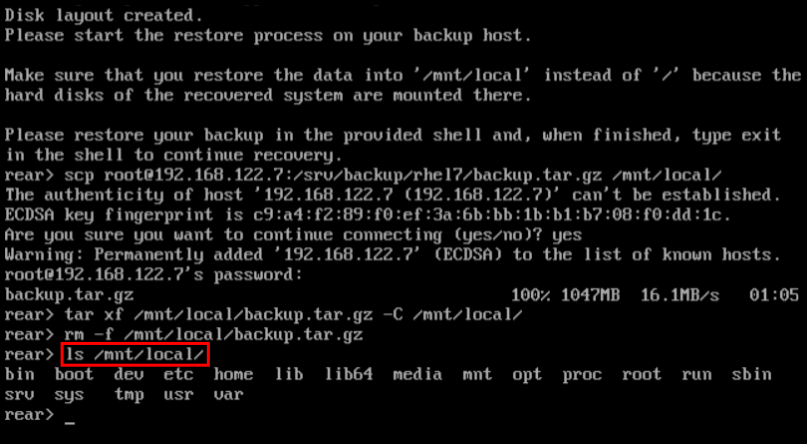
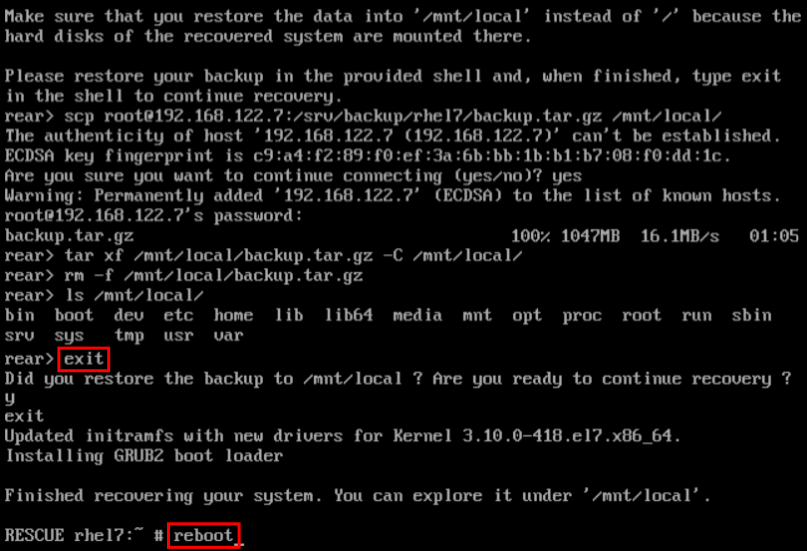
推荐文章