Fabric.js 从入门到膨胀
简介
首先要说的是:本文篇幅很长(好几万字),建议 点赞收藏(点赞就等于学会了) 。
原文地址: Fabric.js 从入门到________ - 掘金
Fabric.js 简介
Fabric.js是一个功能强大且操作简单的Javascript HTML5 canvas工具库。
如果你需要用
canvas
做特效,那我推荐你使用
Fabric.js
,因为
Fabric.js
语法更加简单易用,而且还提供了很多交互类的
api
。
Fabric.js
简化了很多
Canvas
里的概念,代码看上去也更加语义化。
Fabric.js
能做什么?
可以打开 『Fabric.js 官网首页』 直接看例子,也可以看看 『Fabric.js Demos』 查看更炫酷的例子。
本文简介
如果是
0基础
的读者,希望可以从头读到尾,读完起码大概知道
Fabric.js
有哪些功能。
本文是根据我的学习过程来编写的,只要跟着本文一步一步操作,一定可以入门
Fabric.js
,同时还能改善您的睡眠质量、解决毛发过多等诸多问题。
由于我使用
Fabric.js
的时间不长,这份笔记在各个知识点的内容肯定不够全面的,也不一定完全正确。读者们如果发现本文存在不正确的地方请大胆指出,我会改的~
本文适合人群:
- 有原生三件套基础的开发者
-
最好有
canvas基础(这是加分项,完全没有也没关系的)
本文主要讲解
Fabric.js
基础
,包括:
- 画布的基本操作
- 基础图形绘制方法(矩形、圆形、三角形、椭圆、多边形、线段等)
- 图片和滤镜的使用
- 文本和文本框
- 动画
- 分组和打散分组
- 基础事件
- 自由绘画
- 裁剪
- 序列化和反序列化
- ……
除此之外,还会讲一些 进阶 一点的操作,比如:
- 自定义操作角样式和状态
- 自定义控件
- 复制粘贴图形
- 使用事件方式操作图形和分组
- ……
除了上述内容外,我还会根据日后的工作中整理出更多常用和好玩的操作,本文即学习仓库会 不定期更新!!!
相关链接
开发环境搭建
环境和版本说明
-
本文使用
Fabric.js的版本是4.6。 -
本文的开发环境是使用
Vite构建的Vue 3.2项目。
没有
Vite
和
Vue3.2
基础的同学也不用怕,因为
Vite
真的足够简单。
本文的目的是讲解
Fabric.js
,所以用到
Vue 3.2
的地方其实很少,用到时我也会有详细说明。
如果你不打算使用
Vite
和
Vue 3.2
也没关系,
用你喜欢的方式去搭建项目即可
。
现在只需跟着以下步骤搭建项目即可。
搭建环境(Vite + Vue3)
如果你不想使用
Vite + Vue3
的话,可以跳过本节。
我也建议你直接使用原生 (HTML+CSS+JS) 的方式直接学习
Fabric.js
,因为这样上手速度最快。
1. 搭建Vite项目
npm init @vitejs/app
2. 给项目起个名,并选择 Vue

之后会让你选
vue
或者
vue + ts
,我选择了
vue
,你随意。
为什么不选
ts
?因为一人开发的练手项目使用
ts
有点得不偿失。
3. 初始化项目
其实做完上一步就会给出提示(3条命令),跟着敲完就能运行项目了
# 进入项目目录
cd fabric-demo
# 初始化项目
npm install
# 运行项目
npm run dev
如果
npm
太慢的话,可以使用
cnpm
。
如果不知道
cnpm
怎么搞,请自行百度。
安装Fabric.js
方式1:CDN
<script src="https://unpkg.com/[email protected]/dist/fabric.min.js"></script>你可以使用 CDN 的方式引入,因为这样对学习来说是最快捷的。
方式2:npm
本文使用该方法!!!
npm i fabric --save
安装完后,
package.json
会出现箭头指向的那行代码。
起步
只需 3个操作 就能展示点东西了。
1. 新建页面并引入 Fabric.js
如果是原生项目,使用
<script>
标签引入即可:
<script src="https://unpkg.com/[email protected]/dist/fabric.min.js"></script>
本文使用了
Vite
构建的项目,所以可以使用
import
引入
import { fabric } from 'fabric'
2. 创建 canvas 容器
在
HTML
中创建
<canvas>
,并设置容器的
id
和
宽高,width/height
<canvas width="400" height="400" id="c" style="border: 1px solid #ccc;"></canvas>
这里创建了一个
canvas
容器,
id="c"
。
指定长宽都为
400px
,值得注意的是,这里不需要加
px
这个单位。
style="border: 1px solid #ccc;"
这句其实可以不加,这里只是为了在浏览器看到
canvas
元素到底在哪。
3. 使用 fabric 接管容器,并画一个矩形
在
JS
中实例化
fabric
,之后就可以使用
fabric
的
api
管理
canvas
了。
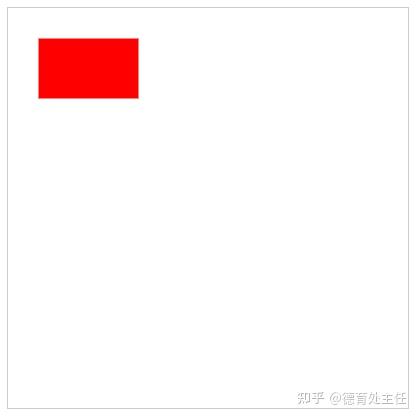
<script setup>
import { onMounted } from 'vue'
import { fabric } from 'fabric' // 引入 fabric
function init() {
  const canvas = new fabric.Canvas('c') // 这里传入的是canvas的id
  // 创建一个长方形
  const rect = new fabric.Rect({
    top: 30, // 距离容器顶部 30px
    left: 30, // 距离容器左侧 30px
    width: 100, // 宽 100px
    height: 60, // 高 60px
    fill: 'red' // 填充 红色
  // 在canvas画布中加入矩形(rect)。add是“添加”的意思
  canvas.add(rect)
// 需要在页面容器加载完才能开始初始化(页面加载完才找到 canvas 元素)
// onMounted 是 Vue3 提供的一个页面生命周期函数:实例被挂载后调用。
// onMounted 官方文档说明:https://v3.cn.vuejs.org/guide/composition-api-lifecycle-hooks.html
onMounted(() => {
  init() // 执行初始化函数
</script>
详情请看代码中每一行注释。
<script setup>
是
Vue 3.2
的一个新语法,普通项目直接使用
<script>
就行了。
就算我不写备注也可以看出
Fabric.js
的代码是极具语义化的,看单词就大概能猜出代码效果。
如果是用原生的
canvas
方法来写,没了解过的同学根本看不懂在写啥。
画布
Fabric.js
的画布操作性是非常强的,这里我列举几个常用例子,其他操作可以查看官方文档。
基础版(可交互)
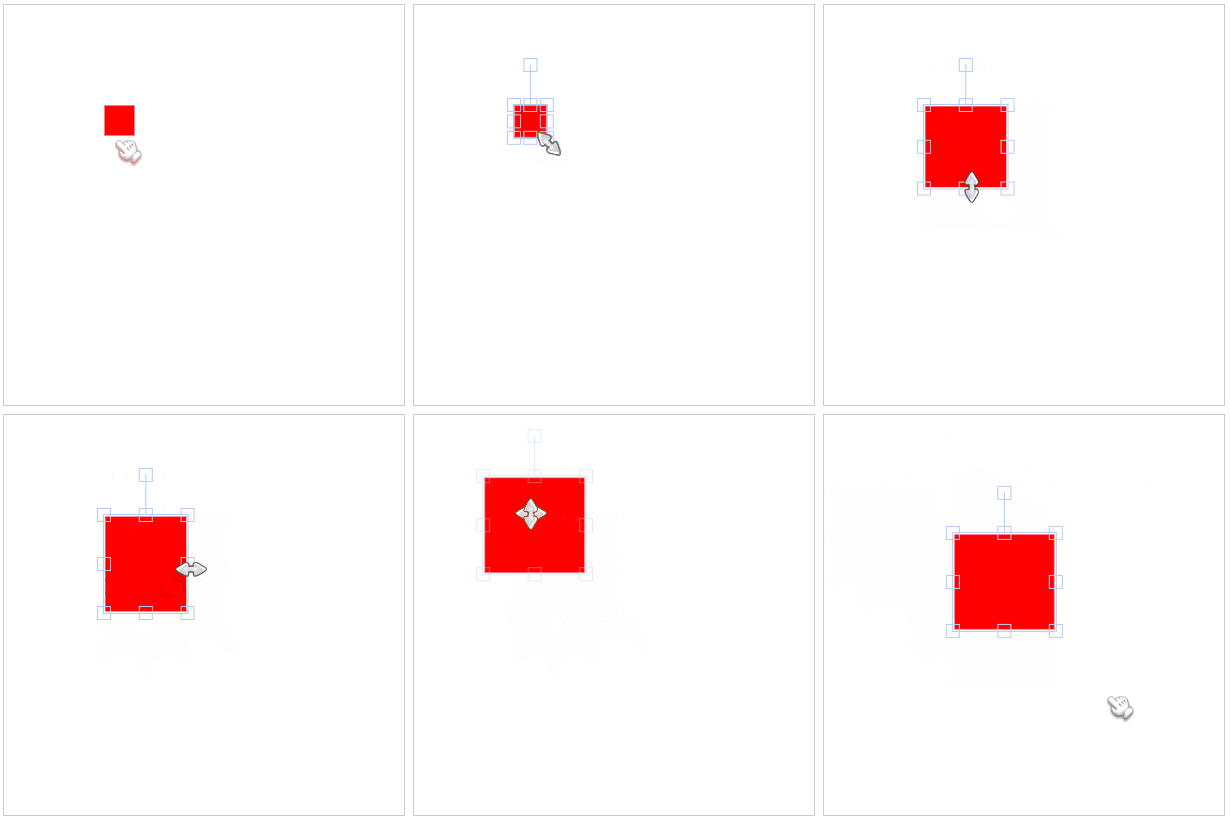
基础版就是“起步”章节所说的那个例子。
<template>
  <canvas width="400" height="400" id="canvas" style="border: 1px solid #ccc;"></canvas>
</template>
<script setup>
import { onMounted } from 'vue'
import { fabric } from 'fabric' // 引入 fabric
function init() {
  const canvas = new fabric.Canvas('canvas') // 这里传入的是canvas元素的id
  // 创建一个长方形
  const rect = new fabric.Rect({
    top: 100, // 距离容器顶部 100px
    left: 100, // 距离容器左侧 100px
    width: 30, // 矩形宽度 30px
    height: 30, // 矩形高度 30px
    fill: 'red' // 填充 红色
  canvas.add(rect) // 将矩形添加到 canvas 画布里
onMounted(() => {
  init()
</script>
不可交互

<template>
  <canvas width="400" height="400" id="canvas" style="border: 1px solid #ccc;"></canvas>
</template>
<script setup>
import { onMounted } from 'vue'
import { fabric } from 'fabric' // 引入 fabric
function init() {
  // 使用 StaticCanvas 创建一个不可操作的画布
  const canvas = new fabric.StaticCanvas('canvas') // 这里传入的是canvas元素的id
  // 创建一个长方形
  const rect = new fabric.Rect({
    top: 100, // 距离容器顶部 100px
    left: 100, // 距离容器左侧 100px
    width: 30, // 矩形宽度 30px
    height: 30, // 矩形高度 30px
    fill: 'red' // 填充 红色
  canvas.add(rect) // 将矩形添加到 canvas 画布里
onMounted(() => {
  init()
</script>
创建不可交互的画布,其实只需把
new fabric.Canvas
改成
new fabric.StaticCanvas
即可。
在js设定画布参数
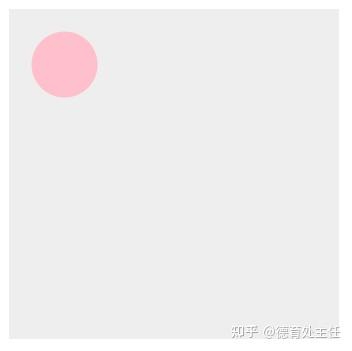
<template>
  <canvas id="canvas"></canvas>
</template>
<script setup>
import { onMounted } from 'vue'
import { fabric } from 'fabric' // 引入 fabric
function init() {
  const canvas = new fabric.Canvas('canvas', {
    width: 300, // 画布宽度
    height: 300, // 画布高度
    backgroundColor: '#eee' // 画布背景色
  // 圆形
  const circle = new fabric.Circle({
    radius: 30, // 圆的半径
    top: 20, // 距离容器顶部 20px
    left: 20, // 距离容器左侧 20px
    fill: 'pink' // 填充 粉色
  canvas.add(circle) // 将圆形添加到 canvas 画布里
onMounted(() => {
  init()
</script>
new fabric.Canvas
的第二个参数是用来设置画布基础功能的。更多配置参数可以查看
『官方文档』
。
使用背景图

<template>
  <canvas width="400" height="400" id="canvas" style="border: 1px solid #ccc;"></canvas>
</template>
<script setup>
import { onMounted } from 'vue'
import { fabric } from 'fabric'
function init() {
  const canvas = new fabric.Canvas('canvas')
  // 设置背景图
  // 参数1:背景图资源(可以引入本地,也可以使用网络图)
  // 参数2:设置完背景图执行以下重新渲染canvas的操作,这样背景图就会展示出来了
  canvas.setBackgroundImage(
    'https://p6-juejin.byteimg.com/tos-cn-i-k3u1fbpfcp/27d1b4e5f8824198b6d51a2b1c2d0d75~tplv-k3u1fbpfcp-zoom-crop-mark:400:400:400:400.awebp',
    canvas.renderAll.bind(canvas)
onMounted(() => {
  init()
</script>
setBackgroundImage
这个很好懂,设置背景图片。
需要注意的是,在
Fabric.js
里使用
gif
只会渲染第一帧。
旋转背景图

<template>
  <canvas width="400" height="400" id="canvas" style="border: 1px solid #ccc;"></canvas>
</template>
<script setup>
import { onMounted } from 'vue'
import { fabric } from 'fabric'
function init() {
  const canvas = new fabric.Canvas('canvas')
  // 设置背景图
  // 参数1:背景图资源(可以引入本地,也可以使用网络图)
  // 参数2:设置完背景图执行以下重新渲染canvas的操作,这样背景图就会展示出来了
  canvas.setBackgroundImage(
    'https://p6-juejin.byteimg.com/tos-cn-i-k3u1fbpfcp/27d1b4e5f8824198b6d51a2b1c2d0d75~tplv-k3u1fbpfcp-zoom-crop-mark:400:400:400:400.awebp',
    canvas.renderAll.bind(canvas),
      angle: 15 // 旋转背景图
onMounted(() => {
  init()
</script>
setBackgroundImage
还有第三个参数,嘿嘿嘿没想到吧
第三个参数除了旋转,还可以设置
scaleX
、
scaleY
之类的操作。
更多设置可以查看 『文档』 。
但这个例子存在一个问题,如果图片的尺寸没
canvas
容器大,就填不满,否则就溢出(只显示图片的局部)。
解决方案请看下一个案例。
拉伸背景图

<template>
  <canvas width="400" height="400" id="canvas" style="border: 1px solid #ccc;"></canvas>
</template>
<script setup>
import { onMounted } from 'vue'
import { fabric } from 'fabric'
function init() {
  const canvas = new fabric.Canvas('canvas')
  // fabric.Image.fromURL:加载图片的api
  // 第一个参数:图片地址(可以是本地的,也可以是网络图)
  // 第二个参数:图片加载的回调函数
  fabric.Image.fromURL(
    'https://p6-juejin.byteimg.com/tos-cn-i-k3u1fbpfcp/27d1b4e5f8824198b6d51a2b1c2d0d75~tplv-k3u1fbpfcp-zoom-crop-mark:400:400:400:400.awebp',
    (img) => {
      // 设置背景图
      canvas.setBackgroundImage(
        img,
        canvas.renderAll.bind(canvas),
          scaleX: canvas.width / img.width, // 计算出图片要拉伸的宽度
          scaleY: canvas.height / img.height // 计算出图片要拉伸的高度
onMounted(() => {
  init()
</script>
这个例子使用了
fabric.Image.fromURL
这个
api
来加载图片,第一个参数是图片地址,第二个参数是回调函数。
拿到图片的参数和画布的宽高进行计算,从而使图片充满全屏。
重复背景图

<template>
  <canvas width="400" height="400" id="canvas" style="border: 1px solid #ccc;"></canvas>
</template>
<script setup>
import { onMounted } from 'vue'
import { fabric } from 'fabric'
function init() {
  const canvas = new fabric.Canvas('canvas')
  canvas.setBackgroundColor({
    source: 'https://p6-juejin.byteimg.com/tos-cn-i-k3u1fbpfcp/27d1b4e5f8824198b6d51a2b1c2d0d75~tplv-k3u1fbpfcp-zoom-crop-mark:40:40:40:40.awebp',
    repeat: 'repeat'
  }, canvas.renderAll.bind(canvas))
onMounted(() => {
  init()
</script>
这个例子使用的图片尺寸是比较小的,所以在
setBackgroundColor
的第3个参数中设置了
repeat: 'repeat'
,表示重复渲染图片。
重叠影象

<template>
  <canvas width="400" height="375" id="canvas" style="border: 1px solid #ccc;"></canvas>
</template>
<script setup>
import { onMounted } from 'vue'
import { fabric } from 'fabric'
import jailCellBars from '@/assets/images/jail_cell_bars.png' // 引入背景图
function init() {
  const canvas = new fabric.Canvas('canvas')
  canvas.add(
    new fabric.Circle({
      radius: 30, // 圆形半径
      fill: '#f55',
      top: 70,
      left: 70
  // 设置覆盖图像的画布
  canvas.setOverlayImage( // setOverlayImage(image, callback, optionsopt)
    jailCellBars, // 图片,script开头import进来的
    canvas.renderAll.bind(canvas)
onMounted(() => {
  init()
</script>
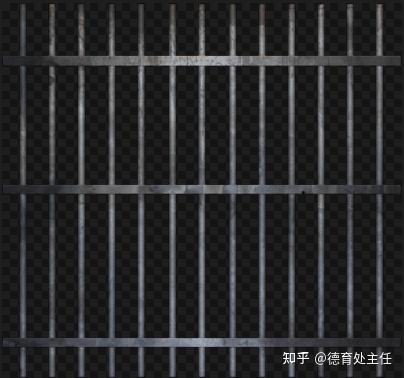
值得注意的2点:
-
使用
canvas.setOverlayImage代替原本的canvas.setBackgroundImage。 -
所使用的图片最好是带透明层的
png,这样就能展示案例所示的效果,背景图叠在图案元素上面。
基础图形
Fabric.js
提供了以下几种基础图形:
矩形

<template>
  <canvas width="400" height="375" id="canvas" style="border: 1px solid #ccc;"></canvas>
</template>
<script setup>
import { onMounted } from 'vue'
import { fabric } from 'fabric'
function init() {
  const canvas = new fabric.Canvas('canvas') // 绑定canvas,传入id
  const rect = new fabric.Rect({
    top: 100, // 距离容器顶部 100px
    left: 100, // 距离容器左侧 100px
    fill: 'orange', // 填充 橙色
    width: 100, // 宽度 100px
    height: 100 // 高度 100px
  // 将矩形添加到画布中
  canvas.add(rect)
onMounted(() => {
  init()
</script>
使用
new fabric.Rect
创建
矩形
。
圆角矩形

<template>
  <canvas width="400" height="375" id="canvas" style="border: 1px solid #ccc;"></canvas>
</template>
<script setup>
import { onMounted } from 'vue'
import { fabric } from 'fabric'
function init() {
  const canvas = new fabric.Canvas('canvas') // 绑定canvas,传入id
  const rect = new fabric.Rect({
    top: 100, // 距离容器顶部 100px
    left: 100, // 距离容器左侧 100px
    fill: 'orange', // 填充 橙色
    width: 100, // 宽度 100px
    height: 100, // 高度 100px
    rx: 20, // x轴的半径
    ry: 20 // y轴的半径
  // 将矩形添加到画布中
  canvas.add(rect)
onMounted(() => {
  init()
</script>
画圆角矩形,需要添加
rx
和
ry
,这两个属性的值可以不一样,如果知道
css
圆角的原理,其实对
rx
和
ry
不难理解。
自己修改一下这两个值看看效果理解会更深刻。
圆形

<template>
  <canvas width="400" height="375" id="canvas" style="border: 1px solid #ccc;"></canvas>
</template>
<script setup>
import { onMounted } from 'vue'
import { fabric } from 'fabric'
function init() {
  const canvas = new fabric.Canvas('canvas')
  const circle = new fabric.Circle({
    top: 100,
    left: 100,
    radius: 50, // 圆的半径 50
    fill: 'green'
  canvas.add(circle)
onMounted(() => {
  init()
</script>
使用
new fabric.Circle
创建
圆形
。
圆形需要使用
radius
设置半径大小。
椭圆形

<template>
  <canvas width="400" height="375" id="canvas" style="border: 1px solid #ccc;"></canvas>
</template>
<script setup>
import { onMounted } from 'vue'
import { fabric } from 'fabric'
function init() {
  const canvas = new fabric.Canvas('canvas')
  const ellipse = new fabric.Ellipse({
    top: 20,
    left: 20,
    rx: 70,
    ry: 30,
    fill: 'hotpink'
  canvas.add(ellipse)
onMounted(() => {
  init()
</script>
需要使用
new fabric.Ellipse
创建
椭圆
。
和圆形不同,椭圆不需要设置
radius
,但要设置
rx
和
ry
。
-
当
rx>ry:椭圆是横着的 -
当
rx<ry:椭圆是竖着的 -
当
rx=ry: 看上去就是个圆形
三角形

<template>
  <canvas width="400" height="375" id="canvas" style="border: 1px solid #ccc;"></canvas>
</template>
<script setup>
import { onMounted } from 'vue'
import { fabric } from 'fabric'
function init() {
  const canvas = new fabric.Canvas('canvas')
  const triangle = new fabric.Triangle({
    top: 100,
    left: 100,
    width: 80, // 底边长度
    height: 100, // 底边到对角的距离
    fill: 'blue'
  canvas.add(triangle)
onMounted(() => {
  init()
</script>
使用
new fabric.Triangle
创建三角形,三角形是需要给定 “底和高” 的。
线段

<template>
  <canvas width="400" height="375" id="canvas" style="border: 1px solid #ccc;"></canvas>
</template>
<script setup>
import { onMounted } from 'vue'
import { fabric } from 'fabric'
function init() {
  const canvas = new fabric.Canvas('canvas')
  const line = new fabric.Line(
      10, 10, // 起始点坐标
      200, 300 // 结束点坐标
      stroke: 'red', // 笔触颜色
  canvas.add(line)
onMounted(() => {
  init()
</script>
使用
new fabric.Line
创建线段。
new fabric.Line
需要传入2个参数。
- 第一个参数是 数组 ,数组需要传4个值, 前2个值是起始坐标的x和y,后2个值是结束坐标的x和y 。
-
第二个参数是
线段的样式
,要设置线段的颜色,需要使用
stroke。
折线

<template>
  <canvas width="400" height="375" id="canvas" style="border: 1px solid #ccc;"></canvas>
</template>
<script setup>
import { onMounted } from 'vue'
import { fabric } from 'fabric'
function init() {
  const canvas = new fabric.Canvas('canvas')
  const polyline = new fabric.Polyline([
    {x: 30, y: 30},
    {x: 150, y: 140},
    {x: 240, y: 150},
    {x: 100, y: 30}
  ], {
    fill: 'transparent', // 如果画折线,需要填充透明
    stroke: '#6639a6', // 线段颜色:紫色
    strokeWidth: 5 // 线段粗细 5
  canvas.add(polyline)
onMounted(() => {
  init()
</script>
使用
new fabric.Polyline
创建
线段
。
new fabric.Polyline
需要传入2个参数。
- 第一个参数是数组,描述线段的每一个点
- 第二个参数用来描述线段样式
需要注意的是,
fill
设置成透明才会显示成线段,如果不设置,会默认填充黑色,如下图所示:

你也可以填充自己喜欢的颜色,
new fabric.Polyline
是不会自动把
起始点
和
结束点
自动闭合起来的。
多边形

<template>
  <canvas width="400" height="375" id="canvas" style="border: 1px solid #ccc;"></canvas>
</template>
<script setup>
import { onMounted } from 'vue'
import { fabric } from 'fabric'
function init() {
  const canvas = new fabric.Canvas('canvas')
  const polygon = new fabric.Polygon([
    {x: 30, y: 30},
    {x: 150, y: 140},
    {x: 240, y: 150},
    {x: 100, y: 30}
  ], {
    fill: '#ffd3b6', // 填充色
    stroke: '#6639a6', // 线段颜色:紫色
    strokeWidth: 5 // 线段粗细 5
  canvas.add(polygon)
onMounted(() => {
  init()
</script>
使用
new fabric.Polygon
绘制多边形,用法和
new fabric.Polyline
差不多,但最大的不同点是
new fabric.Polygon
会自动把
起始点
和
结束点
连接起来。
绘制路径

<template>
  <canvas width="400" height="375" id="canvas" style="border: 1px solid #ccc;"></canvas>
</template>
<script setup>
import { onMounted } from 'vue'
import { fabric } from 'fabric'
function init() {
  const canvas = new fabric.Canvas('canvas')
  // 绘制路径
  const path = new fabric.Path('M 0 0 L 200 100 L 170 200 z')
  path.set({
    top: 50, // 距离容器顶部距离 50px
    left: 50, // 距离容器左侧距离 50px
    fill: 'hotpink', // 填充 亮粉色
    opacity: 0.5, // 不透明度 50%
    stroke: 'black', // 描边颜色 黑色
    strokeWidth: 10 // 描边粗细 10px
  canvas.add(path)
onMounted(() => {
  init()
</script>
使用
new fabric.Path
创建路径。
- M:可以理解为新的起始点x,y坐标
- L:每个折点的x,y坐标
- z:自动闭合(自动把结束点和起始点连接起来)
文本
Fabric.js
有3类跟文本相关的
api
。
- 普通文本
- 可编辑文本
- 文本框
普通文本 Text

<template>
  <canvas width="400" height="400" id="canvas" style="border: 1px solid #ccc;"></canvas>
</template>
<script setup>
import { onMounted } from 'vue'
import { fabric } from 'fabric'
function init() {
  const canvas = new fabric.Canvas('canvas')
  const text = new fabric.Text('雷猴啊')
  canvas.add(text)
onMounted(() => {
  init()
</script>
使用
new fabric.Text
创建文本,传入第一个参数就是文本内容。
new fabric.Text
还支持第二个参数,可以设置文本样式,这方面内容将在下一章讲到,往下滑动页面就能见到。
可编辑文本 IText
<template>
  <canvas width="400" height="400" id="canvas" style="border: 1px solid #ccc;"></canvas>
</template>
<script setup>
import { onMounted } from 'vue'
import { fabric } from 'fabric'
function init() {
  const canvas = new fabric.Canvas('canvas')
  const itext = new fabric.IText('雷猴啊')
  canvas.add(itext)
onMounted(() => {
  init()
</script>
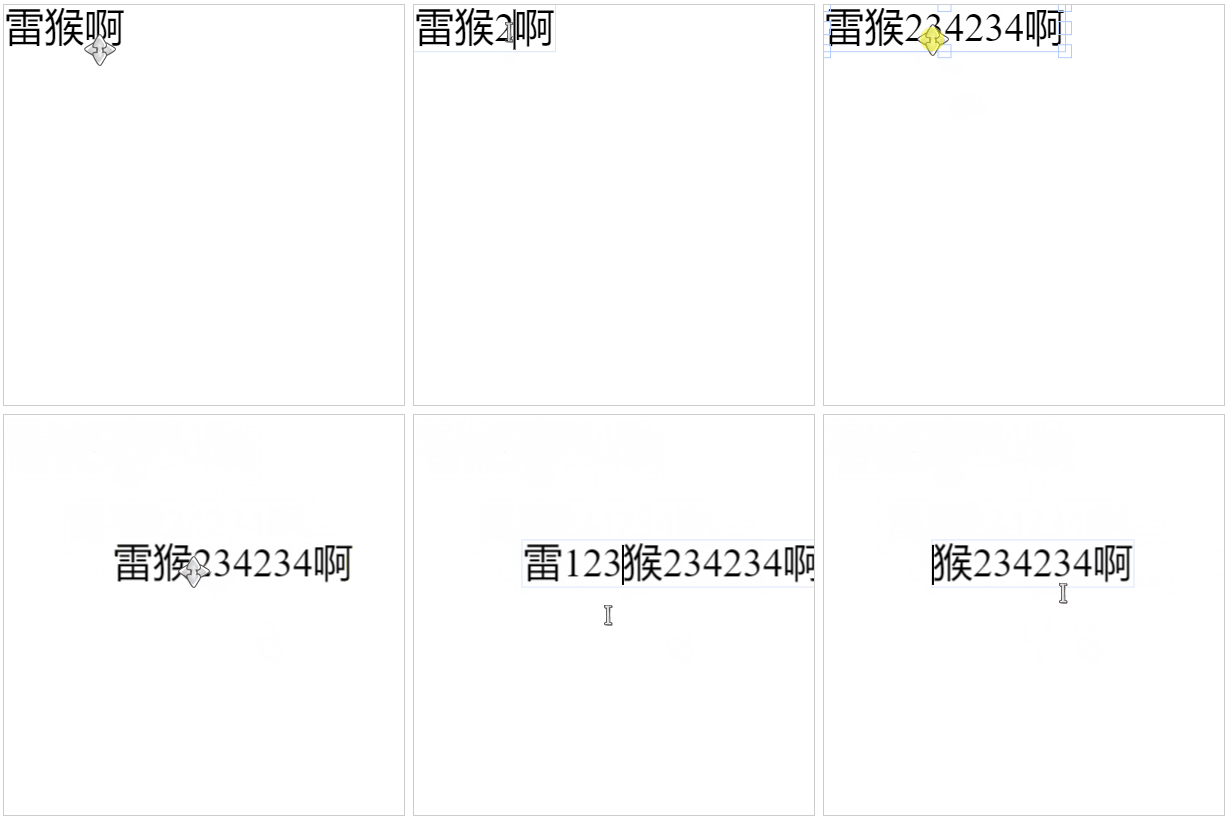
使用
new fabric.IText
可以创建
可编辑文本
,用法和
new fabric.Text
一样。
IText
比
Text
多了个大写 “I” 在首字母上。
文本框 Textbox

<template>
  <canvas width="400" height="400" id="canvas" style="border: 1px solid #ccc;"></canvas>
</template>
<script setup>
import { onMounted } from 'vue'
import { fabric } from 'fabric'
function init() {
  const canvas = new fabric.Canvas('canvas')
  const textbox = new fabric.Textbox('Lorum ipsum dolor sit amet', {
    width: 250
  canvas.add(textbox)
onMounted(() => {
  init()
</script>
使用
new fabric.Textbox
可以创建文本框。
new fabric.Textbox
第二个参数是对象,使用
width
可以设定了文本框的宽度,文本内容超过设定的宽度会自动换行。
new fabric.Textbox
的内容同样是
可编辑
的。
基础样式
图形常用样式
其实样式属性是非常多的,这里只列举常用的属性,其他属性可以自行查阅官方文档。
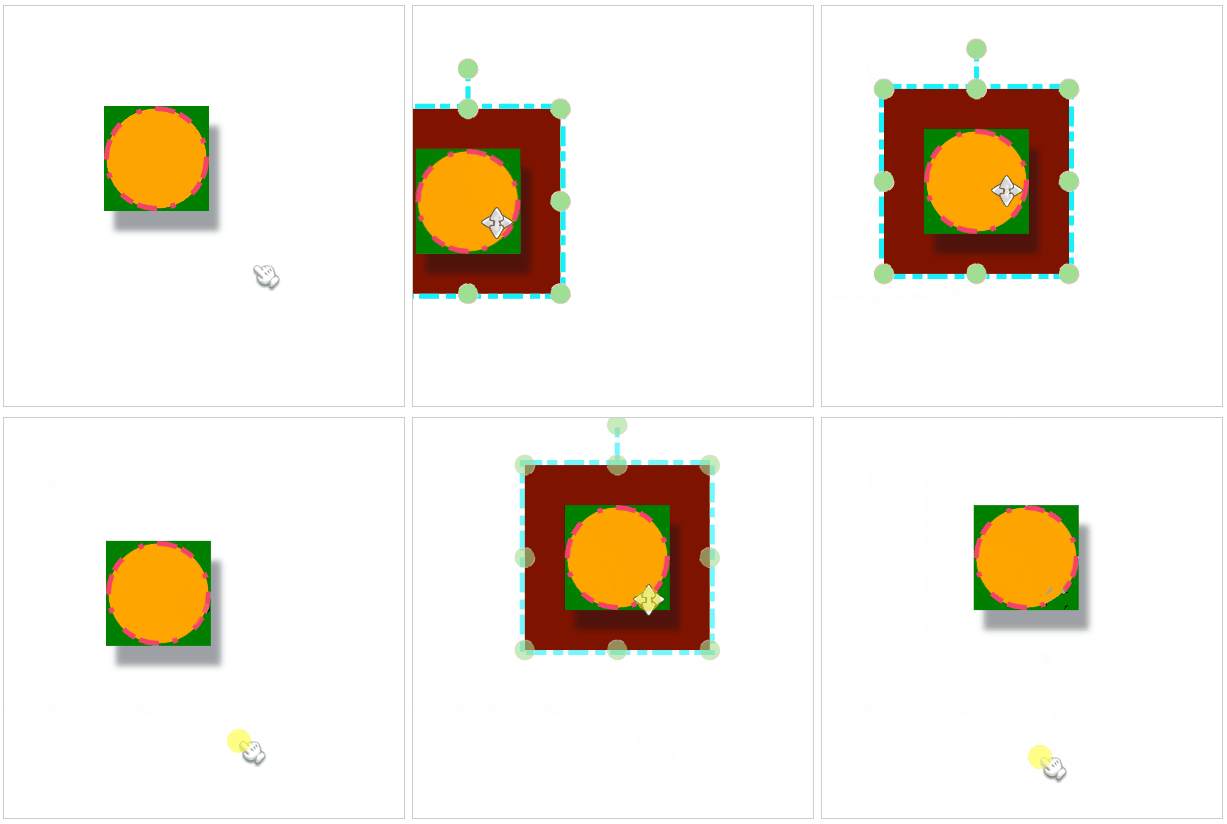
本例以圆形为例(不要在意配色,我随便输入颜色演示一下)
<template>
  <canvas width="400" height="400" id="canvas" style="border: 1px solid #ccc;"></canvas>
</template>
<script setup>
import { onMounted } from 'vue'
import { fabric } from 'fabric'
function init() {
  const canvas = new fabric.Canvas('canvas')
  const circle = new fabric.Circle({
    top: 100,
    left: 100,
    radius: 50, // 半径:50px
    backgroundColor: 'green', // 背景色:绿色
    fill: 'orange', // 填充色:橙色
    stroke: '#f6416c', // 边框颜色:粉色
    strokeWidth: 5, // 边框粗细:5px
    strokeDashArray: [20, 5, 14], // 边框虚线规则:填充20px 空5px 填充14px 空20px 填充5px ……
    shadow: '10px 20px 6px rgba(10, 20, 30, 0.4)', // 投影:向右偏移10px,向下偏移20px,羽化6px,投影颜色及透明度
    transparentCorners: false, // 选中时,角是被填充了。true 空心;false 实心
    borderColor: '#16f1fc', // 选中时,边框颜色:天蓝
    borderScaleFactor: 5, // 选中时,边的粗细:5px
    borderDashArray: [20, 5, 10, 7], // 选中时,虚线边的规则
    cornerColor: "#a1de93", // 选中时,角的颜色是 青色
    cornerStrokeColor: 'pink', // 选中时,角的边框的颜色是 粉色
    cornerStyle: 'circle', // 选中时,叫的属性。默认rect 矩形;circle 圆形
    cornerSize: 20, // 选中时,角的大小为20
    cornerDashArray: [10, 2, 6], // 选中时,虚线角的规则
    selectionBackgroundColor: '#7f1300', // 选中时,选框的背景色:朱红
    padding: 40, // 选中时,选择框离元素的内边距:40px
    borderOpacityWhenMoving: 0.6, // 当对象活动和移动时,对象控制边界的不透明度
  canvas.add(circle)
onMounted(() => {
  init()
</script>
上面这个例子的样式分为 正常状态 和 被选中状态 ,详情请看代码注释。
文本常用样式
<template>
  <canvas width="400" height="400" id="canvas" style="border: 1px solid #ccc;"></canvas>
</template>
<script setup>
import { onMounted } from 'vue'
import { fabric } from 'fabric'
function init() {
  const canvas = new fabric.Canvas('canvas')
  const text = new fabric.Text('雷猴', {
    top: 40,
    left: 40,
    fontSize: 120,
    backgroundColor: 'green', // 背景色:绿色
    fill: 'orange', // 填充色:橙色
    stroke: '#f6416c', // 边框颜色:粉色
    strokeWidth: 3, // 边框粗细:3px
    strokeDashArray: [20, 5, 14], // 边框虚线规则:填充20px 空5px 填充14px 空20px 填充5px ……
    shadow: '10px 20px 6px rgba(10, 20, 30, 0.4)', // 投影:向右偏移10px,向下偏移20px,羽化6px,投影颜色及透明度
    transparentCorners: false, // 选中时,角是被填充了。true 空心;false 实心
    borderColor: '#16f1fc', // 选中时,边框颜色:天蓝
    borderScaleFactor: 5, // 选中时,边的粗细:5px
    borderDashArray: [20, 5, 10, 7], // 选中时,虚线边的规则
    cornerColor: "#a1de93", // 选中时,角的颜色是 青色
    cornerStrokeColor: 'pink', // 选中时,角的边框的颜色是 粉色
    cornerStyle: 'circle', // 选中时,叫的属性。默认rect 矩形;circle 圆形
    cornerSize: 20, // 选中时,角的大小为20
    cornerDashArray: [10, 2, 6], // 选中时,虚线角的规则
    selectionBackgroundColor: '#7f1300', // 选中时,选框的背景色:朱红
    padding: 40, // 选中时,选择框离元素的内边距:40px
    borderOpacityWhenMoving: 0.6, // 当对象活动和移动时,对象控制边界的不透明度
  canvas.add(text)
onMounted(() => {
  init()
</script>
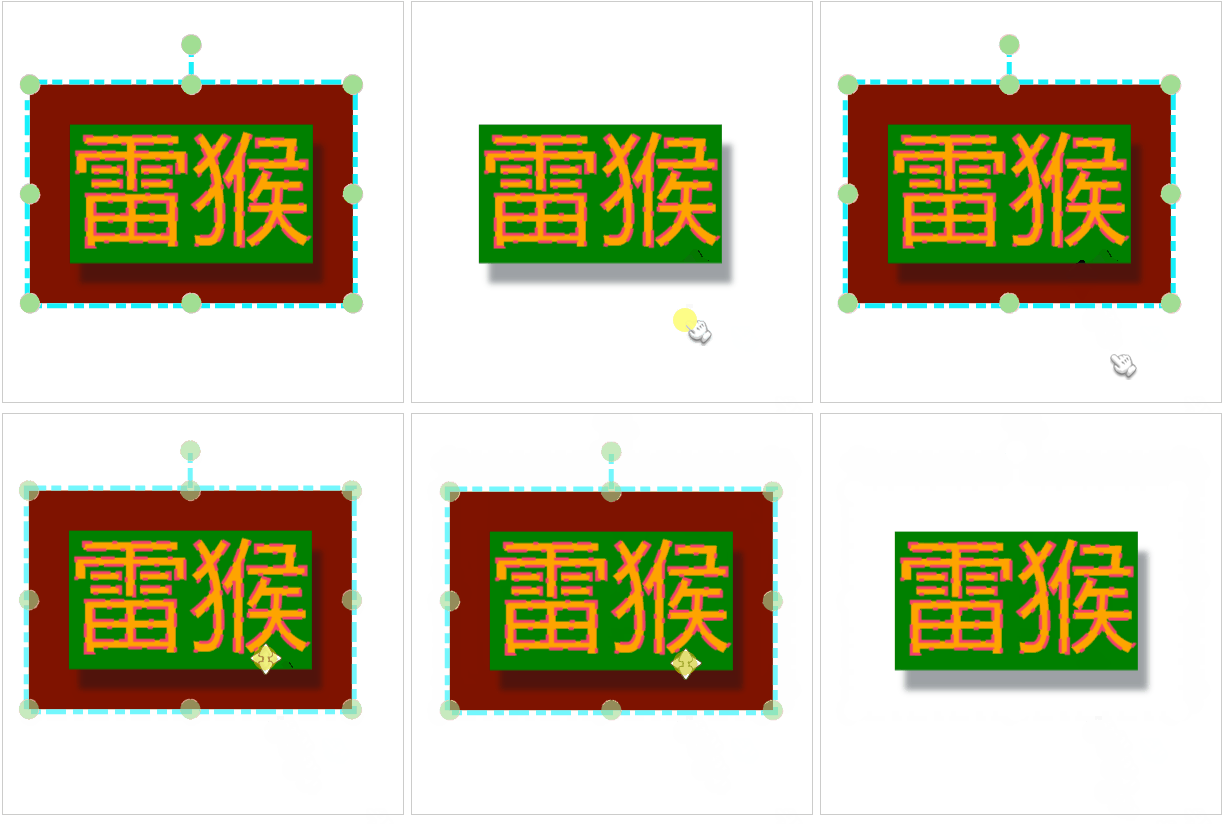
除此之外,还可以配置 上划线 、 下划线 、 删除线 、 左对齐 、 右对齐 、 居中对齐 、 行距 等。

<template>
  <canvas width="600" height="400" id="canvas" style="border: 1px solid #ccc;"></canvas>
</template>
<script setup>
import { onMounted } from 'vue'
import { fabric } from 'fabric'
function init() {
  const canvas = new fabric.Canvas('canvas')
  // 上划线
  const overline = new fabric.Text('上划线', {
    top: 30,
    left: 10,
    fontSize: 20,
    overline: true, // 上划线
  // 下划线
  const underline = new fabric.Text('下划线', {
    top: 30,
    left: 100,
    fontSize: 20,
    underline: true, // 下划线
  // 删除线
  const linethrough = new fabric.Text('删除线', {
    top: 30,
    left: 200,
    fontSize: 20,
    linethrough: true, // 删除线
  // 左对齐
  const msg1 = '左\n左左\n左对齐'
  const left = new fabric.Text(msg1, {
    top: 100,
    left: 10,
    fontSize: 16,
    textAlign: 'left', // 左对齐
  // 居中对齐
  const msg2 = '中\n中中\n居中对齐'
  const center = new fabric.Text(msg2, {
    top: 100,
    left: 100,
    fontSize: 16,
    textAlign: 'center',// 居中对齐
  // 右对齐
  const msg3 = '右\n右右\n右对齐'
  const right = new fabric.Text(msg3, {
    top: 100,
    left: 200,
    fontSize: 16,
    textAlign: 'right', // 右对齐
  // 文本内容
  const msg4 = "Lorem ipsum dolor sit amet,\nconsectetur adipisicing elit,\nsed do eiusmod tempor incididunt\nut labo"
  const lineHeight1 = new fabric.Text(msg4, {
    top: 250,
    left: 10,
    fontSize: 16,
    lineHeight: 1, // 行高
  const lineHeight2 = new fabric.Text(msg4, {
    top: 250,
    left: 300,
    fontSize: 16,
    lineHeight: 2, // 行高
  canvas.add(
    overline,
    underline,
    linethrough,
    left,
    center,
    right,
    lineHeight1,
    lineHeight2
onMounted(() => {
  init()
</script>
上面的上划线、下划线、删除线的配置,可以同时使用。
渐变
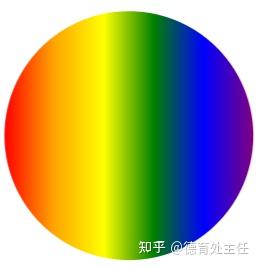
线性渐变
<template>
  <canvas width="600" height="600" id="canvas" style="border: 1px solid #ccc;"></canvas>
</template>
<script setup>
import { onMounted } from 'vue'
import { fabric } from 'fabric'
function init() {
  let canvas = new fabric.Canvas('canvas') // 实例化fabric,并绑定到canvas元素上
  let circle = new fabric.Circle({
    left: 100,
    top: 100,
    radius: 50,
  // 线性渐变
  let gradient = new fabric.Gradient({
    type: 'linear', // linear or radial
    gradientUnits: 'pixels', // pixels or pencentage 像素 或者 百分比
    coords: { x1: 0, y1: 0, x2: circle.width, y2: 0 }, // 至少2个坐标对(x1,y1和x2,y2)将定义渐变在对象上的扩展方式
    colorStops:[ // 定义渐变颜色的数组
      { offset: 0, color: 'red' },
      { offset: 0.2, color: 'orange' },
      { offset: 0.4, color: 'yellow' },
      { offset: 0.6, color: 'green' },
      { offset: 0.8, color: 'blue' },
      { offset: 1, color: 'purple' },
  circle.set('fill', gradient);
  canvas.add(circle)
onMounted(() => {
  init()
</script>
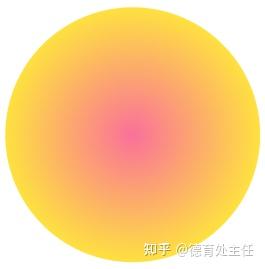
径向渐变
<template>
  <canvas width="600" height="600" id="canvas" style="border: 1px solid #ccc;"></canvas>
</template>
<script setup>
import { onMounted } from 'vue'
import { fabric } from 'fabric'
function init() {
  let canvas = new fabric.Canvas('canvas')  // 实例化fabric,并绑定到canvas元素上
  let circle = new fabric.Circle({
    left: 100,
    top: 100,
    radius: 50,
  let gradient = new fabric.Gradient({
    type: 'radial',
    coords: {
      r1: 50, // 该属性仅径向渐变可用,外圆半径
      r2: 0, // 该属性仅径向渐变可用,外圆半径
      x1: 50, // 焦点的x坐标
      y1: 50, // 焦点的y坐标
      x2: 50, // 中心点的x坐标
      y2: 50, // 中心点的y坐标
    colorStops: [
      { offset: 0, color: '#fee140' },
      { offset: 1, color: '#fa709a' }
  circle.set('fill', gradient);
  canvas.add(circle)
onMounted(() => {
  init()
</script>
r1
、
r2
、
x1
、
y1
、
x2
、
y2
这几个参数可以自己修改值然后看看效果,自己亲手改一下会理解得更深刻。
使用图片
方法1:使用HTML的图片
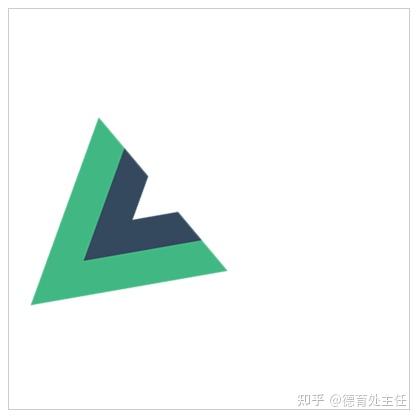
<template>
    <canvas width="400" height="400" id="canvas" style="border: 1px solid #ccc;"></canvas>
    <img src="@/assets/logo.png" id="logo">
  </div>
</template>
<script setup>
import { onMounted } from 'vue'
import { fabric } from 'fabric'
function init() {
  const canvas = new fabric.Canvas('canvas')
  const imgElement = document.getElementById('logo')
  imgElement.onload = function() {
    let imgInstance = new fabric.Image(imgElement, {
      left: 100,
      top: 100,
      width: 200,
      height: 200,
      angle: 50, // 旋转
    canvas.add(imgInstance)
onMounted(() => {
  init()
</script>
<style>
#logo {
  display: none;
</style>
需要使用
onload
方法监听图片是否加载完成。
只有在图片完全加载后再添加到画布上才能展示出来。
使用该方法,如果不想在画布外展示图片,需要使用
display: none;
把图片隐藏起来。
方法2:使用js引入
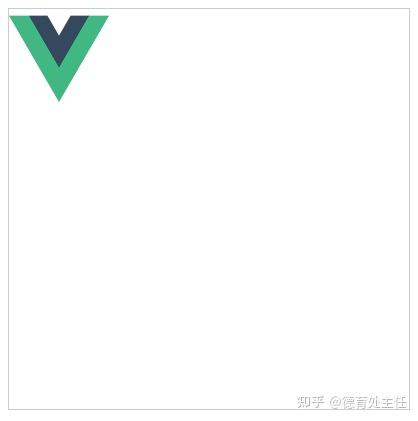
<template>
    <canvas width="400" height="400" id="canvas" style="border: 1px solid #ccc;"></canvas>
  </div>
</template>
<script setup>
import { onMounted } from 'vue'
import { fabric } from 'fabric'
import logo from '@/assets/logo.png' // 引入图片
function init() {
  const canvas = new fabric.Canvas('canvas')
  fabric.Image.fromURL(logo, oImg => {
    oImg.scale(0.5) // 缩放
    canvas.add(oImg) // 将图片加入到画布
onMounted(() => {
  init()
</script>
使用
fabric.Image.fromURL
加载图片。
第一个参数是图片资源,可以放入本地图片,也可以放网络图片;
第二个参数是回调函数,图片加载完就可以对图片对象进行操作。
图片滤镜

<template>
    <canvas width="500" height="500" id="canvas" style="border: 1px solid #ccc;"></canvas>
  </div>
</template>
<script setup>
import { onMounted } from 'vue'
import { fabric } from 'fabric'
import gwen from '@/assets/images/gwen-spider-verse-ah.jpg'
function init() {
  const canvas = new fabric.Canvas('canvas')
  fabric.Image.fromURL(gwen, img => {
    img.scale(0.5) // 图片缩小50%
    canvas.add(img)
  // 单个滤镜
  fabric.Image.fromURL(gwen, img => {
    img.scale(0.5) // 图片缩小50%
    img.left = 250
    // 添加滤镜
    img.filters.push(new fabric.Image.filters.Grayscale())
    // 图片加载完成之后,应用滤镜效果
    img.applyFilters()
    canvas.add(img)
  // 叠加滤镜
  // “filters”属性是一个数组,我们可以用数组方法执行任何所需的操作:移除滤镜(pop,splice,shift),添加滤镜(push,unshift,splice),甚至可以组合多个滤镜。当我们调用 applyFilters 时,“filters”数组中存在的任何滤镜将逐个应用,所以让我们尝试创建一个既色偏又明亮(Brightness)的图像。
  fabric.Image.fromURL(gwen, img => {
    img.scale(0.5) // 图片缩小50%
    // 添加滤镜
    img.filters.push(
        new fabric.Image.filters.Grayscale(),
        new fabric.Image.filters.Sepia(), //色偏
        new fabric.Image.filters.Brightness({ brightness: 0.2 }) //亮度
    // 图片加载完成之后,应用滤镜效果
    img.applyFilters()
    img.set({
      left: 250,
      top: 250,
    canvas.add(img)
onMounted(() => {
  init()
</script>
给图片添加滤镜,
fabric.Image.fromURL
的回调函数里返回一个图片对象,图片对象可以使用
filters
添加滤镜。
fabric 内置滤镜
- BaseFilter 基本过滤器
- Blur 模糊
- Brightness 亮度
- ColorMatrix 颜色矩阵
- Contrast 对比
- Convolute 卷积
- Gamma 伽玛
- Grayscale 灰度
- HueRotation 色调旋转
- Invert 倒置
- Noise 噪音
- Pixelate 像素化
- RemoveColor 移除颜色
- Resize 调整大小
- Saturation 饱和
- Sepia 色偏
转换
旋转角度 angle

<template>
    <canvas width="500" height="500" id="canvas" style="border: 1px solid #ccc;"></canvas>
  </div>
</template>
<script setup>
import { onMounted } from 'vue'
import { fabric } from 'fabric'
function init() {
  const canvas = new fabric.Canvas('canvas')
  let triangle = new fabric.Triangle({
    top: 100,
    left: 100,
    width: 80,
    height: 100,
    fill: 'blue',
    angle: 30 // 旋转30度
  canvas.add(triangle)
onMounted(() => {
  init()
</script>
缩放 scaleX 和 scaleY

<template>
    <canvas width="500" height="500" id="canvas" style="border: 1px solid #ccc;"></canvas>
  </div>
</template>
<script setup>
import { onMounted } from 'vue'
import { fabric } from 'fabric'
function init() {
  const canvas = new fabric.Canvas('canvas')
  let triangle = new fabric.Triangle({
    top: 100,
    left: 100,
    width: 80,
    height: 100,
    fill: 'blue',
    scaleX: 2, // x轴方向放大2倍
    scaleY: 2 // y轴方向放大2倍
  canvas.add(triangle)
onMounted(() => {
  init()
</script>
反转 scaleX 和 scaleY
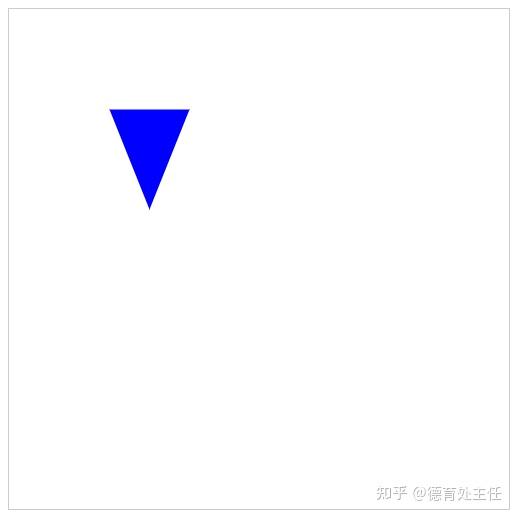
<template>
    <canvas width="500" height="500" id="canvas" style="border: 1px solid #ccc;"></canvas>
  </div>
</template>
<script setup>
import { onMounted } from 'vue'
import { fabric } from 'fabric'
function init() {
  const canvas = new fabric.Canvas('canvas')
  let triangle = new fabric.Triangle({
    top: 100,
    left: 100,
    width: 80,
    height: 100,
    fill: 'blue',
    scaleY: -1 // scale是负数时,图形会反转
  canvas.add(triangle)
onMounted(() => {
  init()
</script>
平移 top 和 left
可以直接设置元素的
top
和
left
进行平移。
可参照前面的例子。
分组
建组
<template>
    <canvas width="400" height="400" id="canvas" style="border: 1px solid #ccc;"></canvas>
  </div>
</template>
<script setup>
import { onMounted } from 'vue'
import { fabric } from 'fabric'
function init() {
  const canvas = new fabric.Canvas('canvas')
  // 椭圆
  const ellipse = new fabric.Ellipse({
    top: 20,
    left: 20,
    rx: 100,
    ry: 50,
    fill: '#ddd',
    originX: 'center', // 旋转x轴:left, right, center
    originY: 'center' // 旋转y轴:top, bottom, center
  // 文本
  const text = new fabric.Text('Hello World', {
    top: 40,
    left: 20,
    fontSize: 20,
    originX: "center",
    originY: "center"
  // 建组
  const group = new fabric.Group([ellipse, text], {
    top: 50, // 整组距离顶部100
    left: 100, // 整组距离左侧100
    angle: -10, // 整组旋转-10deg
  canvas.add(group)
onMounted(() => {
  init()
</script>
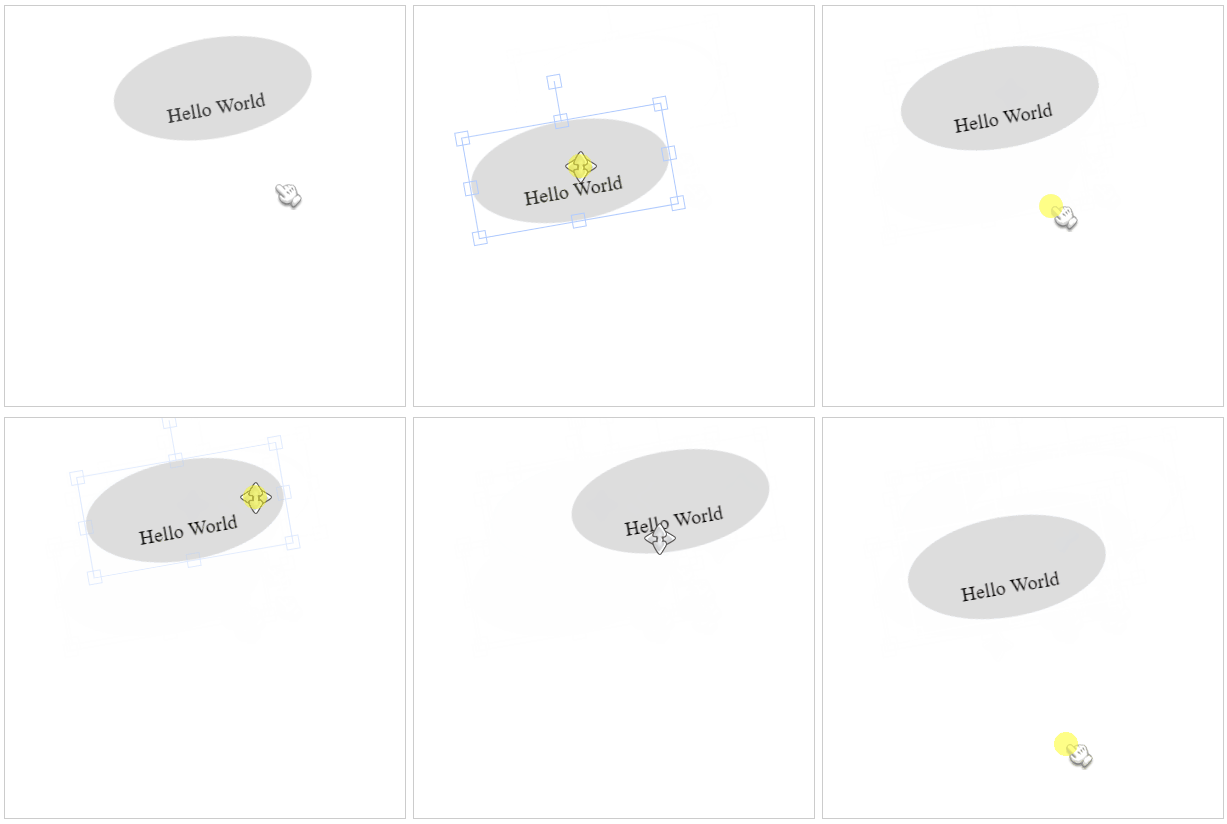
new fabric.Group
可以创建一个组(其实有点像 Photoshop 里面的组,把多个图层放在同一个组内,实现同步的操作,比如拖拽、缩放等)。
操作组
Fabric.js
的组提供了很多方法,这里列一些常用的:
-
getObjects()返回一组中所有对象的数组 -
size()所有对象的数量 -
contains()检查特定对象是否在group中 -
item()组中元素 -
forEachObject()遍历组中对象 -
add()添加元素对象 -
remove()删除元素对象 -
fabric.util.object.clone()克隆
我拿其中一个举例:
item()
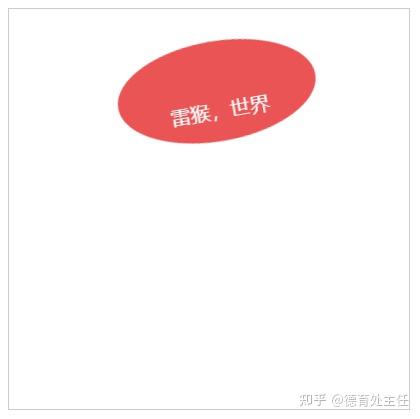
在上一个例子的基础上,把椭圆改成红色,把 “Hello World” 改成 “雷猴,世界”。
<template>
    <canvas width="400" height="400" id="canvas" style="border: 1px solid #ccc;"></canvas>
  </div>
</template>
<script setup>
import { onMounted } from 'vue'
import { fabric } from 'fabric'
function init() {
  const canvas = new fabric.Canvas('canvas')
  // 椭圆
  const ellipse = new fabric.Ellipse({
    top: 20,
    left: 20,
    rx: 100,
    ry: 50,
    fill: '#ddd',
    originX: 'center', // 旋转x轴:left, right, center
    originY: 'center' // 旋转y轴:top, bottom, center
  // 文本
  const text = new fabric.Text('Hello World', {
    top: 40,
    left: 20,
    fontSize: 20,
    originX: "center",
    originY: "center"
  // 建组
  const group = new fabric.Group([ellipse, text], {
    top: 50, // 整组距离顶部100
    left: 100, // 整组距离左侧100
    angle: -10, // 整组旋转-10deg
  // 控制第一个元素(椭圆)
  group.item(0).set('fill', '#ea5455')
  // 控制第二个元素(文本)
  group.item(1).set({
    text: '雷猴,世界',
    fill: '#fff'
  canvas.add(group)
onMounted(() => {
  init()
</script>
打散分组
<template>
    <button @click="ungroup">取消组</button>
    <canvas width="400" height="400" id="canvas" style="border: 1px solid #ccc;"></canvas>
  </div>
</template>
<script setup>
import { onMounted } from 'vue'
import { fabric } from 'fabric'
let canvas = null
// 初始化
function init() {
  canvas = new fabric.Canvas('canvas')
  // 椭圆
  const ellipse = new fabric.Ellipse({
    top: 20,
    left: 20,
    rx: 100,
    ry: 50,
    fill: '#ddd',
    originX: 'center', // 旋转x轴:left, right, center
    originY: 'center' // 旋转y轴:top, bottom, center
  // 文本
  const text = new fabric.Text('Hello World', {
    top: 40,
    left: 20,
    fontSize: 20,
    originX: "center",
    originY: "center"
  // 建组
  const group = new fabric.Group([ellipse, text], {
    top: 50, // 整组距离顶部100
    left: 100, // 整组距离左侧100
    angle: -10, // 整组旋转-10deg
  canvas.add(group)
// 取消组
function ungroup() {
  // 判断当前有没有选中元素,如果没有就不执行任何操作
  if (!canvas.getActiveObject()) {
    return
  // 判断当前是否选中组,如果不是,就不执行任何操作
  if (canvas.getActiveObject().type !== 'group') {
    return
  // 先获取当前选中的对象,然后打散
  canvas.getActiveObject().toActiveSelection()
onMounted(() => {
  init()
</script>
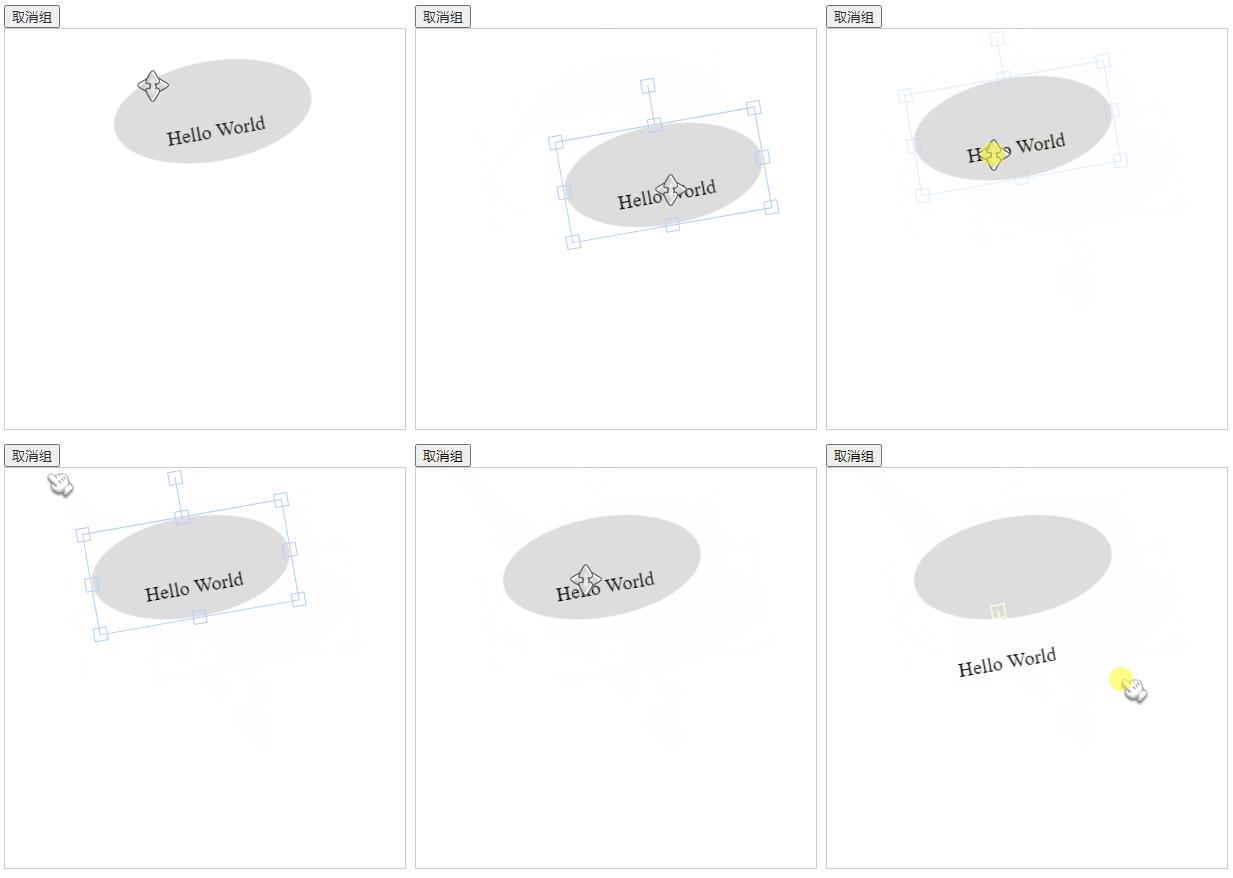
使用
canvas.getActiveObject()
可以获取画布当前选中的对象,然后再通过
toActiveSelection()
将组打散。
动画
绝对值动画
先别管什么
绝对值动画
和
相对值动画
,等学完这节再往下看就知道了。
本节是动画的基础用法。
<template>
    <canvas width="400" height="400" id="canvas" style="border: 1px solid #ccc;"></canvas>
  </div>
</template>
<script setup>
import { onMounted } from 'vue'
import { fabric } from 'fabric'
// 初始化
function init() {
  const canvas = new fabric.Canvas('canvas')
  const rect = new fabric.Rect({
    left: 100,
    top: 100,
    width: 100,
    height: 100,
    fill: 'red'
  // 设置矩形动画
  rect.animate('angle', "-50", {
    onChange:canvas.renderAll.bind(canvas), // 每次刷新的时候都会执行
  canvas.add(rect)
onMounted(() => {
  init()
</script>
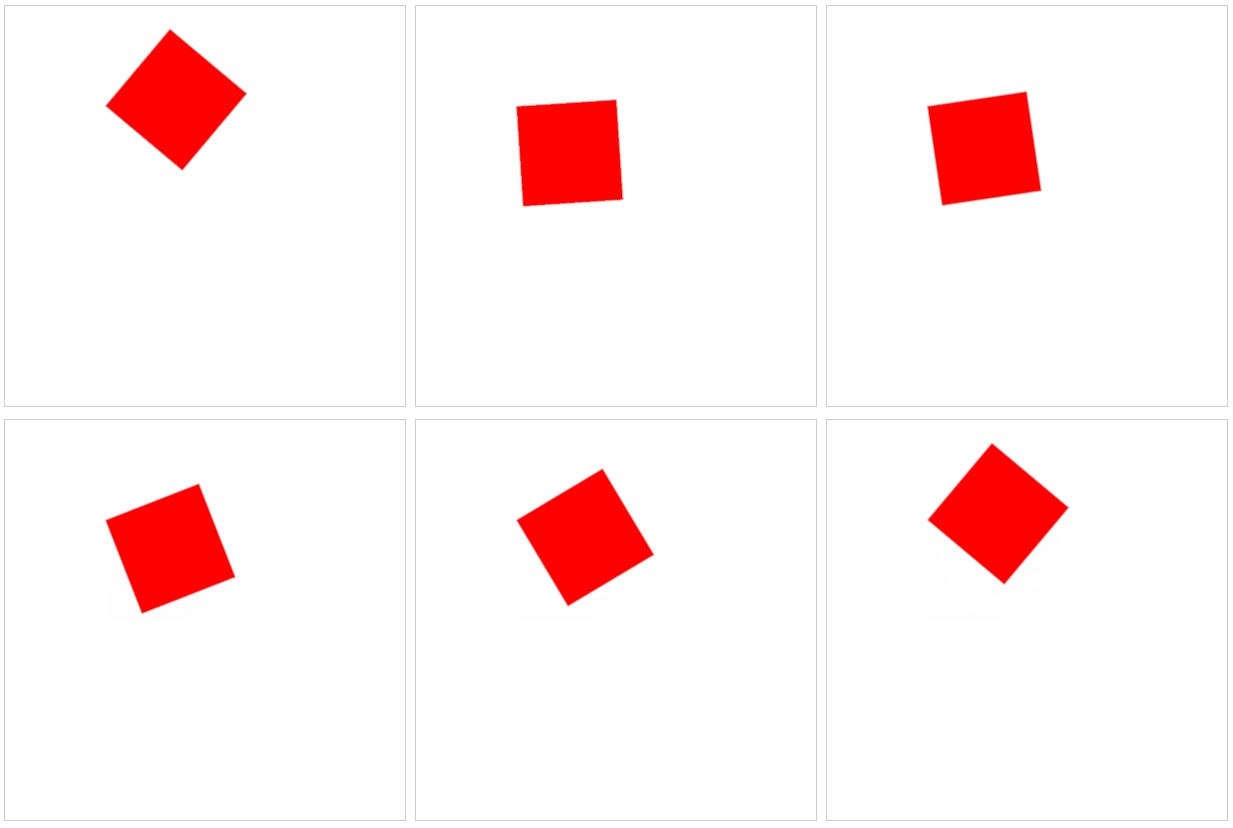
每个
Fabric
对象都有一个
animate
方法,该方法可以动画化该对象。
用法:
animate(动画属性, 动画的结束值, [画的详细信息])
第一个参数 是要设置动画的属性。
第二个参数 是动画的结束值。
第三个参数 是一个对象,包括:
{
   rom:允许指定可设置动画的属性的起始值(如果我们不希望使用当前值)。
   duration:默认为500(ms)。可用于更改动画的持续时间。
   onComplete:在动画结束时调用的回调。
   easing:缓动功能。
}
相对值动画
<template>
    <canvas width="400" height="400" id="canvas" style="border: 1px solid #ccc;"></canvas>
  </div>
</template>
<script setup>
import { onMounted } from 'vue'
import { fabric } from 'fabric'
// 初始化
function init() {
  const canvas = new fabric.Canvas('canvas')
  const rect = new fabric.Rect({
    left: 100,
    top: 100,
    width: 100,
    height: 100,
    fill: 'red'
  // 请注意第二个参数:+=360
  rect.animate('angle', '+=360', {
    onChange:canvas.renderAll.bind(canvas), // 每次刷新的时候都会执行
    duration: 2000, // 执行时间
    easing: fabric.util.ease.easeOutBounce, // 缓冲效果
  canvas.add(rect)
onMounted(() => {
  init()
</script>
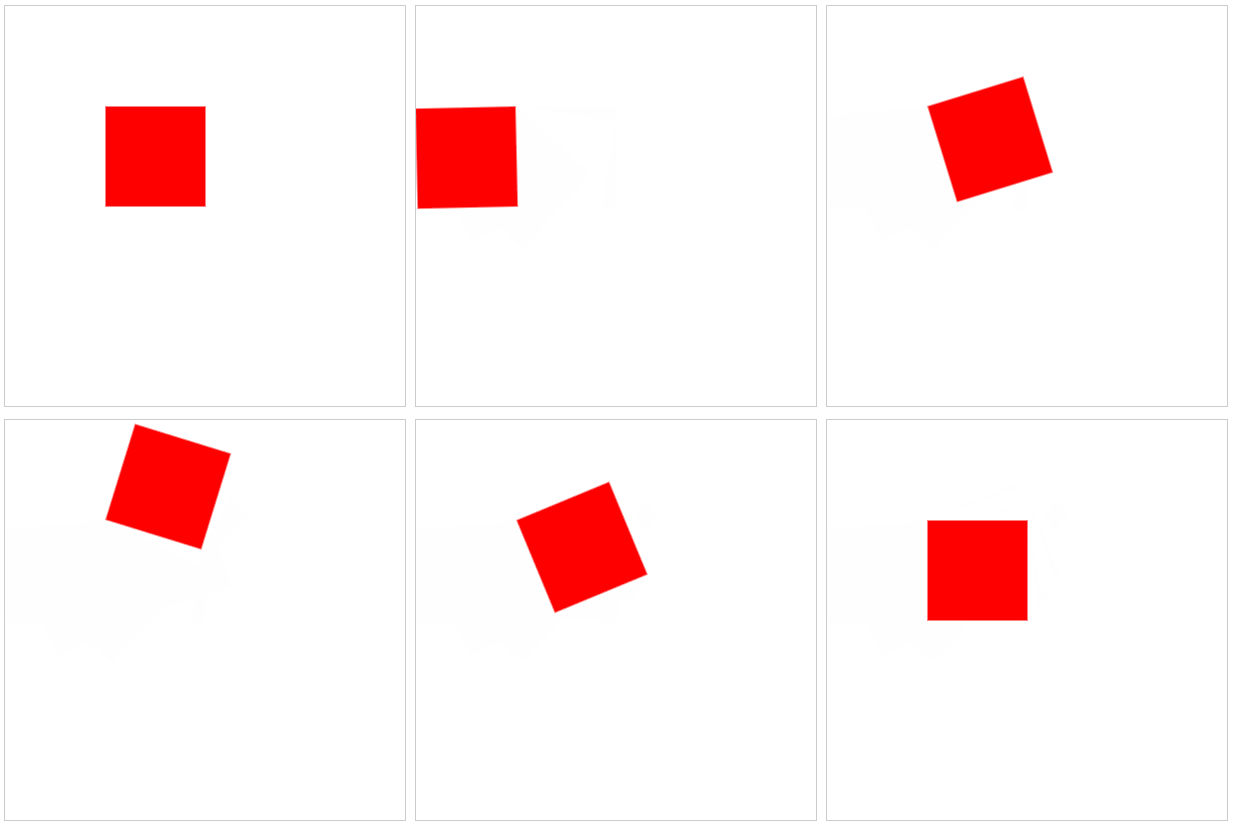
这个例子用了
fabric.util.ease.easeOutBounce
缓冲效果。
其实
绝对值动画
和
相对值动画
的用法是差不多的,只是
第二个参数
用法不同。
相对值动画
是把
animate
改成带上
运算符
的值,这样就会在原基础上做计算。
事件
Fabric.js
提供了一套很方便的事件系统,我们可以用
on
方法可以初始化事件监听器,用
off
方法将其删除。
<template>
    <canvas width="400" height="400" id="canvas" style="border: 1px solid #ccc;"></canvas>
    <button @click="addClickEvent">添加画布点击事件</button>
    <button @click="removeClickEvent">移除画布点击事件</button>
  </div>
</template>
<script setup>
import { onMounted } from 'vue'
import { fabric } from 'fabric'
let canvas = null
// 初始化画布
function init() {
  canvas = new fabric.Canvas('canvas')
  const rect = new fabric.Rect({
    top: 20,
    left: 20,
    width: 100,
    height: 50,
    fill: '#9896f1'
  // 给矩形添加一个选中事件
  rect.on('selected', options => {
    console.log('选中矩形啦', options)
  canvas.add(rect)
  addClickEvent()
// 移除画布点击事件
function removeClickEvent() {
  canvas.off('mouse:down')
// 添加画布点击事件
function addClickEvent() {
  removeClickEvent() // 在添加事件之前先把该事件清除掉,以免重复添加
  canvas.on('mouse:down', options => {
    console.log(`x轴坐标: ${options.e.clientX};    y轴坐标: ${options.e.clientY}`)
onMounted(() => {
  init()
</script>
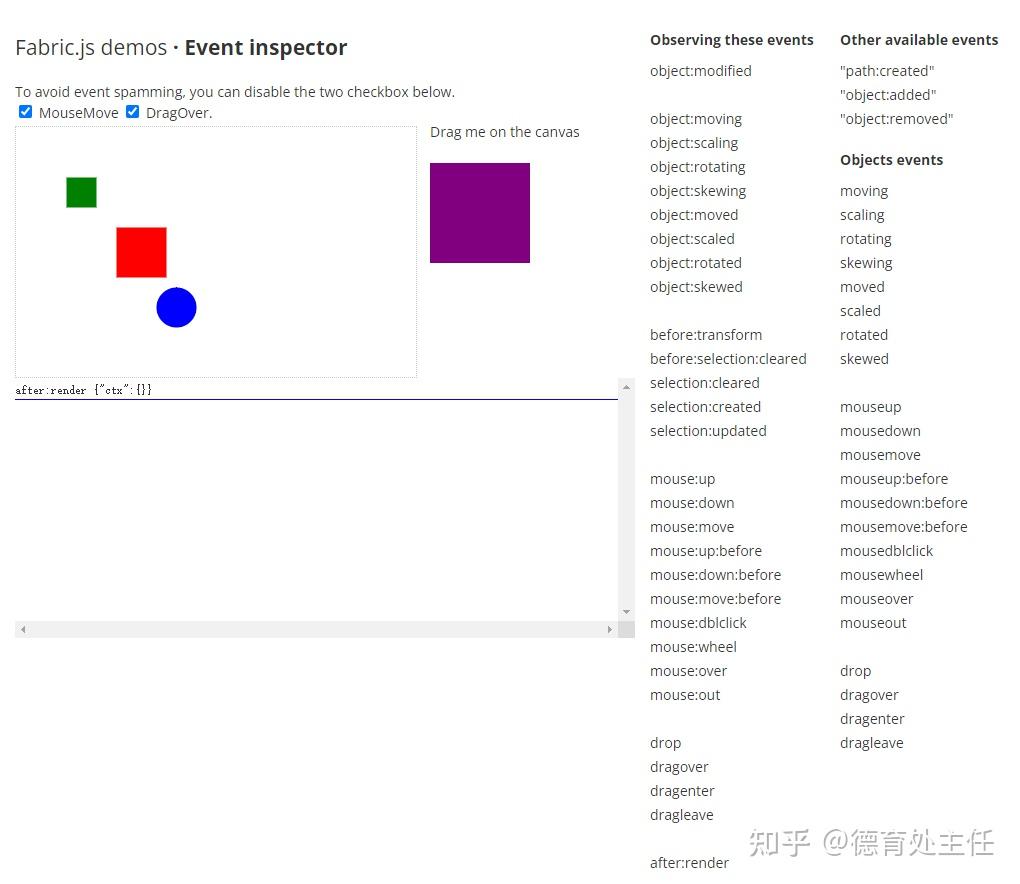
Fabric.js
还提供了很多事件,详情可以查看
官方案例
自由绘画
<template>
    <canvas width="400" height="400" id="canvas" style="border: 1px solid #ccc;"></canvas>
  </div>
</template>
<script setup>
import { onMounted } from 'vue'
import { fabric } from 'fabric'
// 初始化
function init() {
  const canvas = new fabric.Canvas('canvas', {
    isDrawingMode: true, // 开启绘图模式
  // 设置画笔颜色
  canvas.freeDrawingBrush.color = '#11999e'
  // 设置画笔粗细
  canvas.freeDrawingBrush.width = 10
  // 画笔投影
  canvas.freeDrawingBrush.shadow = new fabric.Shadow({
    blur: 10,
    offsetX: 10,
    offsetY: 10,
    affectStroke: true,
    color: '#30e3ca',
onMounted(() => {
  init()
</script>
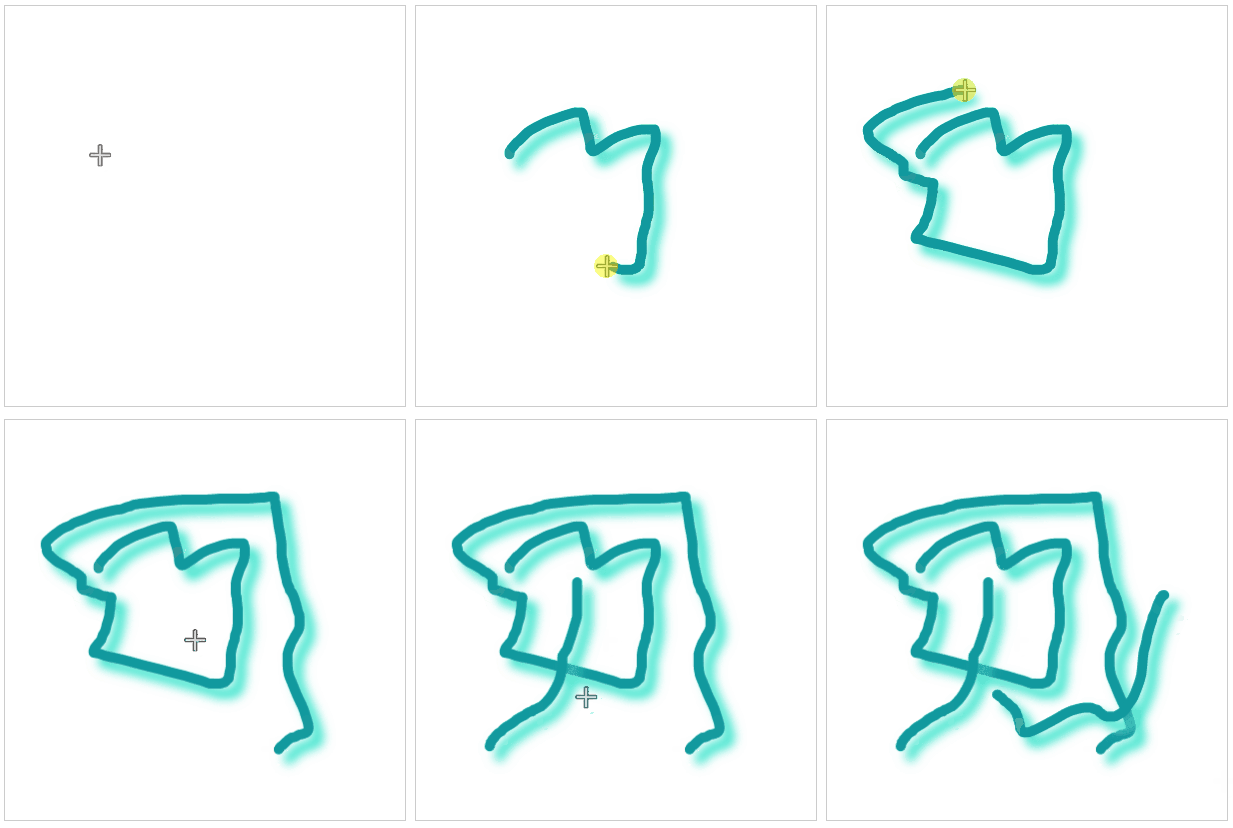
在使用
new fabric.Canvas
创建画布时,设置
isDrawingMode: true
就可以开始自由绘画模式。
canvas.freeDrawingBrush
里有一堆属性可以设置画笔样式。
禁止部分操作
禁止水平移动
<template>
    <canvas id="canvas" width="400" height="400" style="border: 1px solid #ccc;"></canvas>
  </div>
</template>
<script setup>
import { onMounted } from 'vue'
import { fabric } from 'fabric'
// 初始化画布
function init() {
  const canvas = new fabric.Canvas('canvas')
  const rect = new fabric.Rect({
    top: 100,
    left: 100,
    width: 100,
    height: 50,
    fill: '#ffde7d'
  // 不允许水平移动
  rect.lockMovementX = true
  canvas.add(rect)
onMounted(() => {
  init()
</script>
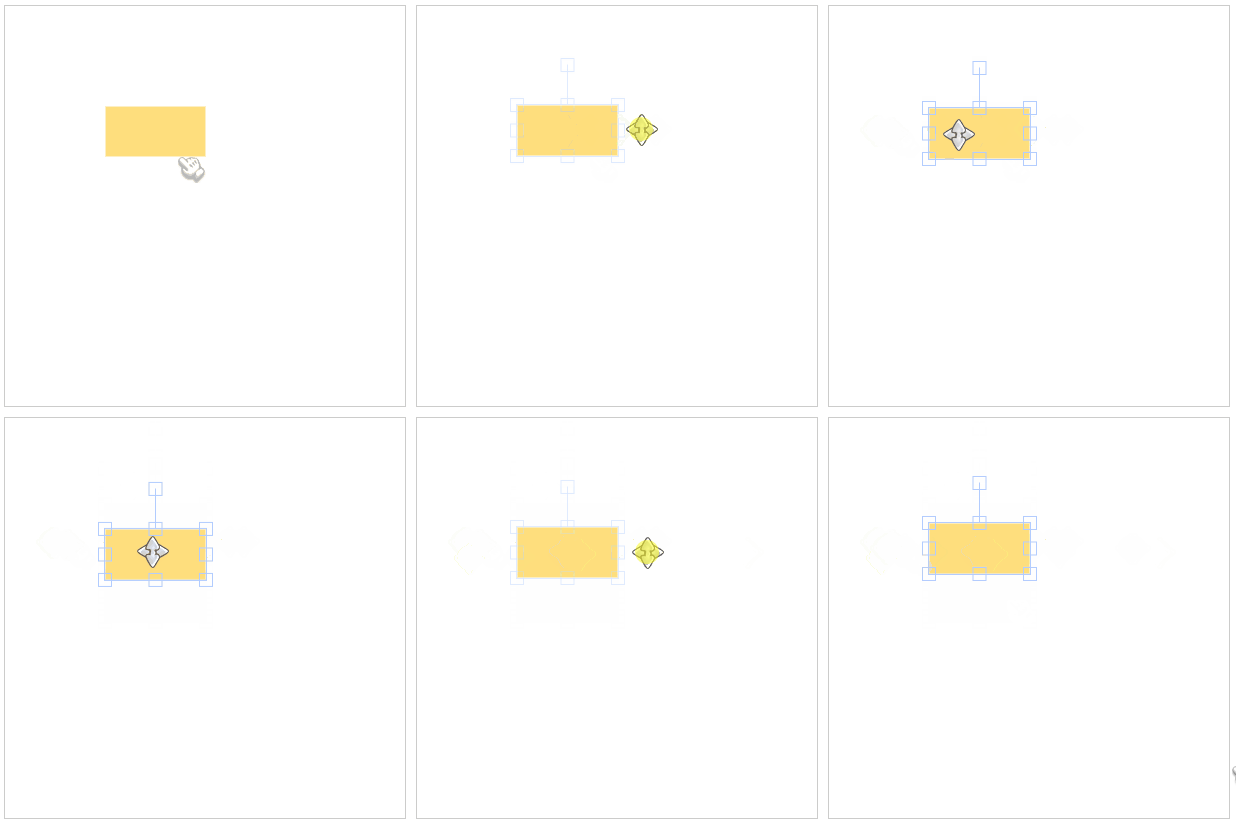
使用
lockMovementX
禁止对象水平移动。
禁止垂直移动
<template>
    <canvas id="canvas" width="400" height="400" style="border: 1px solid #ccc;"></canvas>
  </div>
</template>
<script setup>
import { onMounted } from 'vue'
import { fabric } from 'fabric'
// 初始化画布
function init() {
  const canvas = new fabric.Canvas('canvas')
  const rect = new fabric.Rect({
    top: 100,
    left: 100,
    width: 100,
    height: 50,
    fill: '#f6416c'
  // 不允许垂直移动
  rect.lockMovementY = true
  canvas.add(rect)
onMounted(() => {
  init()
</script>
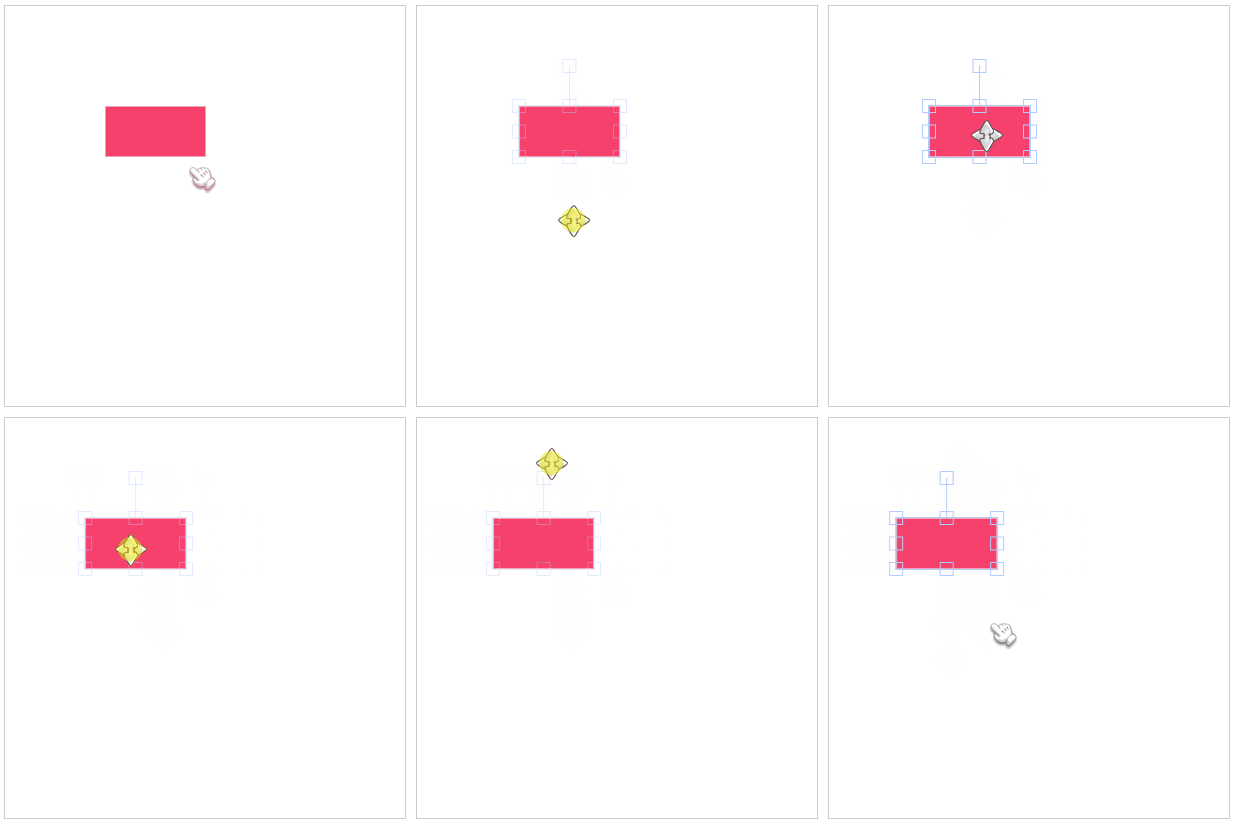
使用
lockMovementY
禁止对象垂直移动。
禁止旋转
<template>
    <canvas id="canvas" width="400" height="400" style="border: 1px solid #ccc;"></canvas>
  </div>
</template>
<script setup>
import { onMounted } from 'vue'
import { fabric } from 'fabric'
// 初始化画布
function init() {
  const canvas = new fabric.Canvas('canvas')
  const rect = new fabric.Rect({
    top: 100,
    left: 100,
    width: 100,
    height: 50,
    fill: '#3490de'
  // 禁止旋转
  rect.lockRotation = true
  canvas.add(rect)
onMounted(() => {
  init()
</script>
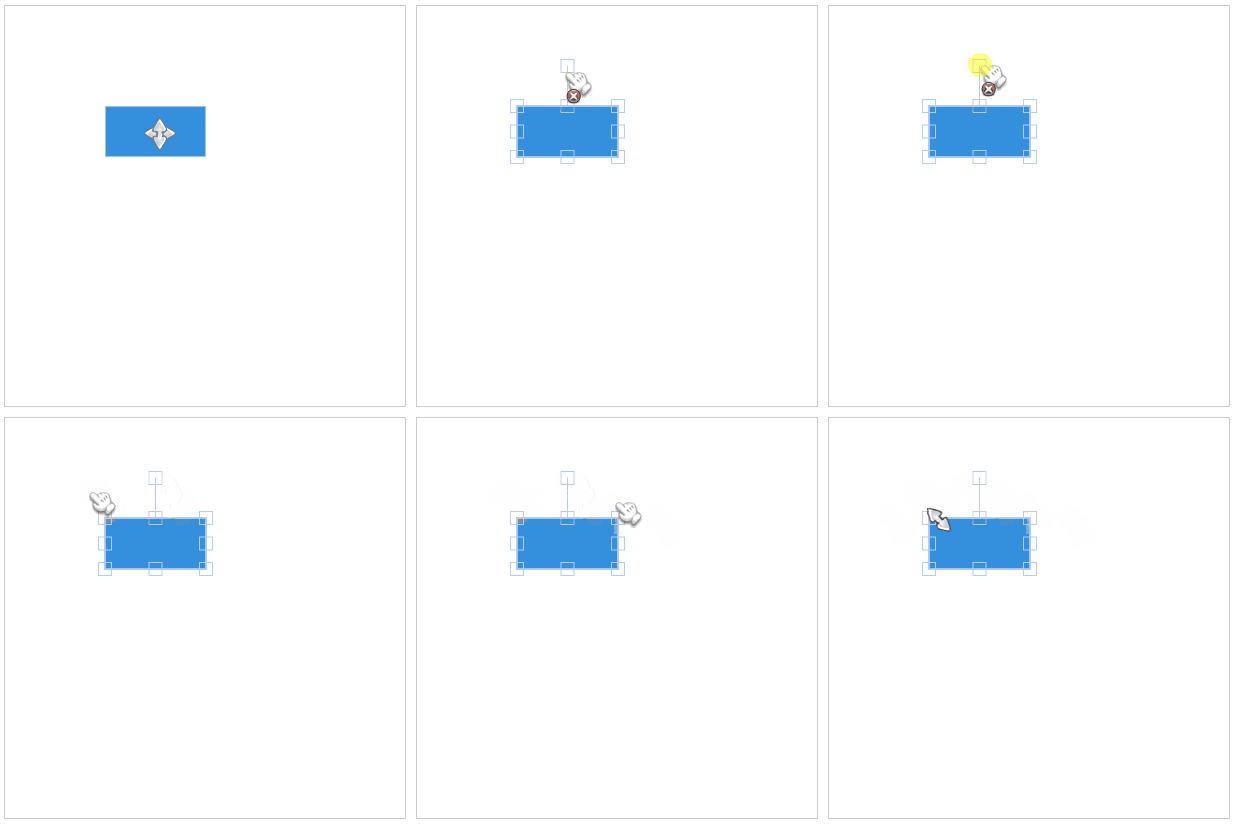
使用
lockRotation
禁止对象旋转。
禁止水平缩放
<template>
    <canvas id="canvas" width="400" height="400" style="border: 1px solid #ccc;"></canvas>
  </div>
</template>
<script setup>
import { onMounted } from 'vue'
import { fabric } from 'fabric'
// 初始化画布
function init() {
  const canvas = new fabric.Canvas('canvas')
  const rect = new fabric.Rect({
    top: 100,
    left: 100,
    width: 100,
    height: 50,
    fill: '#ff9a3c'
  // 禁止水平缩放
  rect.lockScalingX = true
  canvas.add(rect)
onMounted(() => {
  init()
</script>
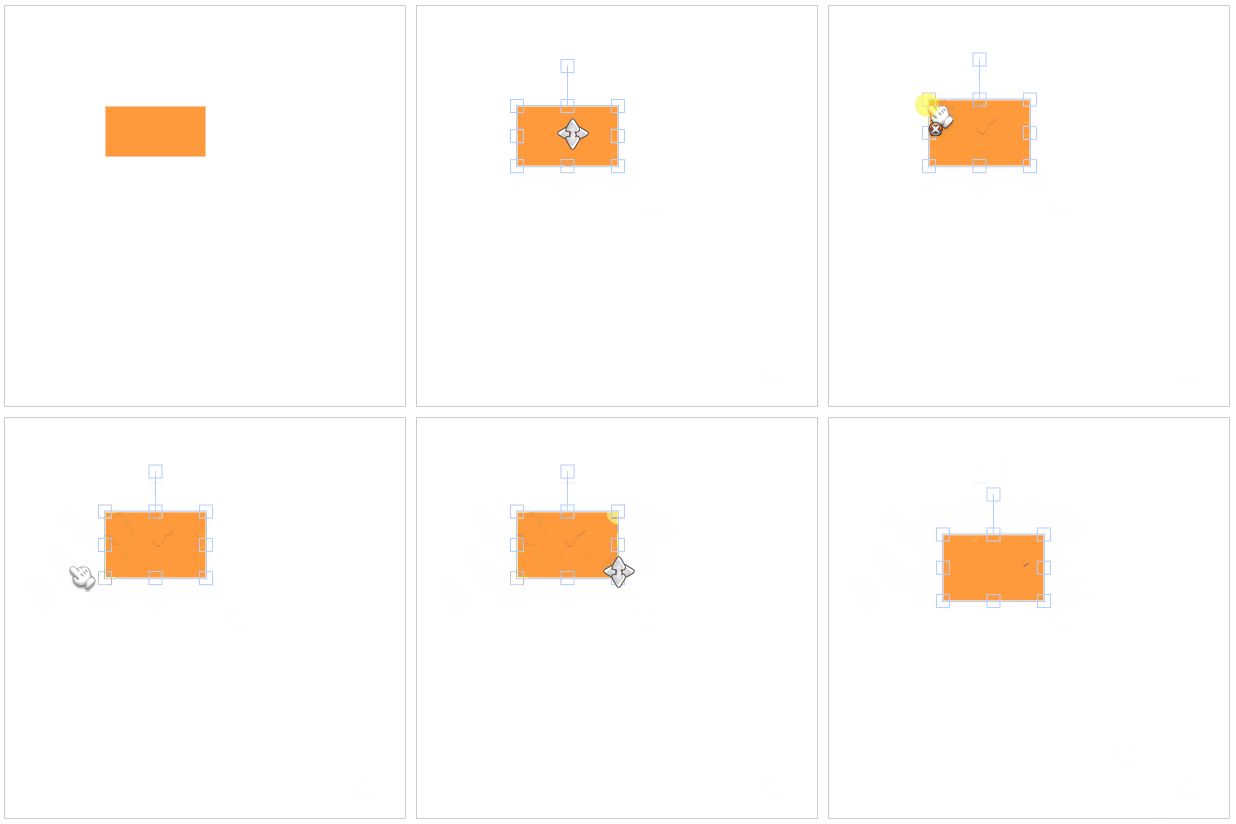
使用
lockScalingX
禁止对象水平缩放。
禁止垂直缩放
<template>
    <canvas id="canvas" width="400" height="400" style="border: 1px solid #ccc;"></canvas>
  </div>
</template>
<script setup>
import { onMounted } from 'vue'
import { fabric } from 'fabric'
// 初始化画布
function init() {
  const canvas = new fabric.Canvas('canvas')
  const rect = new fabric.Rect({
    top: 100,
    left: 100,
    width: 100,
    height: 50,
    fill: '#f95959'
  // 禁止垂直缩放
  rect.lockScalingY = true
  canvas.add(rect)
onMounted(() => {
  init()
</script>
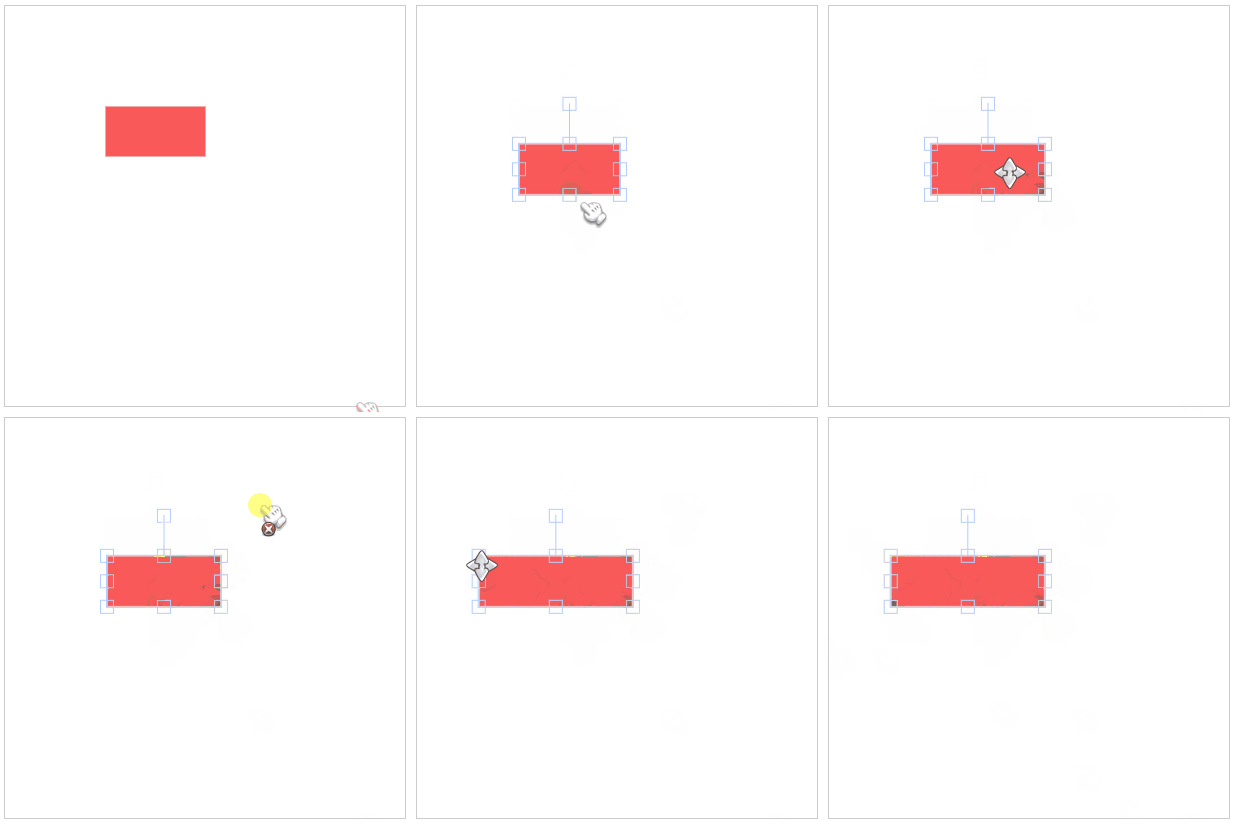
使用
lockScalingY
禁止对象垂直缩放。
缩放和平移画布
缩放画布
以原点为基准缩放画布
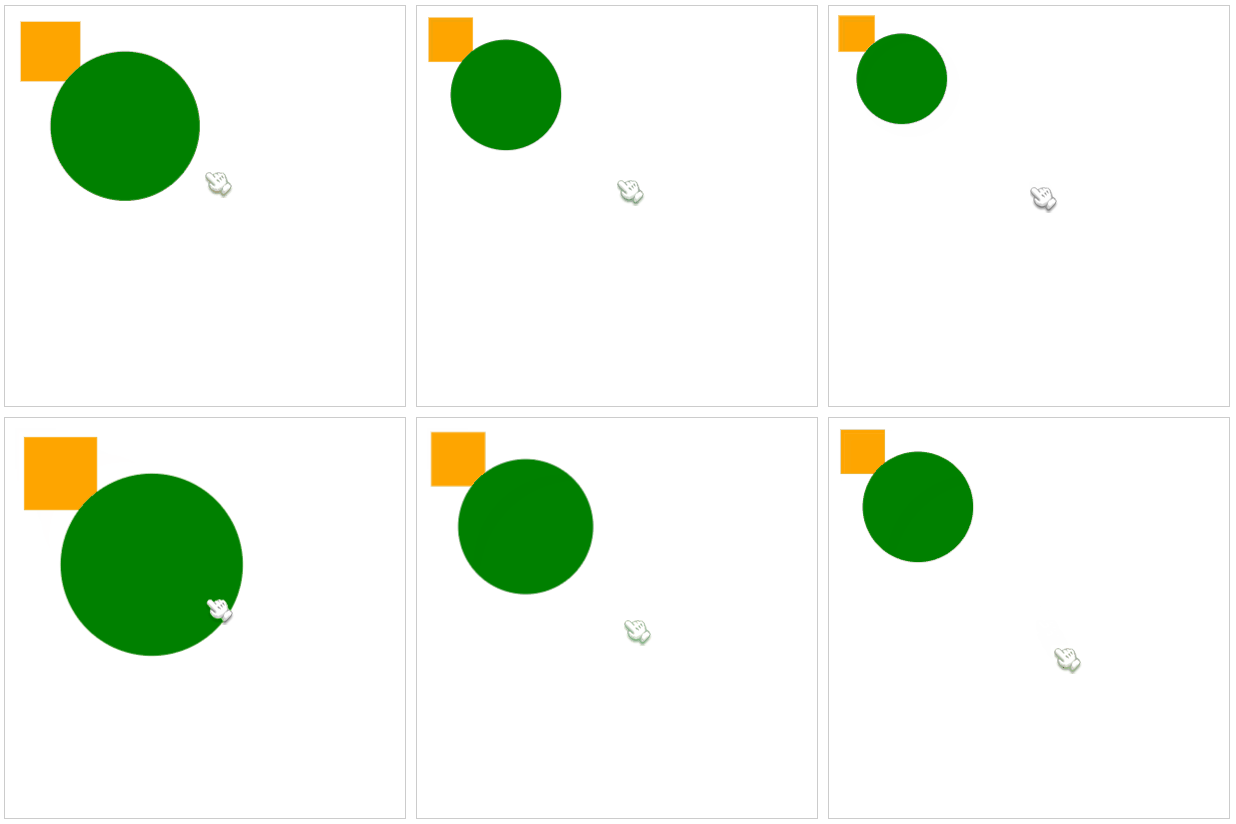
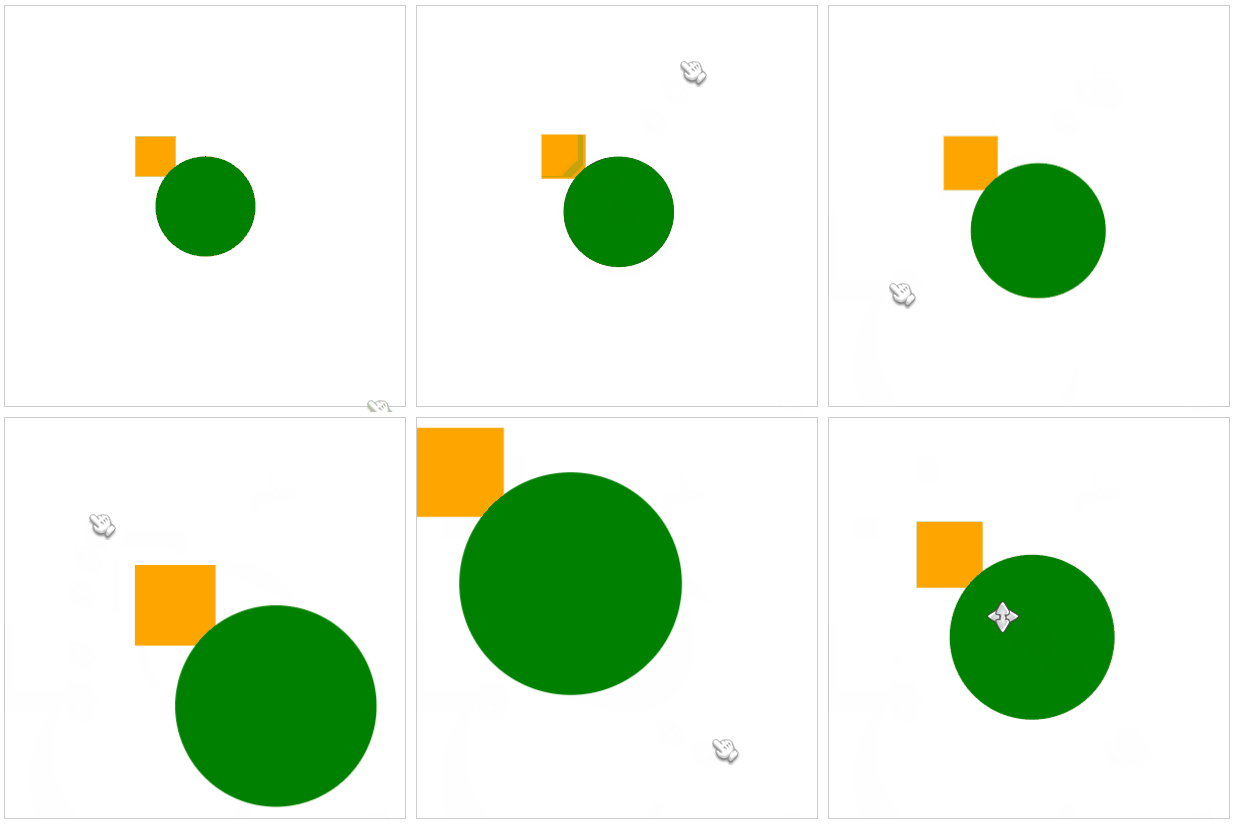
要缩放画布,其实是在监听鼠标事件。
这里监听的是鼠标的滚轮事件:
mouse:wheel
。
<template>
    <canvas id="canvas" width="400" height="400" style="border: 1px solid #ccc;"></canvas>
  </div>
</template>
<script setup>
import { onMounted } from 'vue'
import { fabric } from 'fabric'
function init() {
  // 初始化画布
  const canvas = new fabric.Canvas('canvas')
  // 矩形(参照物)
  const rect = new fabric.Rect({
    top: 10,
    left: 10,
    width: 40,
    height: 40,
    fill: 'orange'
  // 圆形(参照物)
  const circle = new fabric.Circle({
    top: 30,
    left: 30,
    radius: 50,
    fill: 'green'
  canvas.add(rect, circle) // 将矩形和圆形添加到画布中
  // 监听鼠标滚轮事件
  canvas.on('mouse:wheel', opt => {
    let delta = opt.e.deltaY // 滚轮向上滚一下是 -100,向下滚一下是 100
    let zoom = canvas.getZoom() // 获取画布当前缩放值
    // 控制缩放范围在 0.01~20 的区间内
    zoom *= 0.999 ** delta
    if (zoom > 20) zoom = 20
    if (zoom < 0.01) zoom = 0.01
    // 设置画布缩放比例
    canvas.setZoom(zoom)
onMounted(() => {
  init()
</script>
以鼠标指针为基准缩放画布
<template>
    <canvas id="canvas" width="400" height="400" style="border: 1px solid #ccc;"></canvas>
  </div>
</template>
<script setup>
import { onMounted } from 'vue'
import { fabric } from 'fabric'
function init() {
  // 初始化画布
  const canvas = new fabric.Canvas('canvas')
  // 矩形(参照物)
  const rect = new fabric.Rect({
    top: 130,
    left: 130,
    width: 40,
    height: 40,
    fill: 'orange'
  // 圆形(参照物)
  const circle = new fabric.Circle({
    top: 150,
    left: 150,
    radius: 50,
    fill: 'green'
  canvas.add(rect, circle) // 将矩形和圆形添加到画布中
  // 监听鼠标滚轮事件
  canvas.on('mouse:wheel', opt => {
    let delta = opt.e.deltaY // 滚轮向上滚一下是 -100,向下滚一下是 100
    let zoom = canvas.getZoom() // 获取画布当前缩放值
    // 控制缩放范围在 0.01~20 的区间内
    zoom *= 0.999 ** delta
    if (zoom > 20) zoom = 20
    if (zoom < 0.01) zoom = 0.01
    // 设置画布缩放比例
    // 关键点!!!
    // 参数1:将画布的所放点设置成鼠标当前位置
    // 参数2:传入缩放值
    canvas.zoomToPoint(
        x: opt.e.offsetX, // 鼠标x轴坐标
        y: opt.e.offsetY  // 鼠标y轴坐标
      zoom // 最后要缩放的值
onMounted(() => {
  init()
</script>
平移画布
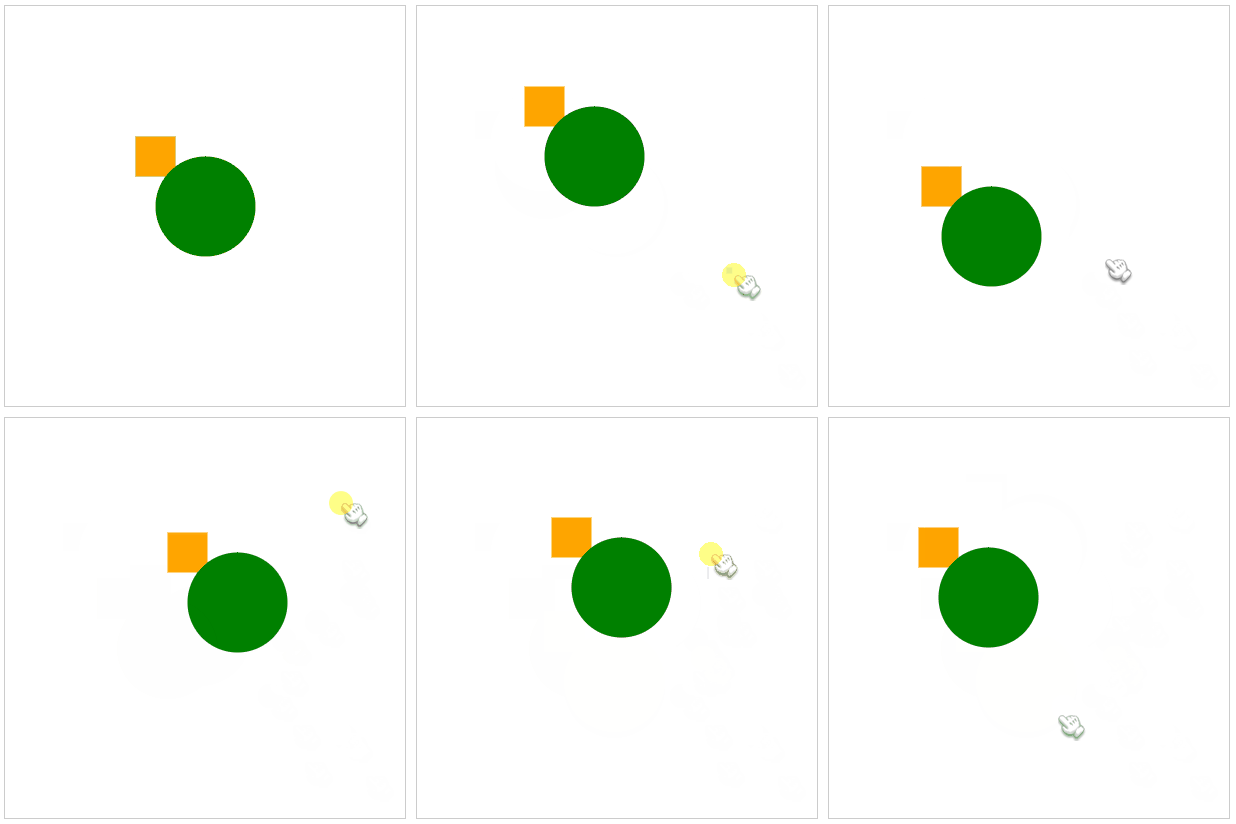
本例的需求是,按下
alt键
后才能触发移动画布的功能。
根据这个需求,可以把任务拆解成3步:
- 鼠标点击(刚按下那刻)
- 鼠标移动
- 鼠标松开
鼠标点击 mouse:down
-
该步骤使用
mouse:down可以监听到。 -
在回调函数里监听是否按下
alt键。 -
如果按下
alt键,设置一个值记录开启移动状态。 -
记录鼠标当前所在的
x和y轴坐标。
鼠标移动 mouse:move
- 判断是否需要移动(鼠标点击的第三步)。
- 如需移动,立刻转换画布视图模式
-
将画布移动到
鼠标x和y轴坐标。
鼠标松开 mouse:up
- 把画布定格在鼠标松开的坐标。
-
关闭移动状态(鼠标点击的第三步)
<template>
    <canvas id="canvas" width="400" height="400" style="border: 1px solid #ccc;"></canvas>
  </div>
</template>
<script setup>
import { onMounted } from 'vue'
import { fabric } from 'fabric'
function init() {
  // 初始化画布
  const canvas = new fabric.Canvas('canvas')
  // 矩形(参照物)
  const rect = new fabric.Rect({
    top: 130,
    left: 130,
    width: 40,
    height: 40,
    fill: 'orange'
  // 圆形(参照物)
  const circle = new fabric.Circle({
    top: 150,
    left: 150,
    radius: 50,
    fill: 'green'
  canvas.add(rect, circle) // 将矩形和圆形添加到画布中
  canvas.on('mouse:down', opt => { // 鼠标按下时触发
    let evt = opt.e
    if (evt.altKey === true) { // 是否按住alt
      canvas.isDragging = true // isDragging 是自定义的,开启移动状态
      canvas.lastPosX = evt.clientX // lastPosX 是自定义的
      canvas.lastPosY = evt.clientY // lastPosY 是自定义的
  canvas.on('mouse:move', opt => { // 鼠标移动时触发
    if (canvas.isDragging) {
      let evt = opt.e
      let vpt = canvas.viewportTransform // 聚焦视图的转换
      vpt[4] += evt.clientX - canvas.lastPosX
      vpt[5] += evt.clientY - canvas.lastPosY
      canvas.requestRenderAll() // 重新渲染
      canvas.lastPosX  = evt.clientX
      canvas.lastPosY  = evt.clientY
  canvas.on('mouse:up', opt => { // 鼠标松开时触发
    canvas.setViewportTransform(canvas.viewportTransform) // 设置此画布实例的视口转换
    canvas.isDragging = false // 关闭移动状态
onMounted(() => {
  init()
</script>
选中状态
Fabric.js
创建出来的元素(图形、图片、组等)默认是可以被选中的。
是否可以选中。
选空白位置可以选中吗?
选中后的样式。
禁止选中
<template>
  <canvas width="400" height="400" id="canvas" style="border: 1px solid #ccc;"></canvas>
</template>
<script setup>
import { onMounted } from 'vue'
import { fabric } from 'fabric'
function init() {
  const canvas = new fabric.Canvas('canvas')
  const rect = new fabric.Rect({
    top: 100,
    left: 100,
    width: 200,
    height: 100,
    fill: 'red'
  // 元素禁止选中
  rect.selectable = false
  canvas.add(rect)
onMounted(() => {
  init()
</script>
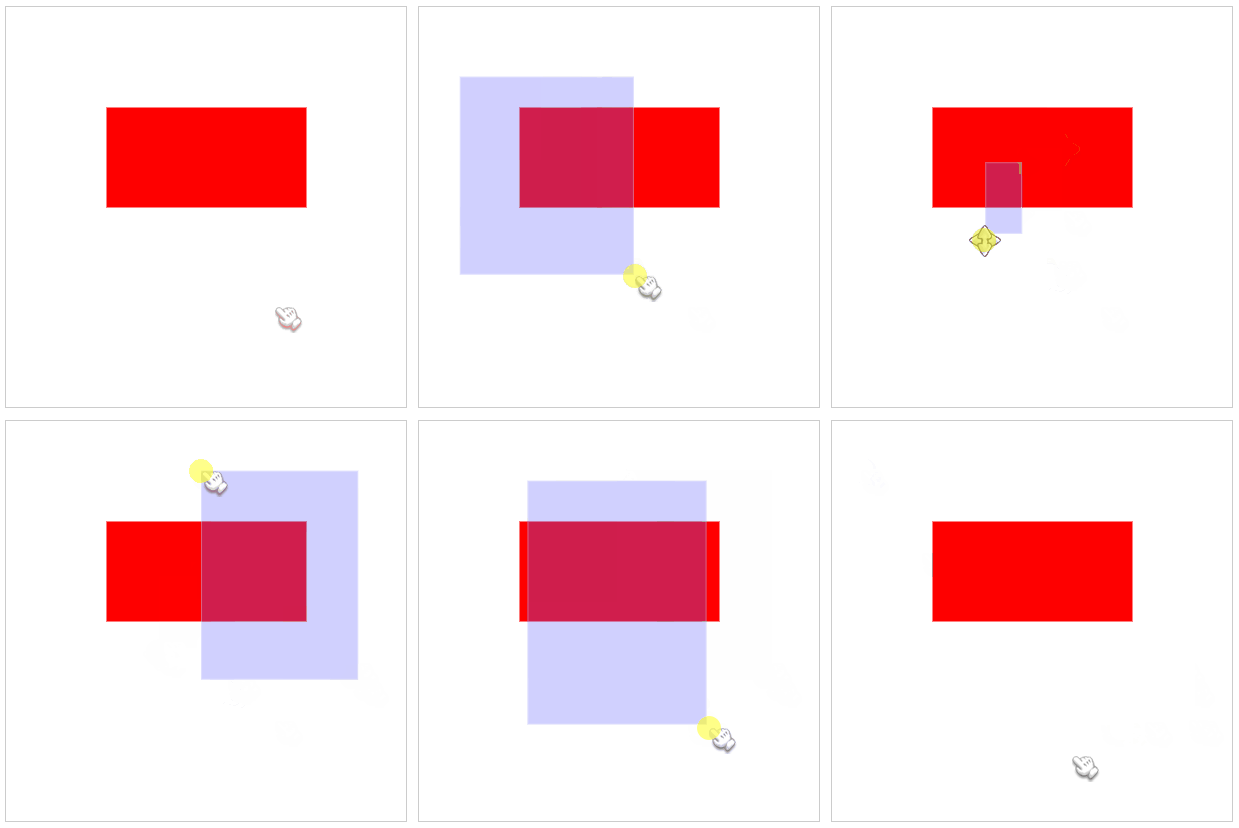
无法通过空白位置选中元素
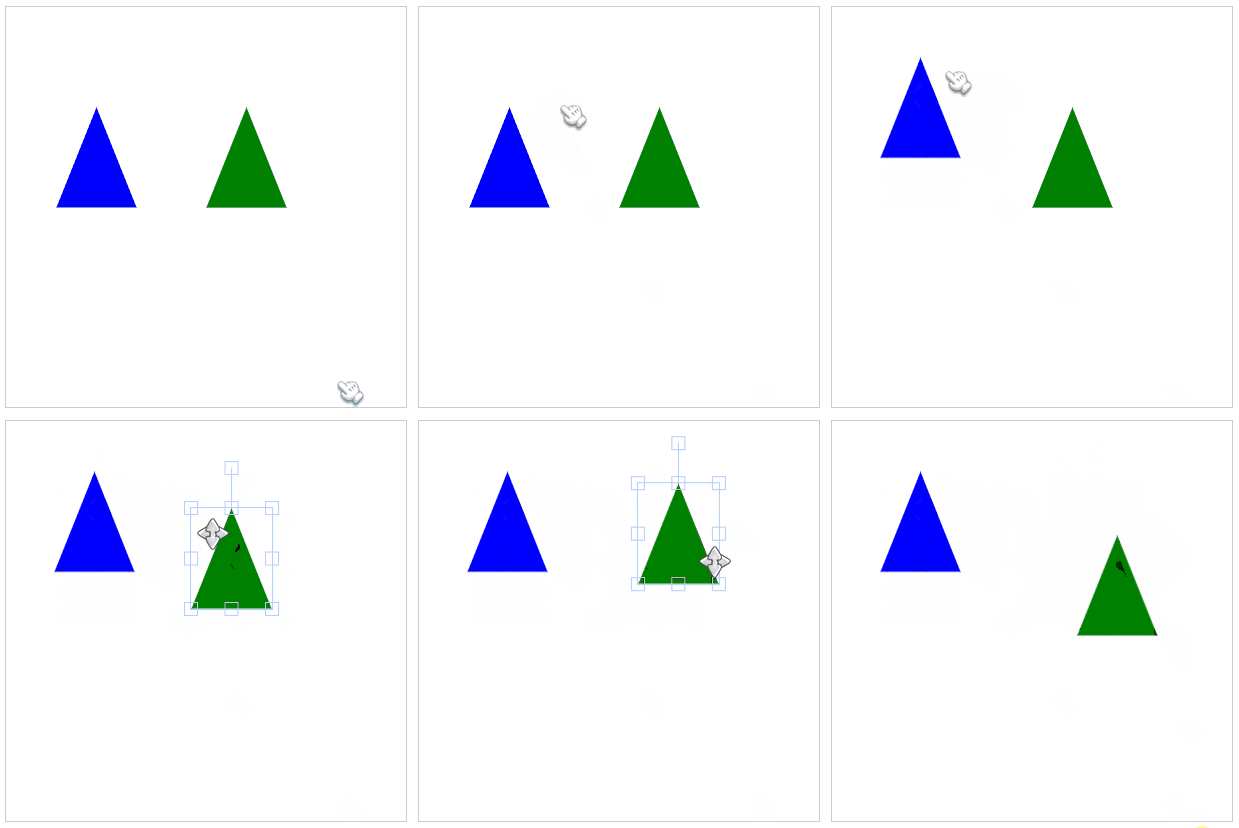
蓝色三角形要鼠标完全放入才能选中
<template>
  <canvas width="400" height="400" id="canvas" style="border: 1px solid #ccc;"></canvas>
</template>
<script setup>
import { onMounted } from 'vue'
import { fabric } from 'fabric'
function init() {
  const canvas = new fabric.Canvas('canvas')
  // 三角形
  const triangle1 = new fabric.Triangle({
    top: 100,
    left: 50,
    width: 80, // 底边宽度
    height: 100, // 底边到定点的距离
    fill: 'blue',
  // 选择三角形空白位置的时候无法选中,当perPixelTargetFind设为false后可以选中。默认值是false
  triangle1.perPixelTargetFind = true
  // 三角形
  const triangle2 = new fabric.Triangle({
    top: 100,
    left: 200,
    width: 80, // 底边宽度
    height: 100, // 底边到定点的距离
    fill: 'green',
  canvas.add(triangle1, triangle2)
  canvas.selectionFullyContained = true // 只选择完全包含在拖动选择矩形中的形状
onMounted(() => {
  init()
</script>
画布框选样式
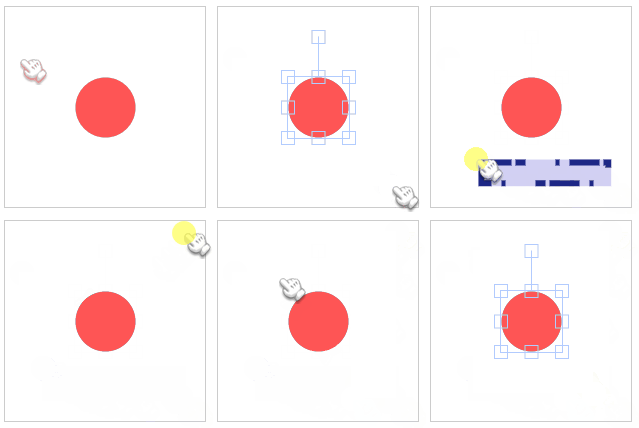
<template>
  <canvas width="200" height="200" id="canvas" style="border: 1px solid #ccc;"></canvas>
</template>
<script setup>
import { onMounted } from 'vue'
import { fabric } from 'fabric'
function init() {
  const canvas = new fabric.Canvas('canvas')
  // 圆形
  const circle = new fabric.Circle({
    radius: 30,
    fill: '#f55',
    top: 70,
    left: 70
  canvas.add(circle)
  canvas.selection = true // 画布是否可选中。默认true;false 不可选中
  canvas.selectionColor = 'rgba(106, 101, 216, 0.3)' // 画布鼠标框选时的背景色
  canvas.selectionBorderColor = "#1d2786" // 画布鼠标框选时的边框颜色
  canvas.selectionLineWidth = 6 // 画布鼠标框选时的边框厚度
  canvas.selectionDashArray = [30, 4, 10] // 画布鼠标框选时边框虚线规则
  canvas.selectionFullyContained = true // 只选择完全包含在拖动选择矩形中的形状
onMounted(() => {
  init()
</script>
自定义边和控制角样式
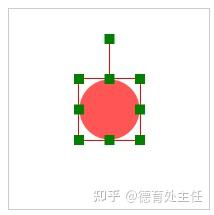
<template>
  <canvas width="200" height="200" id="canvas" style="border: 1px solid #ccc;"></canvas>
</template>
<script setup>
import { onMounted } from 'vue'
import { fabric } from 'fabric'
function init() {
  const canvas = new fabric.Canvas('canvas')
  // 圆形
  const circle = new fabric.Circle({
    radius: 30,
    fill: '#f55',
    top: 70,
    left: 70
  circle.set({
    borderColor: 'red', // 边框颜色
    cornerColor: 'green', // 控制角颜色
    cornerSize: 10, // 控制角大小
    transparentCorners: false // 控制角填充色不透明
  canvas.add(circle)
  canvas.setActiveObject(circle) // 选中圆
onMounted(() => {
  init()
</script>
透明控制角
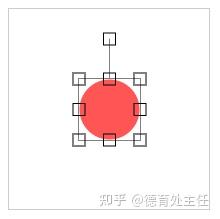
<template>
  <canvas width="200" height="200" id="canvas" style="border: 1px solid #ccc;"></canvas>
</template>
<script setup>
import { onMounted } from 'vue'
import { fabric } from 'fabric'
function init() {
  const canvas = new fabric.Canvas('canvas')
  // 圆形
  const circle = new fabric.Circle({
    radius: 30,
    fill: '#f55',
    top: 70,
    left: 70
  circle.set({
    borderColor: 'gray', // 边框颜色
    cornerColor: 'black', // 控制角颜色
    cornerSize: 12, // 控制角大小
    transparentCorners: true // 控制角填充色透明
  canvas.add(circle)
  canvas.setActiveObject(circle) // 选中第一项
onMounted(() => {
  init()
</script>
自定义选中后的背景色
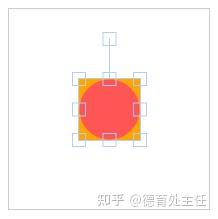
<template>
  <canvas width="200" height="200" id="canvas" style="border: 1px solid #ccc;"></canvas>
</template>
<script setup>
import { onMounted } from 'vue'
import { fabric } from 'fabric'
function init() {
  const canvas = new fabric.Canvas('canvas')
  // 圆形
  const circle = new fabric.Circle({
    radius: 30,
    fill: '#f55',
    top: 70,
    left: 70
  circle.set({
    selectionBackgroundColor: 'orange' // 选中后,背景色变橙色
  canvas.add(circle)
  canvas.setActiveObject(circle) // 选中第一项
onMounted(() => {
  init()
</script>
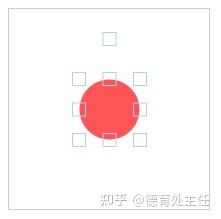
没有边框
<template>
  <canvas width="200" height="200" id="canvas" style="border: 1px solid #ccc;"></canvas>
</template>
<script setup>
import { onMounted } from 'vue'
import { fabric } from 'fabric'
function init() {
  const canvas = new fabric.Canvas('canvas')
  // 圆形
  const circle = new fabric.Circle({
    radius: 30,
    fill: '#f55',
    top: 70,
    left: 70
  circle.hasBorders = false // 取消边框
  canvas.add(circle)
  canvas.setActiveObject(circle) // 选中第一项
onMounted(() => {
  init()
</script>
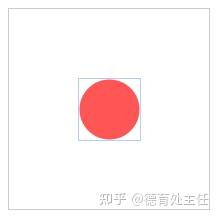
没有控制角
没有控制角将意味着无法用鼠标直接操作缩放和旋转,只允许移动操作。
<template>
  <canvas width="200" height="200" id="canvas" style="border: 1px solid #ccc;"></canvas>
</template>
<script setup>
import { onMounted } from 'vue'
import { fabric } from 'fabric'
function init() {
  const canvas = new fabric.Canvas('canvas')
  // 圆形
  const circle = new fabric.Circle({
    radius: 30,
    fill: '#f55',
    top: 70,
    left: 70
  circle.hasControls = false // 禁止控制角
  canvas.add(circle)
  canvas.setActiveObject(circle) // 选中第一项
onMounted(() => {
  init()
</script>
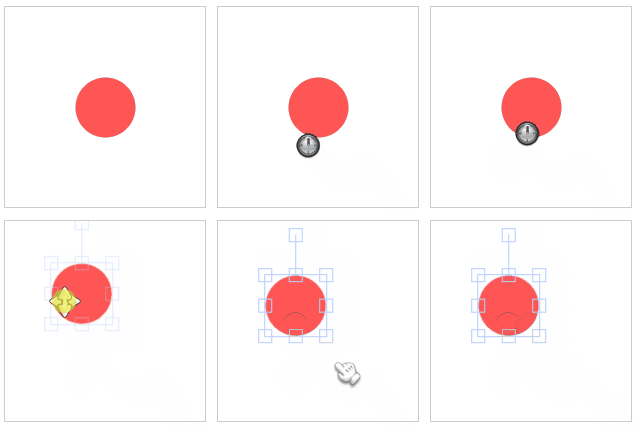
自定义光标在对象悬停
本例设置了当鼠标在元素上出现 ”等待指针“ 。
<template>
  <canvas width="200" height="200" id="canvas" style="border: 1px solid #ccc;"></canvas>
</template>
<script setup>
import { onMounted } from 'vue'
import { fabric } from 'fabric'
function init() {
  const canvas = new fabric.Canvas('canvas')
  // 圆形
  const circle = new fabric.Circle({
    radius: 30,
    fill: '#f55',
    top: 70,
    left: 70
  canvas.hoverCursor = 'wait' // 设置等待指针
  canvas.add(circle)
onMounted(() => {
  init()
</script>
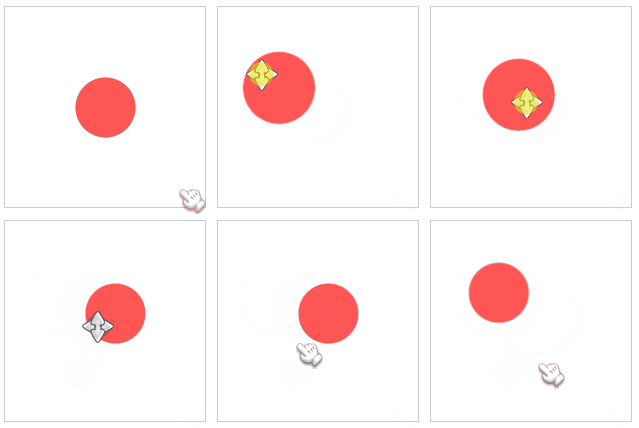
元素移动时的样式
<template>
  <canvas width="200" height="200" id="canvas" style="border: 1px solid #ccc;"></canvas>
</template>
<script setup>
import { onMounted } from 'vue'
import { fabric } from 'fabric'
function init() {
  const canvas = new fabric.Canvas('canvas')
  // 圆形
  const circle = new fabric.Circle({
    radius: 30,
    fill: '#f55',
    top: 70,
    left: 70
  circle.hasBorders = circle.hasControls = false
  canvas.add(circle)
  function animate(e, dir) {
    if (e.target) {
      fabric.util.animate({
        startValue: e.target.get('angle'),
        endValue: e.target.get('angle') + (dir ? 10 : -10),
        duration: 100
      fabric.util.animate({
        startValue: e.target.get('scaleX'),
        endValue: e.target.get('scaleX') + (dir ? 0.2 : -0.2),
        duration: 100,
        onChange: function(value) {
          e.target.scale(value)
          canvas.renderAll()
        onComplete: function() {
          e.target.setCoords()
  canvas.on('mouse:down', function(e) { animate(e, 1) })
  canvas.on('mouse:up', function(e) { animate(e, 0) })
onMounted(() => {
  init()
</script>
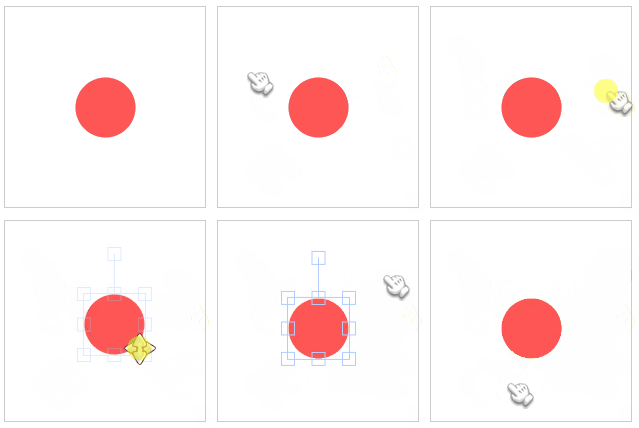
不允许框选
不允许从画布框选,但允许选中元素。
<template>
  <canvas width="200" height="200" id="canvas" style="border: 1px solid #ccc;"></canvas>
</template>
<script setup>
import { onMounted } from 'vue'
import { fabric } from 'fabric'
function init() {
  const canvas = new fabric.Canvas('canvas')
  // 圆形
  const circle = new fabric.Circle({
    radius: 30,
    fill: '#f55',
    top: 70,
    left: 70
  canvas.add(circle)
  canvas.selection = false // 不允许直接从画布框选
onMounted(() => {
  init()
</script>
裁剪
裁剪单一图形
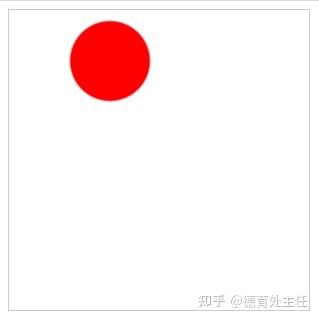
<template>
  <canvas width="300" height="300" id="canvas" style="border: 1px solid #ccc;"></canvas>
</template>
<script setup>
import { onMounted } from 'vue'
import { fabric } from 'fabric'
function init() {
  const canvas = new fabric.Canvas('canvas')
  // 裁剪的图形
  // clipPath从对象的中心开始定位,对象originX和originY不起任何作用,而clipPath originX和originY起作用。定位逻辑与fabric.Group相同
  const clipPath = new fabric.Circle({
    radius: 40,
    left: -40,
    top: -40
  // 矩形
  const rect = new fabric.Rect({
    width: 200,
    height: 100,
    fill: 'red'
  // 裁剪矩形
  rect.clipPath = clipPath
  canvas.add(rect)
onMounted(() => {
  init()
</script>
裁剪一个组
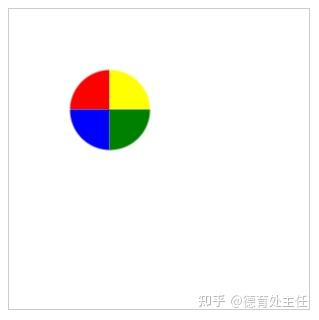
<template>
  <canvas width="300" height="300" id="canvas" style="border: 1px solid #ccc;"></canvas>
</template>
<script setup>
import { onMounted } from 'vue'
import { fabric } from 'fabric'
function init() {
  const canvas = new fabric.Canvas('canvas')
  // 裁剪的图形
  // clipPath从对象的中心开始定位,对象originX和originY不起任何作用,而clipPath originX和originY起作用。定位逻辑与fabric.Group相同
  const clipPath = new fabric.Circle({
    radius: 40,
    left: -40,
    top: -40
  const group = new fabric.Group([
    new fabric.Rect({ width: 100, height: 100, fill: 'red' }),
    new fabric.Rect({ width: 100, height: 100, fill: 'yellow', left: 100 }),
    new fabric.Rect({ width: 100, height: 100, fill: 'blue', top: 100 }),
    new fabric.Rect({
      width: 100,
      height: 100,
      fill: 'green',
      left: 100,
      top: 100
  // 裁剪一个组
  group.clipPath = clipPath
  canvas.add(group)
onMounted(() => {
  init()
</script>
组合剪辑
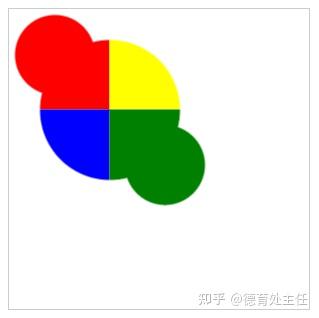
<template>
  <canvas width="300" height="300" id="canvas" style="border: 1px solid #ccc;"></canvas>
</template>
<script setup>
import { onMounted } from 'vue'
import { fabric } from 'fabric'
function init() {
  const canvas = new fabric.Canvas('canvas')
  const clipPath = new fabric.Group(
      new fabric.Circle({ radius: 70, top: -70, left: -70 }),
      new fabric.Circle({ radius: 40, top: -95, left: -95 }),
      new fabric.Circle({ radius: 40, top: 15, left: 15 })
    { left: -95, top: -95 }
  const group = new fabric.Group([
    new fabric.Rect({ width: 100, height: 100, fill: 'red' }),
    new fabric.Rect({ width: 100, height: 100, fill: 'yellow', left: 100 }),
    new fabric.Rect({ width: 100, height: 100, fill: 'blue', top: 100 }),
    new fabric.Rect({
      width: 100,
      height: 100,
      fill: 'green',
      left: 100,
      top: 100
  group.clipPath = clipPath
  canvas.add(group)
onMounted(() => {
  init()
</script>
剪完再剪(组合剪辑)
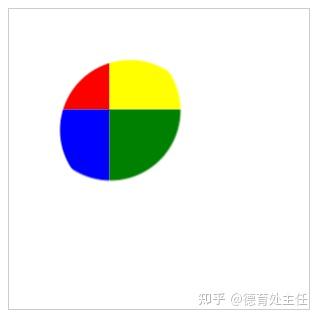
<template>
  <canvas width="300" height="300" id="canvas" style="border: 1px solid #ccc;"></canvas>
</template>
<script setup>
import { onMounted } from 'vue'
import { fabric } from 'fabric'
function init() {
  const canvas = new fabric.Canvas('canvas')
  const clipPath = new fabric.Circle({ radius: 70, top: -50, left: -50 })
  const innerClipPath = new fabric.Circle({ radius: 70, top: -90, left: -90 })
  clipPath.clipPath = innerClipPath
  const group = new fabric.Group([
    new fabric.Rect({ width: 100, height: 100, fill: 'red' }),
    new fabric.Rect({ width: 100, height: 100, fill: 'yellow', left: 100 }),
    new fabric.Rect({ width: 100, height: 100, fill: 'blue', top: 100 }),
    new fabric.Rect({ width: 100, height: 100, fill: 'green', left: 100, top: 100 }),
  group.clipPath = clipPath
  canvas.add(group)
onMounted(() => {
  init()
</script>
组内嵌套剪辑
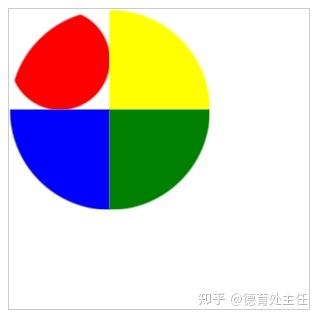
<template>
  <canvas width="300" height="300" id="canvas" style="border: 1px solid #ccc;"></canvas>
</template>
<script setup>
import { onMounted } from 'vue'
import { fabric } from 'fabric'
function init() {
  const canvas = new fabric.Canvas('canvas')
  const clipPath = new fabric.Circle({ radius: 100, top: -100, left: -100 })
  const small = new fabric.Circle({ radius: 50, top: -50, left: -50 })
  const group = new fabric.Group([
    new fabric.Rect({ width: 100, height: 100, fill: "red", clipPath: small }),
    new fabric.Rect({ width: 100, height: 100, fill: "yellow", left: 100 }),
    new fabric.Rect({ width: 100, height: 100, fill: "blue", top: 100 }),
    new fabric.Rect({ width: 100, height: 100, fill: "green", left: 100, top: 100 }),
  group.clipPath = clipPath
  canvas.add(group)
onMounted(() => {
  init()
</script>
用文字来裁剪
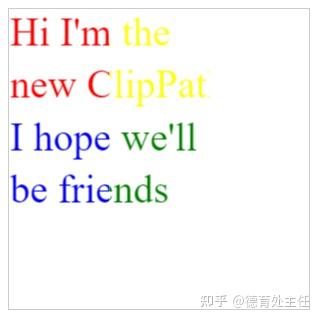
<template>
  <canvas width="300" height="300" id="canvas" style="border: 1px solid #ccc;"></canvas>
</template>
<script setup>
import { onMounted } from 'vue'
import { fabric } from 'fabric'
function init() {
  const canvas = new fabric.Canvas('canvas')
  const clipPath = new fabric.Text(
    'Hi I\'m the \nnew ClipPath!\nI hope we\'ll\nbe friends',
    { top: -100, left: -100 }
  const group = new fabric.Group([
    new fabric.Rect({ width: 100, height: 100, fill: "red" }),
    new fabric.Rect({ width: 100, height: 100, fill: "yellow", left: 100 }),
    new fabric.Rect({ width: 100, height: 100, fill: "blue", top: 100 }),
    new fabric.Rect({ width: 100, height: 100, fill: "green", left: 100, top: 100 }),
  group.clipPath = clipPath
  canvas.add(group)
onMounted(() => {
  init()
</script>
裁剪画布
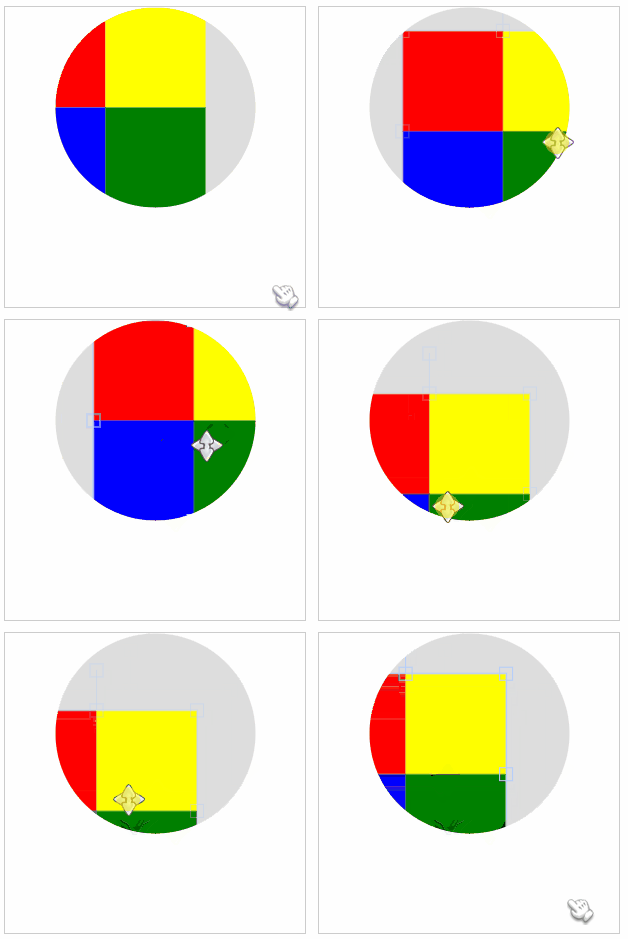
<template>
  <canvas width="300" height="300" id="canvas" style="border: 1px solid #ccc;"></canvas>
</template>
<script setup>
import { onMounted } from 'vue'
import { fabric } from 'fabric'
function init() {
  const canvas = new fabric.Canvas('canvas', {
    backgroundColor: "#ddd"
  const group = new fabric.Group([
    new fabric.Rect({ width: 100, height: 100, fill: "red" }),
    new fabric.Rect({ width: 100, height: 100, fill: "yellow", left: 100 }),
    new fabric.Rect({ width: 100, height: 100, fill: "blue", top: 100 }),
    new fabric.Rect({ width: 100, height: 100, fill: "green", left: 100, top: 100 }),
  const clipPath = new fabric.Circle({ radius: 100, top: 0, left: 50 })
  canvas.clipPath = clipPath
  canvas.add(group)
onMounted(() => {
  init()
</script>
裁剪画布,但不裁控件
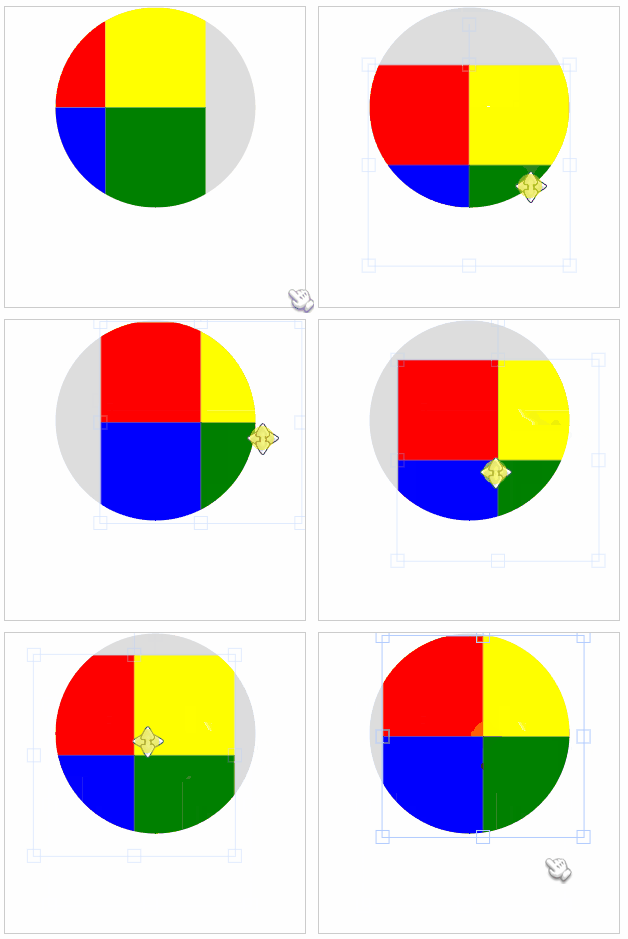
<template>
  <canvas width="300" height="300" id="canvas" style="border: 1px solid #ccc;"></canvas>
</template>
<script setup>
import { onMounted } from 'vue'
import { fabric } from 'fabric'
function init() {
  const canvas = new fabric.Canvas('canvas', {
    backgroundColor: "#ddd"
  const group = new fabric.Group([
    new fabric.Rect({ width: 100, height: 100, fill: "red" }),
    new fabric.Rect({ width: 100, height: 100, fill: "yellow", left: 100 }),
    new fabric.Rect({ width: 100, height: 100, fill: "blue", top: 100 }),
    new fabric.Rect({ width: 100, height: 100, fill: "green", left: 100, top: 100 }),
  // 裁剪区之外控件可见
  canvas.controlsAboveOverlay = true
  const clipPath = new fabric.Circle({ radius: 100, top: 0, left: 50 })
  canvas.clipPath = clipPath
  canvas.add(group)
onMounted(() => {
  init()
</script>
动画裁剪
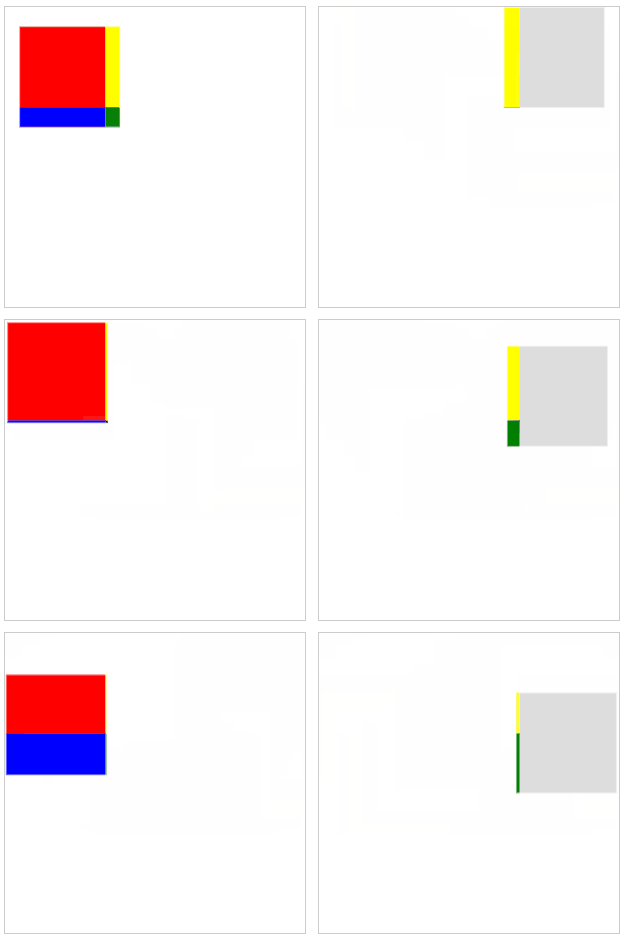
<template>
  <canvas width="300" height="300" id="canvas" style="border: 1px solid #ccc;"></canvas>
</template>
<script setup>
import { onMounted } from 'vue'
import { fabric } from 'fabric'
function init() {
  const canvas = new fabric.Canvas('canvas', {
    backgroundColor: "#ddd"
  const clipPath = new fabric.Rect({ width: 100, height: 100, top: 0, left: 0 })
  function animateLeft(){
    clipPath.animate({
      left: 200,
      duration: 900,
      onChange: canvas.requestRenderAll.bind(canvas),
      onComplete: animateRight
  function animateRight(){
    clipPath.animate({
      left: 0,
      duration: 1200,
      onChange: canvas.requestRenderAll.bind(canvas),
      onComplete: animateLeft
  function animateDown(){
    clipPath.animate({
      top: 100,
      duration: 500,
      onChange: canvas.requestRenderAll.bind(canvas),
      onComplete: animateUp
  function animateUp(){
    clipPath.animate({
      top: 0,
      duration: 400,
      onChange: canvas.requestRenderAll.bind(canvas),
      onComplete: animateDown
  const group = new fabric.Group([
    new fabric.Rect({ width: 100, height: 100, fill: "red" }),
    new fabric.Rect({ width: 100, height: 100, fill: "yellow", left: 100 }),
    new fabric.Rect({ width: 100, height: 100, fill: "blue", top: 100 }),
    new fabric.Rect({ width: 100, height: 100, fill: "green", left: 100, top: 100 }),
  ], {
    scale: 1.5
  canvas.controlsAboveOverlay = true
  animateLeft()
  animateDown()
  canvas.clipPath = clipPath
  canvas.add(group)
onMounted(() => {
  init()
</script>
使用绝对定位裁剪
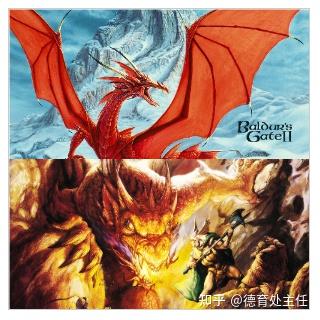
<template>
  <canvas width="300" height="300" id="canvas" style="border: 1px solid #ccc;"></canvas>
</template>
<script setup>
import { onMounted } from 'vue'
import { fabric } from 'fabric'
function init() {
  const canvas = new fabric.Canvas("canvas")
  const clipPath = new fabric.Rect({ width: 300, height: 300, top: 0, left: 0, absolutePositioned: true })
  const clipPath2 = new fabric.Rect({ width: 300, height: 300, top: 0, left: 0, absolutePositioned: true })
  fabric.Image.fromURL("http://fabricjs.com/assets/dragon.jpg", function(img){
    img.clipPath = clipPath
    img.scaleToWidth(300)
    canvas.add(img)
  fabric.Image.fromURL("http://fabricjs.com/assets/dragon2.jpg", function(img){
    img.clipPath =clipPath2
    img.scaleToWidth(300)
    img.top = 150
    canvas.add(img)
onMounted(() => {
  init()
</script>
颠倒的clipPaths
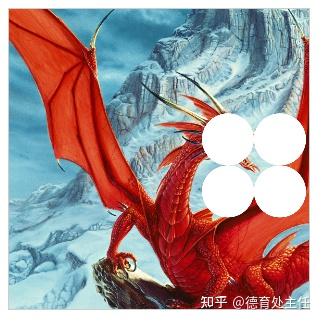
<template>
  <canvas width="300" height="300" id="canvas" style="border: 1px solid #ccc;"></canvas>
</template>
<script setup>
import { onMounted } from 'vue'
import { fabric } from 'fabric'
function init() {
  const canvas = new fabric.Canvas("canvas")
  const clipPath = new fabric.Circle({ radius: 100, top: -200, left: -220 })
  const clipPath2 = new fabric.Circle({ radius: 100, top: 0, left: -20 })
  const clipPath3 = new fabric.Circle({ radius: 100, top: 0, left: -220 })
  const clipPath4 = new fabric.Circle({ radius: 100, top: -200, left: -20 })
  const g = new fabric.Group([ clipPath, clipPath2, clipPath3, clipPath4 ])
  g.inverted = true // 颠倒裁剪
  fabric.Image.fromURL("http://fabricjs.com/assets/dragon.jpg", function(img) {
    img.clipPath = g
    img.scaleToWidth(500)
    canvas.add(img)
onMounted(() => {
  init()
</script>
序列化
所谓的序列化其实就是将画布的内容转成
JSON
,方便保存。
但
Fabric.js
除了能将画布转成字符串,还可以输出
base64
和
svg
。
输出JSON

<template>
    <canvas id="canvas" width="200" height="200" style="border: 1px solid #ccc;"></canvas>
  </div>
</template>
<script setup>
import { onMounted } from 'vue'
import { fabric } from 'fabric'
function init() {
  // 初始化画布
  const canvas = new fabric.Canvas('canvas')
  console.log('canvas stringify ', JSON.stringify(canvas))
  console.log('canvas toJSON', canvas.toJSON())
  console.log('canvas toObject', canvas.toObject())
onMounted(() => {
  init()
</script>
打开控制台可以看到输出。
本例分别使用了
JSON.stringify()
、
canvas.toJSON()
和
canvas.toObject()
进行序列化一个空画布。
Fabric.js
提供了
toJSON
和
toObject
两个方法,把画布及内容转换成
JSON
。
因为本例输出的是一个空画布,所以在输出内容里的
objects
字段是一个空数组。
如果有背景、有图形之类的元素存在,
objects
对象里就会出现相应的数据。
详情可查看 本节案例在线预览 - 序列化
输出png(base64版)

<template>
    <canvas id="canvas" width="200" height="200" style="border: 1px solid #ccc;"></canvas>
  </div>
</template>
<script setup>
import { onMounted } from 'vue'
import { fabric } from 'fabric'
function init() {
  // 初始化画布
  const canvas = new fabric.Canvas('canvas', {
    backgroundColor: '#a5dee5'
  const rect = new fabric.Rect({
    left: 50,
    top: 50,
    height: 20,
    width: 20,
    fill: 'green'
  const circle = new fabric.Circle({
    left: 80,
    top: 80,
    radius: 40,
    fill: "red"
  canvas.add(rect, circle)
  console.log('toPng', canvas.toDataURL('png')) // 在控制台输出 png(base64)
  canvas.requestRenderAll()
onMounted(() => {
  init()
</script>
使用
canvas.toDataURL('png')
可以输出
png
图片。但这个操作可能会打断
canvas
的渲染,所以之后要再执行以下
canvas.requestRenderAll()
。
输出以下内容,可以把这段复制到浏览器地址打开看看
data:image/png;base64,iVBORw0KGgoAAAANSUhEUgAAAMgAAADICAYAAACtWK6eAAAAAXNSR0IArs4c6QAADGdJREFUeF7tnX9sVtUZx5+moFBXE0Q7i5gayKbYQiUKWNmUujIwDJ24jm7DRRAnjgkKjgUypo4FMiZocUycCGbiVtaJU0ago7PqxhDQINCKboFIBkWrQGK1oEC6nIZlBoG+99xz7nvPOZ/3X+55znk+3/MJvT/e++Y8s3tfu/CBAAROSSAHQdgZEDg9AQRhd0DgDAQQhO0BAQRhD0BAjwD/g+hxY1QgBBAkkKBpU48AguhxY1QgBBAkkKBpU48AguhxY1QgBBAkkKBpU48AguhxY1QgBBAkkKBpU48AguhxY1QgBBAkkKBpU48AguhxY1QgBBAkkKBpU48AguhxY1QgBBAkkKBpU48AguhxY1QgBBAkkKBpU48AguhxY1QgBBAkkKBpU48AguhxY1QgBBAkkKBpU48AguhxY1QgBBAkkKBpU48AguhxY1QgBBAkkKBpU48AguhxY1QgBBAkkKBpU48AguhxY1QgBBAkkKBpU48AguhxY1QgBBAkkKBpU48AguhxY1QgBBAkkKBpU48AguhxY1QgBBAkkKBpU48AguhxY1QgBBAkkKBpU48AguhxY1QgBBAkkKBpU48AguhxY1QgBBAkkKBpU48AguhxY1QgBBAkkKBpU48AguhxY1QgBBAkkKBpU48AguhxY1QgBLwR5NltC4xHdkvpdOM1KegWAa8EWbVtoTH6Y0qnCYIYw+lsIQQ5TXQI4uyeNrpwBEEQoxvKt2IIgiC+7Wmj/SAIghjdUL4VQxAE8W1PG+0HQRDE6IbyrRiCIIhve9poPwiCIEY3lG/FEARBfNvTRvtBEAQxuqF8K4YgCOLbnjbaD4IgiNEN5VsxBEEQ3/a00X4QBEGMbijfiiEIgvi2p432gyAIYnRD+VYMQRDEtz1ttB8EQRCjG8q3Yl4JYjocvnJrmqh79bwRxD30rNgFAgjiQkqsMWsEECRr6JnYBQII4kJKrDFrBBAka+iZ2AUCCOJCSqwxawQQJGvomdgFAgjiQkqsMWsEECRr6JnYBQII4kJKGayxa2ur5O95R/Le3S9nH/hAzmptldwjR2TAwvmyfdoMOd6tm3yany+f9Dxf2i4slNaiS+Rofn4GlcM+BEEczb9g86tywZbN0nPbVunxZpOc07wvcidthb3kYHGJHCgdKO9fNUhahpRFruH7AARxJeH2dilas1p6r18nvRpelK4ftRpf+dEv5Etz+fWyd/hI2TNqtEhOjvE5XCuIIClPrEdTo/StrZE+tTXS5fDhxFZ7rHt32V1ZJbsqq+RQcUli86ZtIgRJWyIn1vPFjf+US59aKr3X12V9hXuHj5C3b5so75Vdk/W1JL0ABEmaeCfznde4Q4oXV8vFdWtTtjKR/4y4QZomT5WDJf1TtzZbC0IQW2Qj1s05flyumD9X+j2xJOLI5A/fecckeWPGLGnPzU1+8oRnRJCEgZ9qusKXG+TKOffLubt3pWA1mS3hwz595fXZD8r+68ozG+DoUQiS5eAGPPKQlCx6OMur0J++ccq9sv2e+/QLpHwkgmQpoC5tbVI2fUoqzzWiIlHnJhsXLJJjeXlRh6b+eATJQkTqjvfQuyeJOiH35aNO3Dc8uqTjDr1PHwRJOE11X2PY7bdK95aWhGe2P93hggJ5adkKOXR5sf3JEpoBQRICraZRj4QMmzDOSzn+h7FDkief9ubmIoIkJIj6s6pi7M1ey/FZSepXPufFn1sIkoAg6oS8omqMV+ccnWFT5yT1NaucP3FHkM6SNvDvX71rohdXq6KiUFe3/v7Y0qjDUnU8gliOw/X7HHHxuH6fBEHi7oAzjFd3yMvHj7M4gxulG5avcPaOO4JY2mPq2apRI8qdenzEEgpRj6WsqWtw8tktBLG0KwbOm+PEg4eW2v9cWfWA49aZs5Oaztg8CGIM5f8LqTvkI28caaGy2yXXvbDOuUflEcTCngv1qlVnKF28qoUgnaUa8d/VNwG/9r3KiKPCOfxvz9Q69c1EBDG8N6+9c0IqviZruC1j5dTXd195fJmxerYLIYhBwupBxBtGjzBY0c9Sa1fXOfOsFoIY3INXPfBT+fLvlhus6Gepf31/vLz2wC+caA5BTMXU3i7fLvlSoq/mMbX0pOuoVwr9sfHfTrx3C0EM7Y6iv7wgQ6fcZaia/2U2LHpM9nzjxtQ3iiCGIho69YdStPp5Q9X8L7Nn9E2yofo3qW8UQQxFVDngMiuvAzW0vNSVUa85rd3+VurWdfKCEMRARAWbNkrFd75loFJYJeprnpWWwVenumkEMRBP8eJFUrrglwYqhVVi2/SfSNPkKaluGkEMxHPtD8ZL7/q/GqgUVom9FV+XV36b7sviCGJgT35z6CDJ299soFJYJT7udZE8/4/NqW4aQWLGo37ZqbL0sphVwh1eu+2tVP/SFYLE3Js82h4PYNofgUeQePl2nHuocxA+egTUOYg6F0nrB0FiJtN35e9lyMwfx6wS7vBN834lu8Z+N7UAECRmNP2WPi4D5/48ZpVwh2+d9TPZOfHO1AJAkJjRlPy6uuOnlvnoEVA/Ud34o6l6gxMYhSAxIfevXiD9qxfGrBLu8B1Tp8uOqdNSCwBBYkbD/yDxAPI/SDx+qR/NOUi8iDgHiccv9aO5ihUvIq5ixeOX+tHcB4kXEfdB4vFL/WjupMeLiDvp8filfjTPYsWLiGex4vFzYvRNXxks5zTvc2KtaVpkW2Ev+fOGLWla0ufWwmVeA/HwfRA9iHwfRI+bc6P4RqFeZHyjUI+bc6MKNr8qFVW3OLfubC+4/g9/kpYhZdlexhnn508sQ/HwVpNoIHmrSTRezh/Ne7GiRch7saLxcv5o3qwYLULerBiNl/tH827ejDPk3bwZo/LrQN7unlmevN09M07eHcXvg2QWKb8PkhknL4/iF6bOHCu/MOXlts+8KX6j8Mys+I3CzPeSt0fyK7enjpZfufV2y0drjEfgT80r7Y+2n2rV3EmPtvczPnrgvDnS74klGR/v+4E775gkW2fOdq5NBLEUWc7x4zJqRLmcu3uXpRncKfthn76ypq5B2nNz3Vn0iZUiiMXICl9ukPLx4yzO4EbphuUrZP915W4s9qRVIojl2AY88pCULHrY8izpLd845V7Zfs996V1gJytDkASiC/WqlotXrU7eDgiSgCBd2tqkomqMqKtboXwOlvSX+ppVciwvz+mWESSh+PL3vCMVY2+W7i0tCc2YvWkOFxRI/crnpLXokuwtwtDMCGIIZCZl1LNaw26/1WtJlBwvLVshhy4vzgRJ6o9BkIQj6vFmkwybMM5LSTrkePJpOVRckjBVe9MhiD22p62s/twaevckr85J1DnHhkeXePFn1WeDQ5AsCKKmVCfuZdOnyMV1a7O0AnPTqqtVGxcscv6E/FREEMTcPtGq5Pp9Etfvc3QWGoJ0RiiBf1d33K+cc79Tj6Wox0den/2gs3fIM40VQTIlZfk49ezWFfPnOvGAo3rw8I0Zs5x8tipqjAgSlZjl49XNxOLF1ak8N1HnGk2Tp4o6IQ/lgyApTVp9M/HSp5ZK7/V1WV+h+prs27dNlPfKrsn6WpJeAIIkTTzifOrmYt/aGulTWyNdDh+OOFr/cPVqnt2VVbKrssqr+xpRiSBIVGLZOr69XYrWrJbe69dJr4YXpetHrcZXol4H2lx+vewdPlL2jBotkpNjfA7XCiKIa4mdWG/Bpo1ywWtbpOe2rXJeU6Pk7W+O3MnHvS7qeCTkQOlAeX/QYGkZfHXkGr4PQBBPEla/dKXu0Oe9u1/OPvCBnNXaKrlHjoi6Oqa+yXe8Wzf5ND9fPul5vrRdWNhxx/tofr4n3dtrA0HssaWyBwQQxIMQacEeAQSxx5bKHhBAEA9CpAV7BBDEHlsqe0AAQTwIkRbsEUAQe2yp7AEBBPEgRFqwRwBB7LGlsgcEEMSDEGnBHgEEsceWyh4QQBAPQqQFewQQxB5bKntAAEE8CJEW7BFAEHtsqewBAQTxIERasEcAQeyxpbIHBBDEgxBpwR4BBLHHlsoeEEAQD0KkBXsEEMQeWyp7QABBPAiRFuwRQBB7bKnsAQEE8SBEWrBHAEHssaWyBwQQxIMQacEeAQSxx5bKHhBAEA9CpAV7BBDEHlsqe0AAQTwIkRbsEUAQe2yp7AEBBPEgRFqwRwBB7LGlsgcEEMSDEGnBHgEEsceWyh4QQBAPQqQFewQQxB5bKntAAEE8CJEW7BFAEHtsqewBgf8Coc6ZjF61hZ4AAAAASUVORK5CYII=
输出 SVG

<template>
    <canvas id="canvas" width="200" height="200" style="border: 1px solid #ccc;"></canvas>
  </div>
</template>
<script setup>
import { onMounted } from 'vue'
import { fabric } from 'fabric'
function init() {
  // 初始化画布
  const canvas = new fabric.Canvas('canvas', {
    backgroundColor: '#a5dee5'
  const rect = new fabric.Rect({
    left: 50,
    top: 50,
    height: 20,
    width: 20,
    fill: 'green'
  const circle = new fabric.Circle({
    left: 80,
    top: 80,
    radius: 40,
    fill: "red"
  canvas.add(rect, circle)
  console.log(canvas.toSVG()) // 输出 SVG
onMounted(() => {
  init()
</script>
输出
SVG
很简单,直接调用
canvas.toSVG()
即可。
输出:
<?xml version="1.0" encoding="UTF-8" standalone="no" ?>
<!DOCTYPE svg PUBLIC "-//W3C//DTD SVG 1.1//EN" "http://www.w3.org/Graphics/SVG/1.1/DTD/svg11.dtd">
<svg xmlns="http://www.w3.org/2000/svg" xmlns:xlink="http://www.w3.org/1999/xlink" version="1.1" width="200" height="200" viewBox="0 0 200 200" xml:space="preserve">
<desc>Created with Fabric.js 4.6.0</desc>
</defs>
<rect x="0" y="0" width="100%" height="100%" fill="#a5dee5"></rect>
<g transform="matrix(1 0 0 1 60.5 60.5)"  >
<rect style="stroke: none; stroke-width: 1; stroke-dasharray: none; stroke-linecap: butt; stroke-dashoffset: 0; stroke-linejoin: miter; stroke-miterlimit: 4; fill: rgb(0,128,0); fill-rule: nonzero; opacity: 1;"  x="-10" y="-10" rx="0" ry="0" width="20" height="20" />
<g transform="matrix(1 0 0 1 120.5 120.5)"  >
<circle style="stroke: none; stroke-width: 1; stroke-dasharray: none; stroke-linecap: butt; stroke-dashoffset: 0; stroke-linejoin: miter; stroke-miterlimit: 4; fill: rgb(255,0,0); fill-rule: nonzero; opacity: 1;"  cx="0" cy="0" r="40" />
</svg>
反序列化
反序列化就是把
JSON
数据渲染到画布上。
通常把从后台请求回来的数据渲染到画布上。
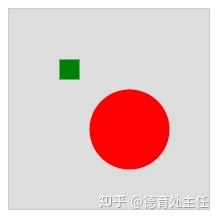
<template>
    <canvas id="canvas" width="200" height="200" style="border: 1px solid #ccc;"></canvas>
  </div>
</template>
<script setup>
import { onMounted } from 'vue'
import { fabric } from 'fabric'
function init() {
  const str = '{"version":"4.6.0","objects":[{"type":"rect","version":"4.6.0","originX":"left","originY":"top","left":50,"top":50,"width":20,"height":20,"fill":"green","stroke":null,"strokeWidth":1,"strokeDashArray":null,"strokeLineCap":"butt","strokeDashOffset":0,"strokeLineJoin":"miter","strokeUniform":false,"strokeMiterLimit":4,"scaleX":1,"scaleY":1,"angle":0,"flipX":false,"flipY":false,"opacity":1,"shadow":null,"visible":true,"backgroundColor":"","fillRule":"nonzero","paintFirst":"fill","globalCompositeOperation":"source-over","skewX":0,"skewY":0,"rx":0,"ry":0},{"type":"circle","version":"4.6.0","originX":"left","originY":"top","left":80,"top":80,"width":80,"height":80,"fill":"red","stroke":null,"strokeWidth":1,"strokeDashArray":null,"strokeLineCap":"butt","strokeDashOffset":0,"strokeLineJoin":"miter","strokeUniform":false,"strokeMiterLimit":4,"scaleX":1,"scaleY":1,"angle":0,"flipX":false,"flipY":false,"opacity":1,"shadow":null,"visible":true,"backgroundColor":"","fillRule":"nonzero","paintFirst":"fill","globalCompositeOperation":"source-over","skewX":0,"skewY":0,"radius":40,"startAngle":0,"endAngle":6.283185307179586}],"background":"#ddd"}'
  // 初始化画布
  const canvas = new fabric.Canvas('canvas')
  // 反序列化
  canvas.loadFromJSON(str)
