

什么是 WSL ?
有了 WSL ,用户既能使用 Windows 桌面环境,又能使用更强大的 Linux 终端工具
WSL(Windows Subsystem for Linux):WSL 是运行在 Windows 上的 GNU/Linux 环境,Linux 程序无需修改即可在 Windows 上运行,包括大多数命令行工具、实用程序和应用程序,没有传统虚拟机或双引导设置的开销。
注意:只支持 Windows 10 Version 1903 或更高版本
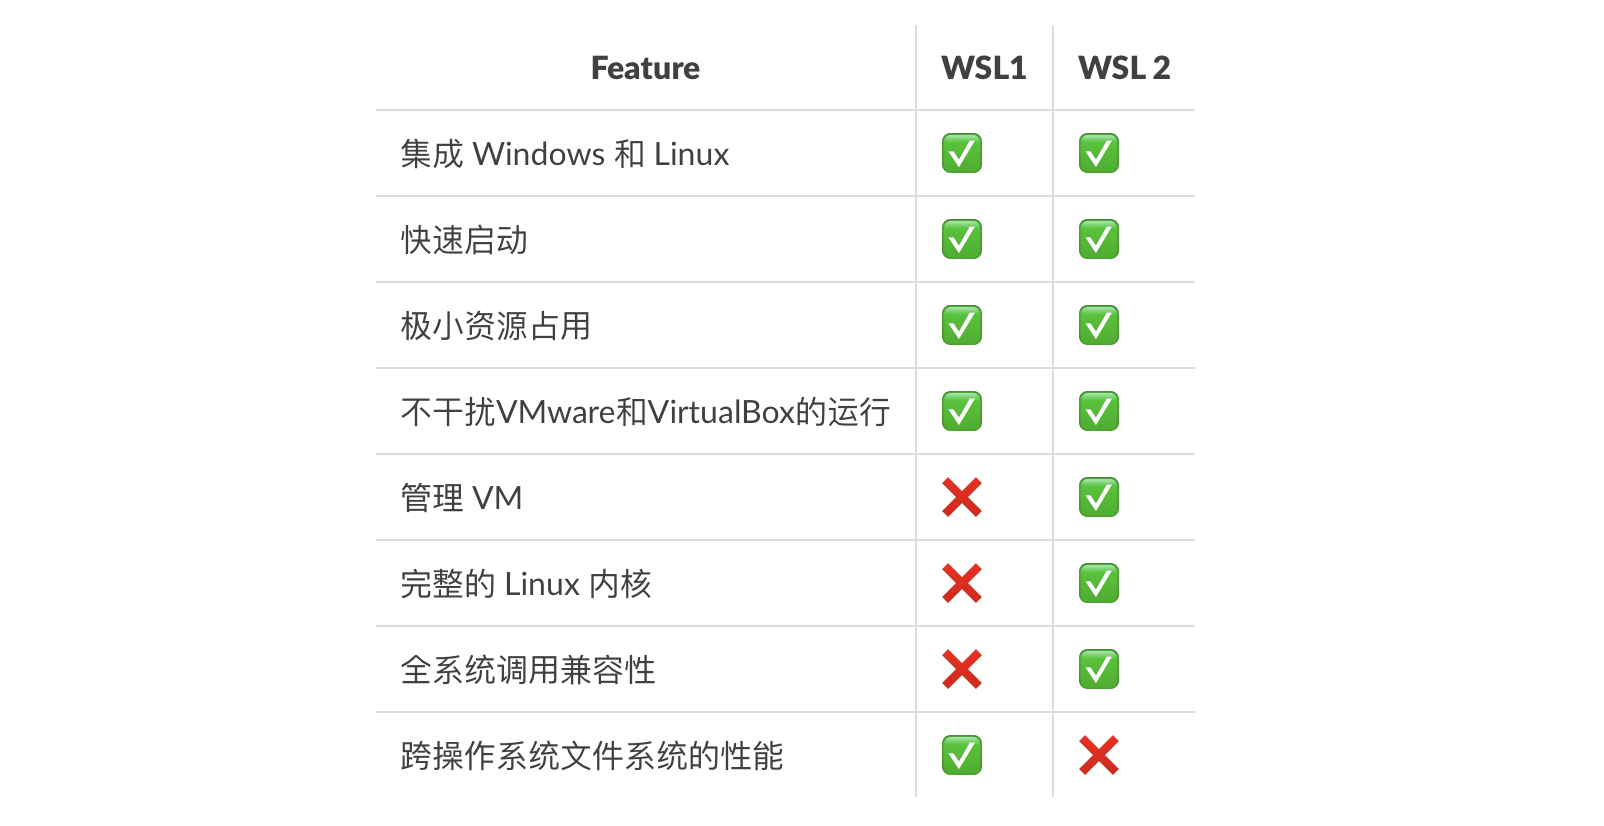
WSL2 提升了文件系统性能
WSL2 升级了 WSL 的软件架构,支持在 Windows 上直接运行 ELF64 Linux 二进制文件。它的优点是提高了文件系统性能(2-5 倍提升),以及增加整个系统调用的兼容性。
WSL 官方文档:https://docs.microsoft.com/en-us/windows/wsl/
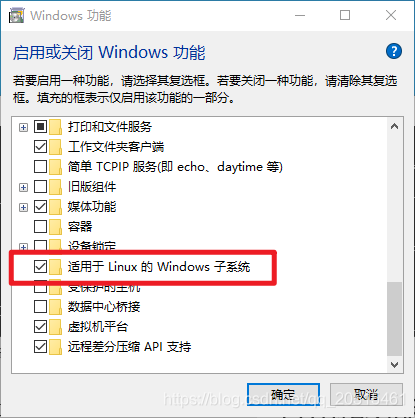
1. 启用 WSL
方法 1 :在启用或关闭 Windows 功能中,勾选“适用于 Linux 的 Windows 子系统” (Windows Subsystem for Linux),然后按照提示重启电脑。
方法 2(推荐)
:可以通过命令行指令开启,管理员模式进入
powershell
,然后运行:
dism.exe /online /enable-feature /featurename:Microsoft-Windows-Subsystem-Linux /all /norestart有些电脑可能提示安装 Linux kernel update package(https://docs.microsoft.com/en-us/windows/wsl/install-win10#step-4---download-the-linux-kernel-update-package),下载安装即可。
如何切换 WSL 版本 ?
如果需要切换
WSL
版本,可通过命令行
wsl --set-version <distribution name> <versionNumber>
进行切换,例如将
Ubuntu-18.04
版本切换为
WSL2
:
wsl --set-version Ubuntu-18.04 2
是否要切换取决于你的应用场景,如果需要使用 USB 和串口,可以暂时使用
WSL1
,目前
WSL2
还不支持操作 USB 和串口(2020.09)。
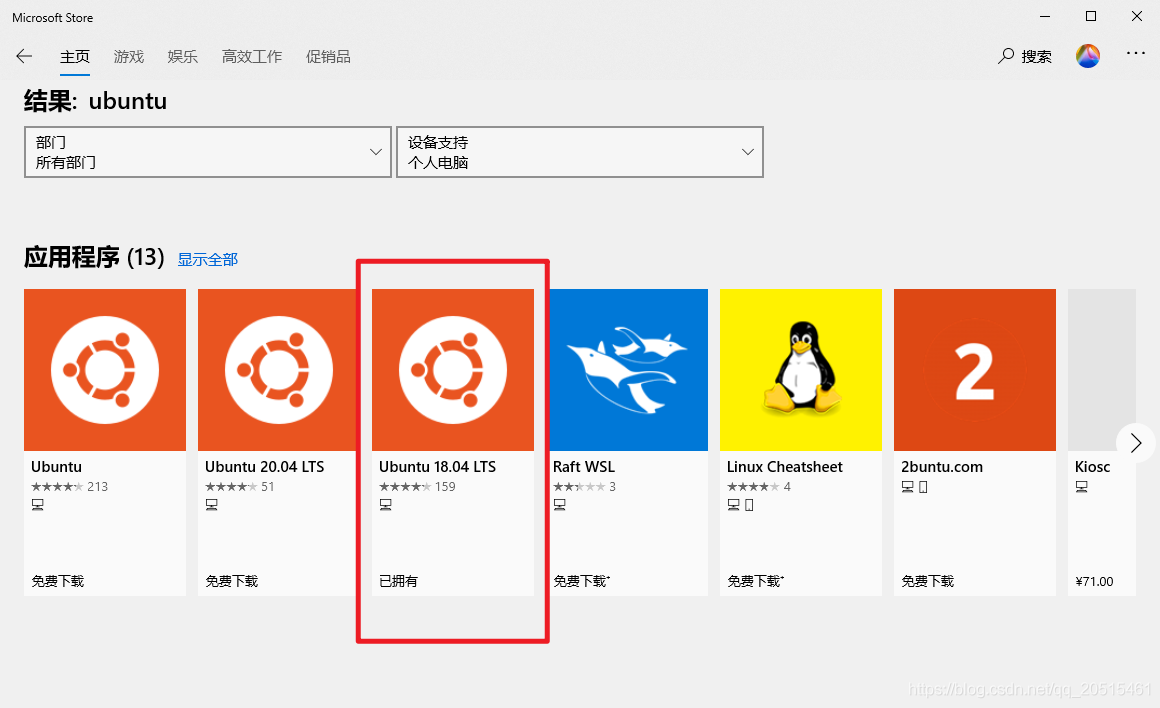
2. 选择并安装一个 Linux 发行版
这里建议选择
ubuntu 18.04
,直接在
Microsoft 应用商店
搜索并安装:
应用安装好以后,可以直接运行:
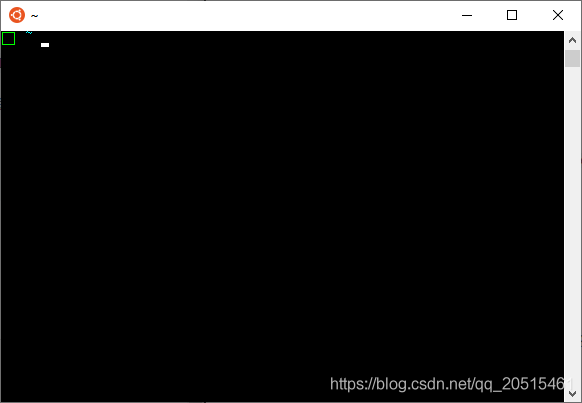
默认只有终端,也可以手动安装 Ubuntu 的图形界面,但是并不建议。
3. 克隆 ESP-IDF 代码仓库
方法 1 :从 github 下载,可以直接克隆主仓库和子仓库:
git clone --recursive https://github.com/espressif/esp-idf.git方法 2(推荐) :从国内镜像 gitee 下载,需要使用以下操作:
-
下载子仓库重定向工具
esp-gitee-tools
git clone https://gitee.com/EspressifSystems/esp-gitee-tools.git-
克隆主仓库代码
git clone https://gitee.com/EspressifSystems/esp-idf.git-
克隆重定向后的子仓库代码
cd esp-gitee-tools
export EGT_PATH=$(pwd)
cd .
.
cd esp-idf
$EGT_PATH/submodule-update.sh
官方 gitee 操作指南,请参考:
submodule-update(https://gitee.com/EspressifSystems/esp-gitee-tools/blob/master/docs/README-submodule-update.md)
4. 安装 ESP-IDF 工具链
1. 将默认 python 切换为 python3 ( 可选步骤,推荐 )
1.1 修改 ubuntu 源到国内镜像:
cd /etc/apt/
sudo cp sources.list sources.list.bak
sudo vim sources.list
删除该文件全部内容,粘贴以下内容并保存:
deb http://mirrors.aliyun.com/ubuntu/ bionic main restricted universe multiverse
deb http://mirrors.aliyun.com/ubuntu/ bionic-security main restricted universe multiverse
deb http://mirrors.aliyun.com/ubuntu/ bionic-updates main restricted universe multiverse
deb http://mirrors.aliyun.com/ubuntu/ bionic-proposed main restricted universe multiverse
deb http://mirrors.aliyun.com/ubuntu/ bionic-backports main restricted universe multiverse
deb-src http://mirrors.aliyun.com/ubuntu/ bionic main restricted universe multiverse
deb-src http://mirrors.aliyun.com/ubuntu/ bionic-security main restricted universe multiverse
deb-src http://mirrors.aliyun.com/ubuntu/ bionic-updates main restricted universe multiverse
deb-src http://mirrors.aliyun.com/ubuntu/ bionic-proposed main restricted universe multiverse
deb-src http://mirrors.aliyun.com/ubuntu/ bionic-backports main restricted universe multiverse
1.2 安装 python3 :
sudo apt-get install python3 python3-pip python3-setuptools1.3 将 python 默认切换为 python3:
sudo update-alternatives --install /usr/bin/python python /usr/bin/python3 10
2. 将 pip 源更换到国内镜像(可选步骤,推荐)
方法 1 :pip 版本 >= 10.0.0,可以使用以下方式:
pip --version
pip config set global.index-url http://mirrors.aliyun.com/pypi/simple
pip config set global.trusted-host mirrors.aliyun.com
方法 2(通用)
:可以创建并修改配置文件
~/.pip/pip.conf
:
mkdir ~/.pip
vim ~/.pip/pip.conf
将下面内容添加到文件并保存:
[global]
index-url = http://mirrors.aliyun.com/pypi/simple
[install]
trusted-host = mirrors.aliyun.com
3. 安装依赖
在终端输入以下指令,安装依赖工具:
sudo apt-get install git wget flex bison gperf python python-pip python-setuptools cmake ninja-build ccache libffi-dev libssl-dev dfu-util进入 esp-idf 目录,安装 Python 依赖包:(该步骤可忽略,后续 install.sh 会默认安装)
cd esp-idf pip3 install -r requirements.txt
4. 安装编译工具链
方法 1 :从默认路径下载并安装工具链
./install.sh方法 2(推荐) :从国内镜像下载并安装工具链,需要使用以下操作:
cd esp-gitee-tools
export EGT_PATH=$(pwd)
cd ..
cd esp-idf
$EGT_PATH/install.sh
5. 安装 VSCode WSL 插件
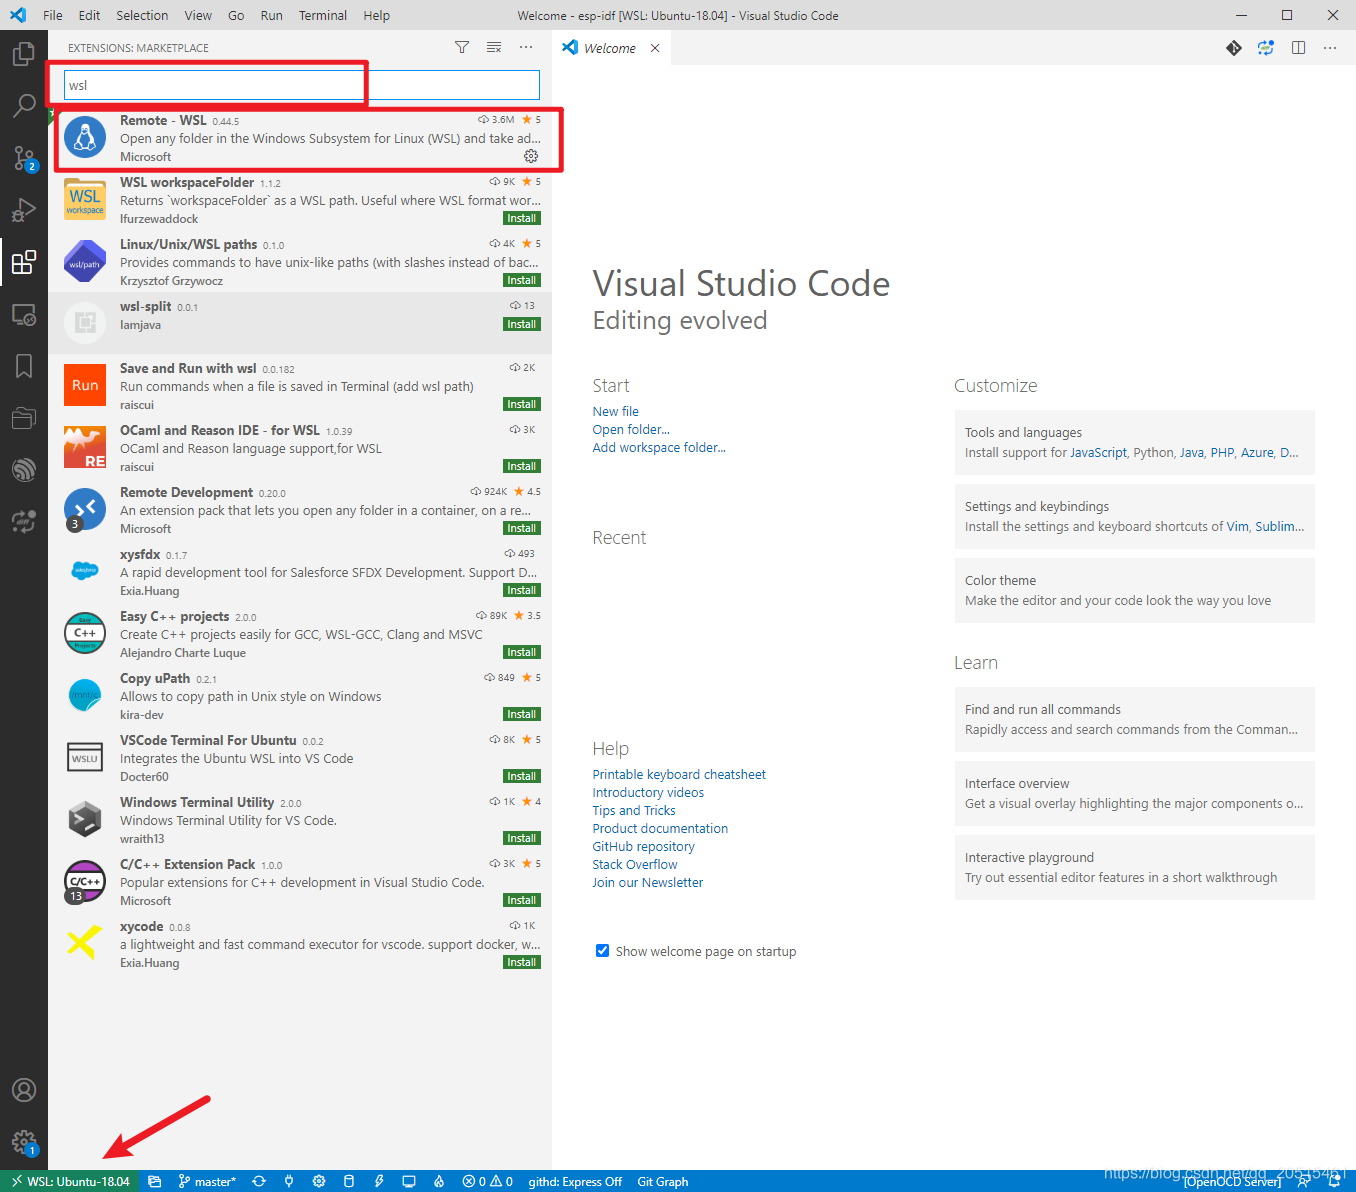
如果从 WSL 启动 VSCode,一般会自动安装插件,之后就能直接在 VSCode 中使用 Linux 的终端编译程序啦!!
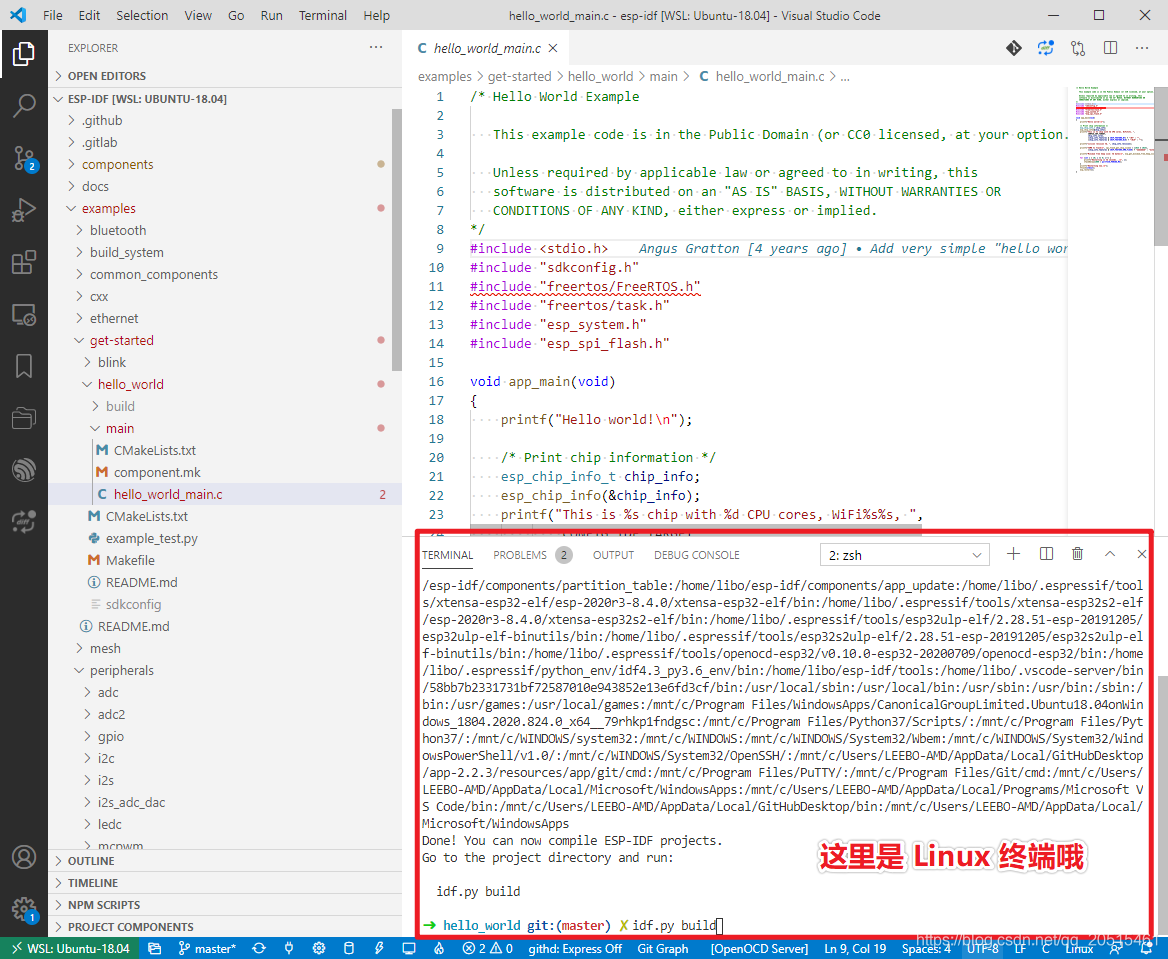
6. 编译示例程序
添加环境变量:
. $HOME/esp-idf/export.sh
进入
helloworld
示例程序:
cd ~/esp-idf/examples/get-started/hello_world/直接在终端输入:
idf.py build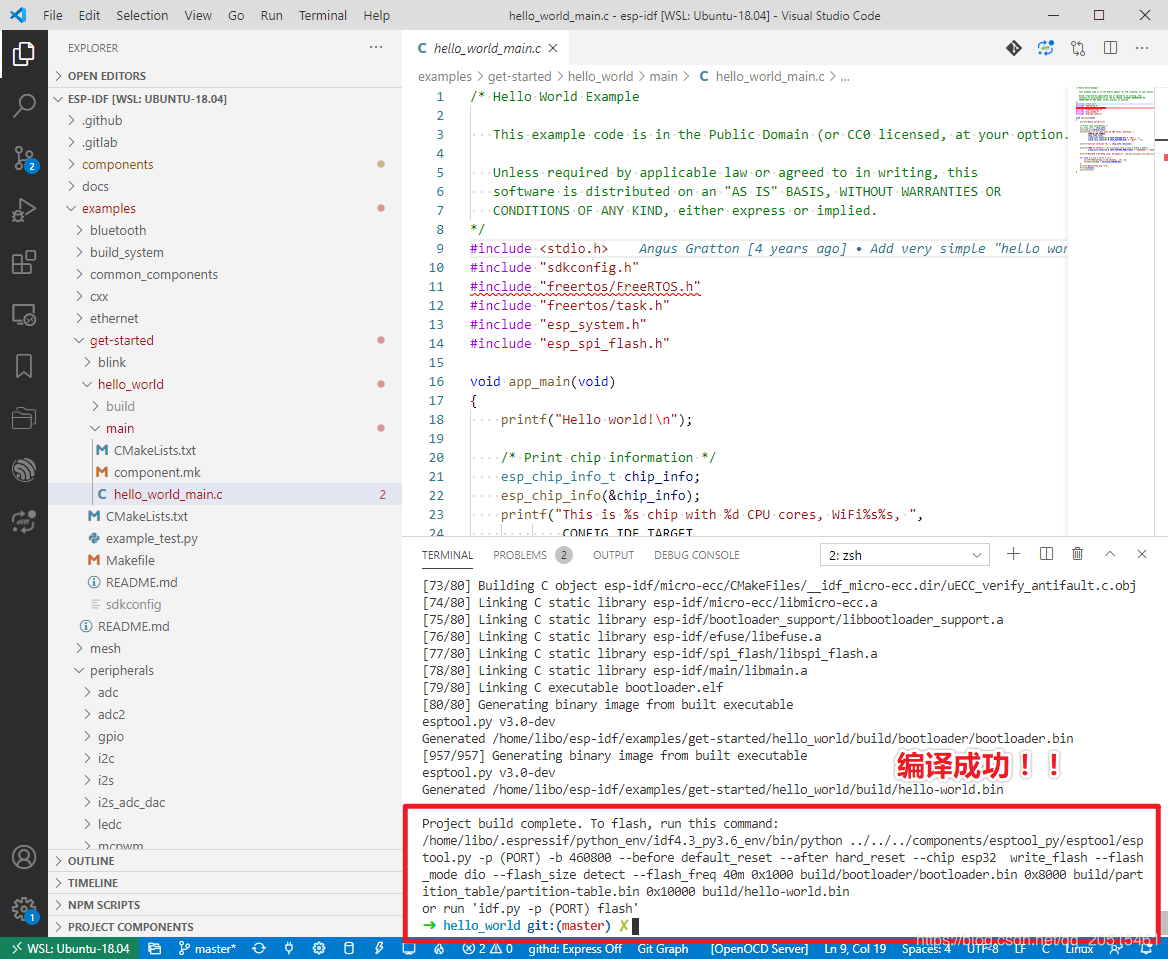
编译成功!!
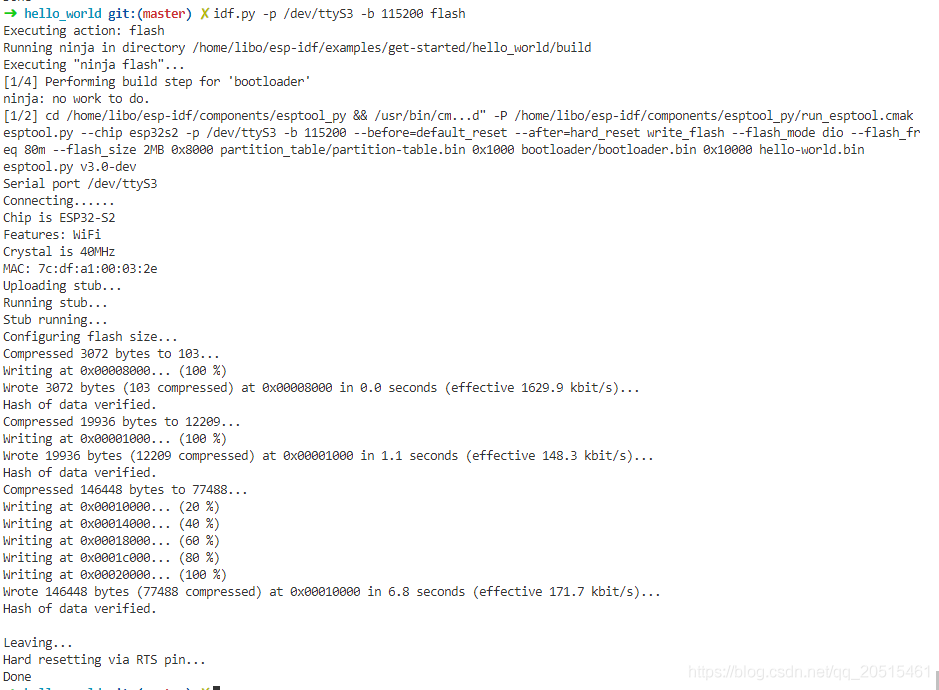
7. 下载程序
方法 1
: 直接在 WSL 终端使用
idf.py flash
(目前仅限 WSL1)
WSL1 可直接访问串口下载程序,需要注意的是,如果你的串口号在 Windows 上显示为 COM3,那么在 wsl 下载程序时,需要对应修改为
/dev/ttyS3
,直接使用以下命令下载:
idf.py -p /dev/ttyS3 -b 115200 flash终端显示下载过程:
部分电脑可能遇到的问题:CP2102 USB 转串口芯片导致不能下载的问题(https://github.com/microsoft/WSL/issues/3795)
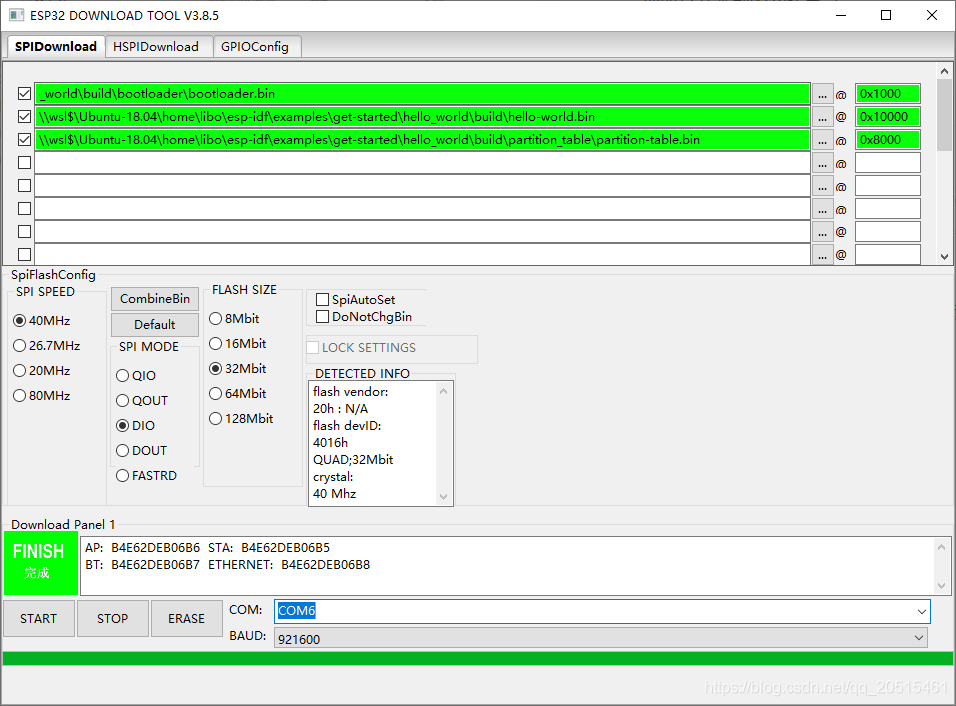
方法 2 : 使用 Flash Download Tools 下载 (WSL2 推荐使用)
注意:截止到 2020.09 月,WSL2 还不支持访问 usb 和 串口,Windows 烧录工具下载:Flash Download Tools(https://www.espressif.com/en/support/download/other-tools)
在 wsl 终端输入
explorer.exe .
,即可使用 Windows 上的文件管理器打开当前的 wsl 目录
explorer.exe .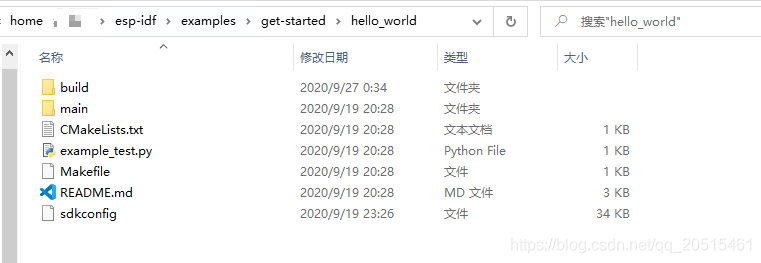
使用 Flash Download Tools 输入 bin 的路径和地址进行下载
8. Hello world !
方法 1
: 直接在 WSL 终端使用
idf.py monitor
(目前仅限 WSL1)
WSL1 可直接访问串口下载程序,需要注意的是,如果你的串口号在 Windows 上显示为 COM3,那么在 wsl 下载程序时,需要对应修改为
/dev/ttyS3
,直接使用以下命令下载并打印:
idf.py -p /dev/ttyS3 -b 115200 monitor方法 2(通用) : 使用任意 Windows 串口工具(WSL2 推荐使用)
配置端口号
COMX
,波特率
115200
,直接打开即可显示:
