Publishing and exposing ports
Explanation
If you've been following the guides so far, you understand that containers provide isolated processes for each component of your application. Each component - a React frontend, a Python API, and a Postgres database - runs in its own sandbox environment, completely isolated from everything else on your host machine. This isolation is great for security and managing dependencies, but it also means you can’t access them directly. For example, you can’t access the web app in your browser.
That’s where port publishing comes in.
Publishing ports
Publishing a port provides the ability to break through a little bit of networking isolation by setting up a forwarding rule. As an example, you can indicate that requests on your host’s port
8080
should be forwarded to the container’s port
80
. Publishing ports happens during container creation using the
-p
(or
--publish
) flag with
docker run
. The syntax is:
$ docker run -d -p HOST_PORT:CONTAINER_PORT nginx
-
HOST_PORT: The port number on your host machine where you want to receive traffic -
CONTAINER_PORT: The port number within the container that's listening for connections
For example, to publish the container's port
80
to host port
8080
:
$ docker run -d -p 8080:80 nginx
Now, any traffic sent to port
8080
on your host machine will be forwarded to port
80
within the container.
Important
When a port is published, it's published to all network interfaces by default. This means any traffic that reaches your machine can access the published application. Be mindful of publishing databases or any sensitive information. Learn more about published ports here .
Publishing to ephemeral ports
At times, you may want to simply publish the port but don’t care which host port is used. In these cases, you can let Docker pick the port for you. To do so, simply omit the
HOST_PORT
configuration.
For example, the following command will publish the container’s port
80
onto an ephemeral port on the host:
$ docker run -p 80 nginx
Once the container is running, using
docker ps
will show you the port that was chosen:
docker ps
CONTAINER ID   IMAGE         COMMAND                  CREATED          STATUS          PORTS                    NAMES
a527355c9c53   nginx         "/docker-entrypoint.…"   4 seconds ago    Up 3 seconds    0.0.0.0:54772->80/tcp    romantic_williamson
In this example, the app is exposed on the host at port
54772
.
Publishing all ports
When creating a container image, the
EXPOSE
instruction is used to indicate the packaged application will use the specified port. These ports aren't published by default.
With the
-P
or
--publish-all
flag, you can automatically publish all exposed ports to ephemeral ports. This is quite useful when you’re trying to avoid port conflicts in development or testing environments.
For example, the following command will publish all of the exposed ports configured by the image:
$ docker run -P nginx
Try it out
In this hands-on guide, you'll learn how to publish container ports using both the CLI and Docker Compose for deploying a web application.
Use the Docker CLI
In this step, you will run a container and publish its port using the Docker CLI.
-
Download and install Docker Desktop.
-
In a terminal, run the following command to start a new container:
$ docker run -d -p 8080:80 docker/welcome-to-dockerThe first
8080refers to the host port. This is the port on your local machine that will be used to access the application running inside the container. The second80refers to the container port. This is the port that the application inside the container listens on for incoming connections. Hence, the command binds to port8080of the host to port80on the container system. -
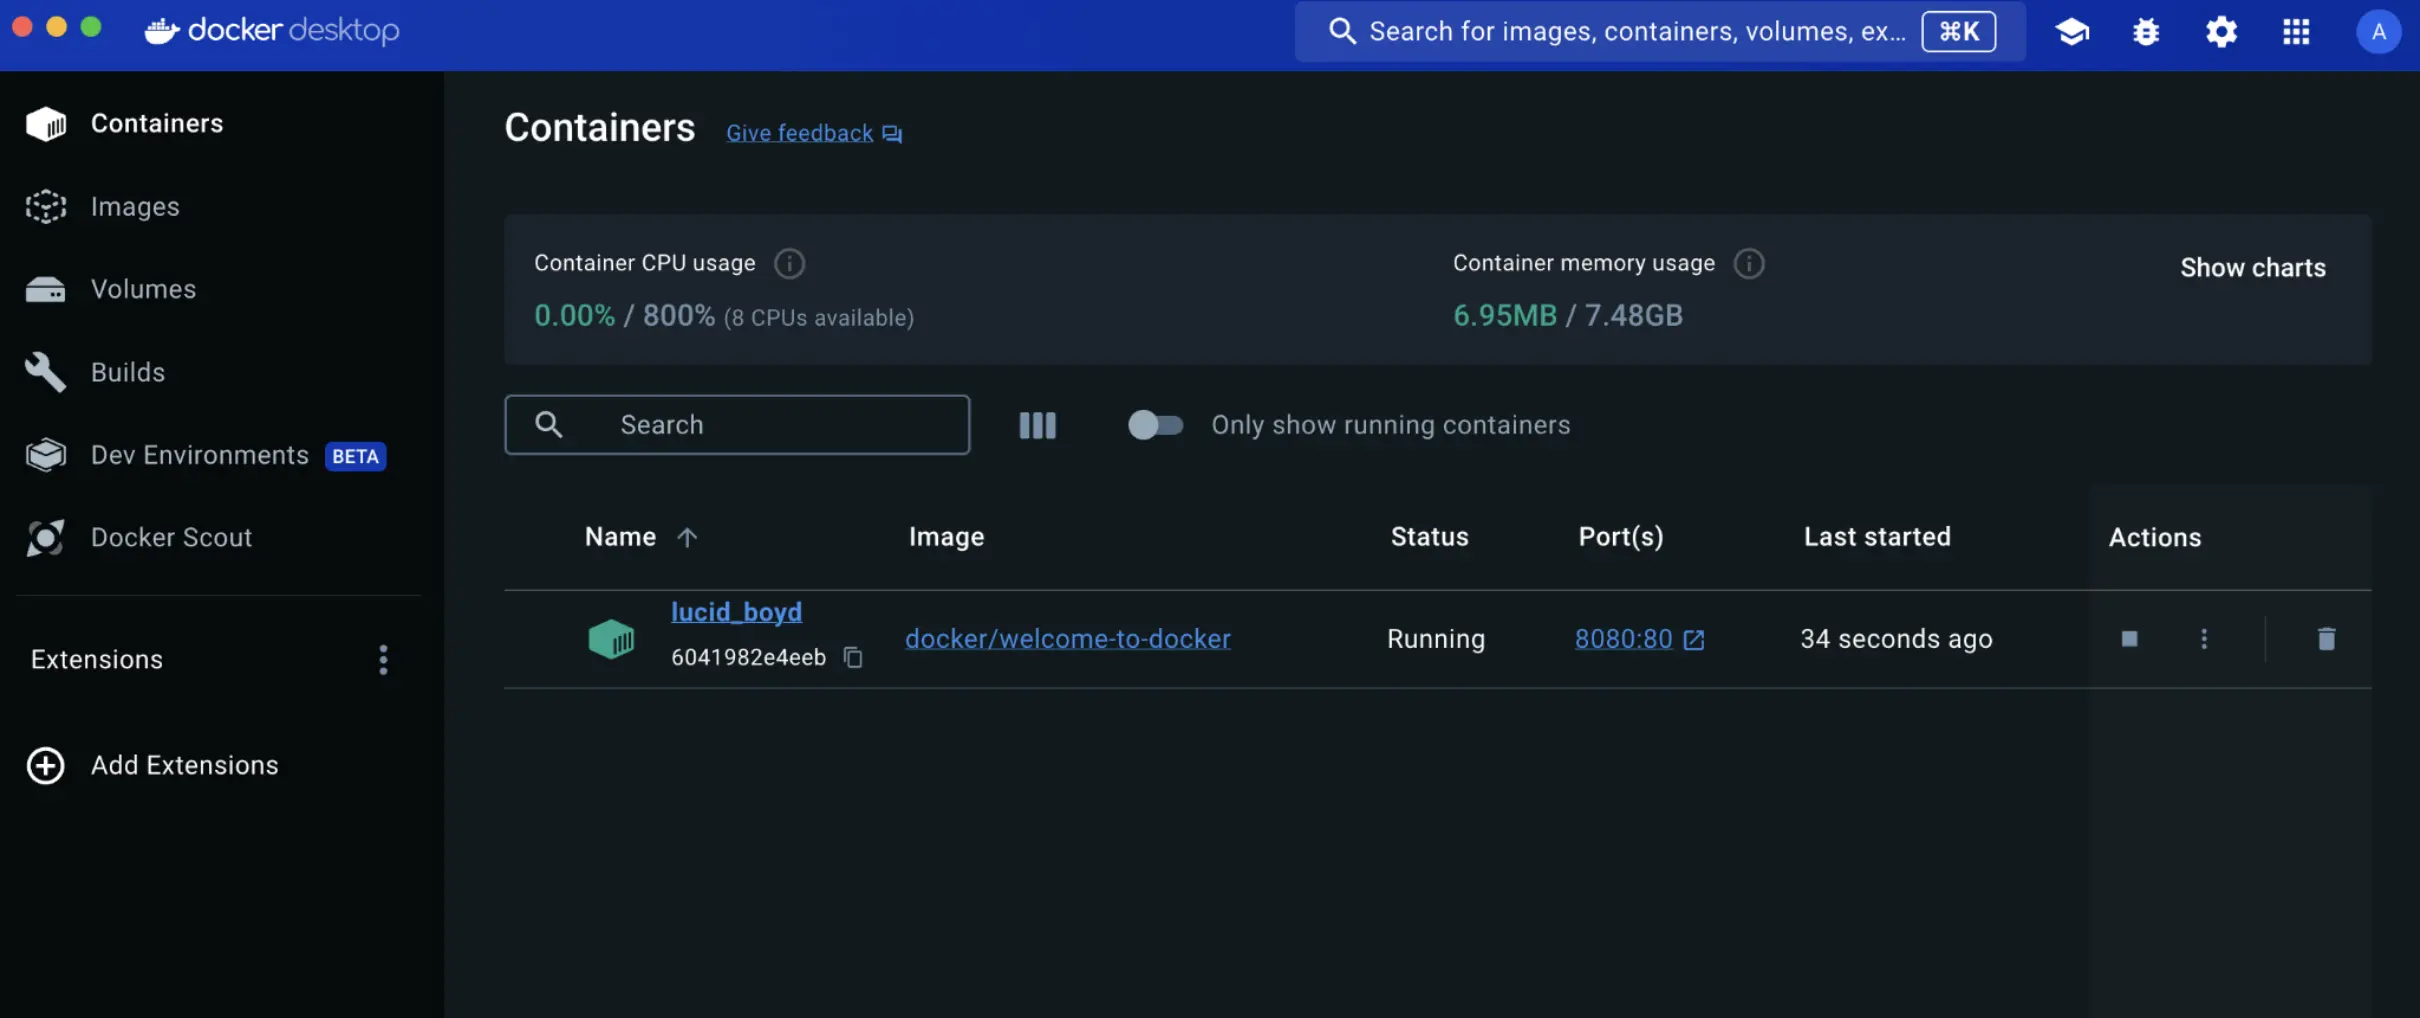
Verify the published port by going to the Containers view of the Docker Desktop Dashboard.


Open the website by either selecting the link in the Port(s) column of your container or visiting http://localhost:8080 in your browser.

