Why Volumes?
In my last article , I showed how to create a Docker image and a container based on that image.
One nice thing about containers is that, if one fails, you can quickly create another one based on the same image. A disadvantage of this approach is that the new image will not contain any data saved to the container after it was created. If we want to maintain stateful data, we need to connect a container to a volume.
A volume is a folder on the host machine or virtual machine that is mounted within the container, so that the container and its applications can write to it. It will persist even if the container is destroyed. You can even share the same volume (and its data) among multiple containers.
Creating a Volume
To create a new volume, use the docker volume create command, followed by a name for that volume, as in the following example, which creates a volume named "vol1":
docker volume create vol1
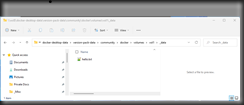
By default, this will create a folder with the same name as the volume in the /docker-desktop-data/version-pack-data/community/docker/volumes/ folder (on Windows, this folder is \\wsl$\docker-desktop-data\version-pack-data\community\docker\volumes\ )
A folder named “_data” inside each volume folder holds all the files written to that volume.
This folder is shown in Windows Explorer in Fig. 1
Fig. 1
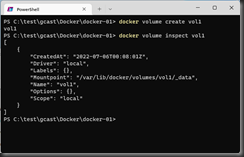
You can view information about this volume with the command:
docker volume inspect volume_name
where volume_name is the name of the volume you just created.
Fig. 2 shows the output for the vol1 volume I created.
Fig. 2
Attaching a Volume to a Container
Recall from the last article that the command to create a container from an image is
docker container run --name name_of_container -p external_port : internal_port image_tag
So, the following command, creates a container named "app1" based on the dgiard/app1:1.0 image with port 8000 mapped to the container's port 8080
docker container run –d --name app1 -p 8000:8080 dgiard/app1:1.0
You can attach a volume to a container when you create it using the -v switch. This switch accepts the name of a volume you created, followed by a colon, followed by the folder location to find the volume data inside the container.
The following command creates the same container above with the volume we created earlier attached and mapped to the container's /var/opt/project folder.
docker container run –d --name app1 -v vol1:/var/opt/project -p 8000:8080 dgiard/app1:1.0
Viewing the Volume's Data
We can see this by opening a bash shell on the container and writing a file into the volume folder.
To open a shell on the app1 container, execute the following command:
docker exec -it app1 sh
This changes your prompt and places you inside the container. Change folders to the volume folder assigned above with the following bash command:
cd /var/opt/project
Now, use the following command to create a file in this folder:
echo "Hello world" > hello.txt
You can exit this Bash shell command by pressing CTRL+P+Q on your keyboard.
You can view this file on the host machine. On Windows, open \\wsl$\docker-desktop-data\version-pack-data\community\docker\volumes\vol1\data in Windows Explorer, as shown in Fig. 3.
Fig. 3
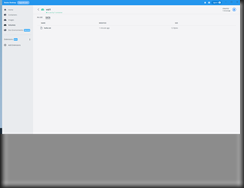
You can also view it in Docker Desktop. Click "Volumes" in the left menu and select the "Data" tab, as shown in Fig. 4
Fig. 4
Other Useful Commands
Here are a few other useful commands when dealing with volumes


